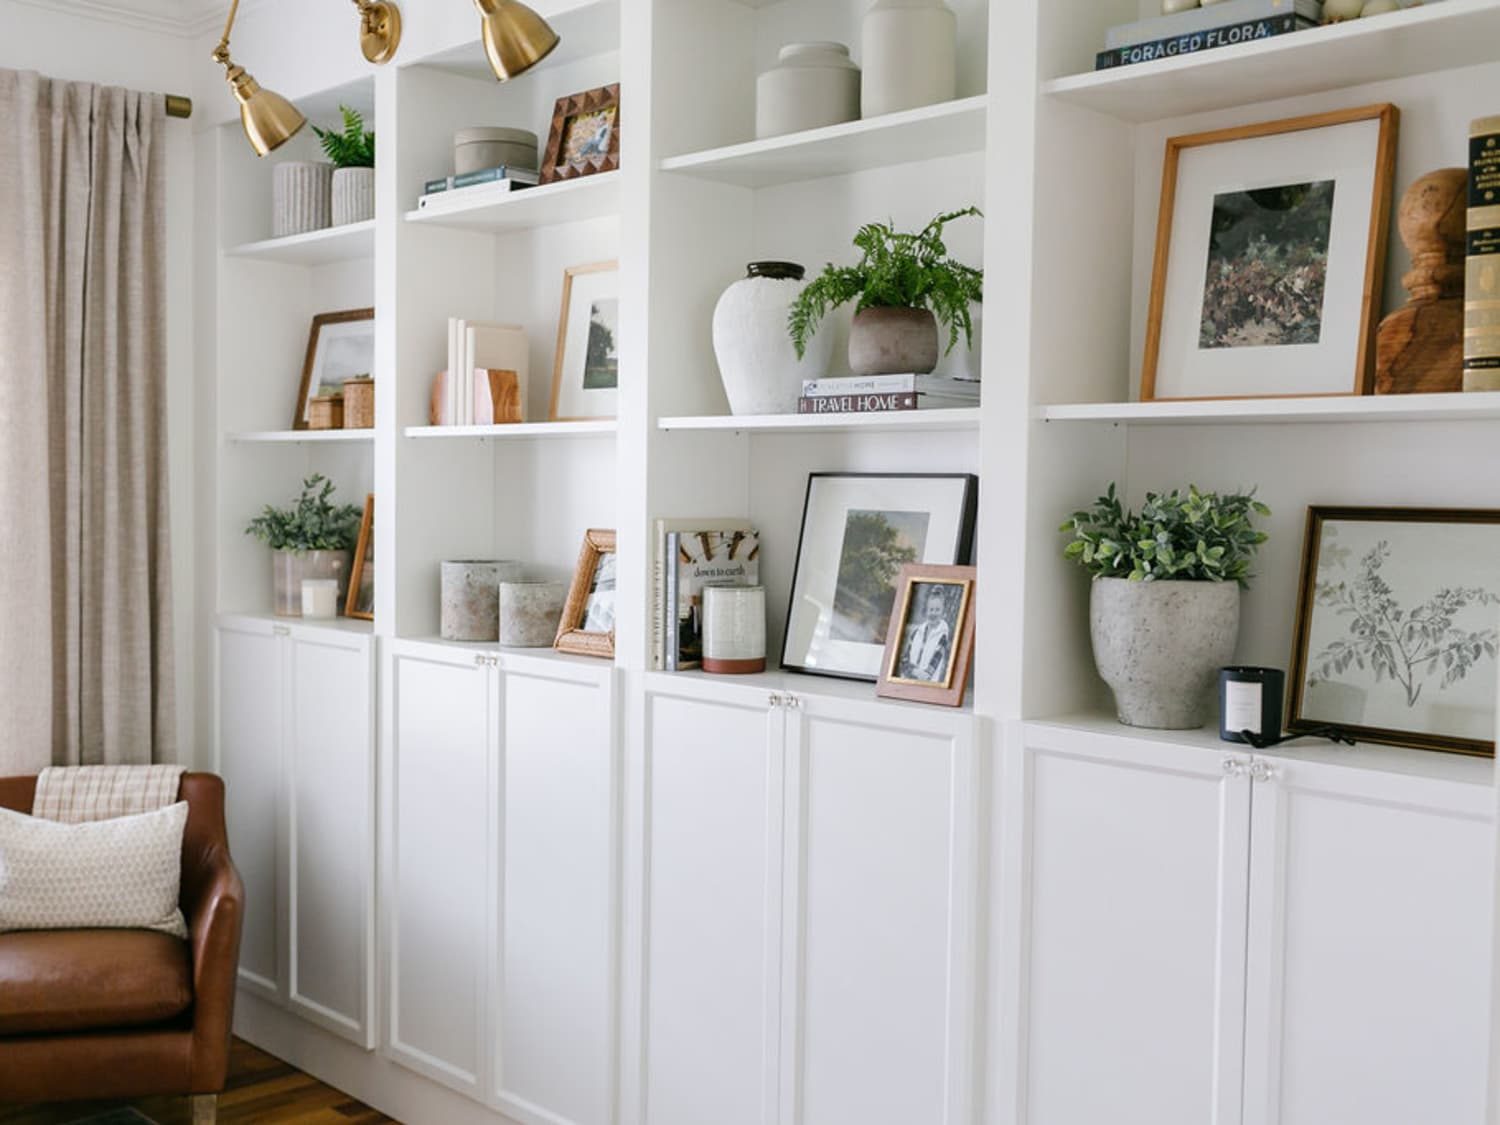
Transforming your living space doesn’t have to break the bank. Enter the world of IKEA hacks, where creativity meets affordability. This collection of 91 IKEA hacks for custom home decor will help you elevate ordinary IKEA pieces into bespoke home decor that reflects your unique style.
From repurposing bookcases into statement kitchen islands to metamorphosing basic dressers into luxurious vanities, these hacks span every room and style. Whether you’re a DIY novice or a seasoned upcycler, you’ll find projects that match your skill level and aesthetic preferences.
Our curated selection covers a spectrum of design sensibilities, from minimalist Scandinavian to eclectic bohemian. Learn how to add custom hardware, apply fresh paint techniques, or completely reimagine furniture functions. With step-by-step guidance and insider tips, you’ll be equipped to tackle these transformations with confidence.
Embrace the art of customization and breathe new life into mass-produced items. These IKEA hacks offer a sustainable approach to home decor, allowing you to create one-of-a-kind pieces without the exorbitant price tag of custom furniture.
IKEA Hacks for Custom Home Decor
Get ready to unlock your inner designer and revolutionize your living space!
Living Room Hacks
1. BILLY Bookcase Built-Ins
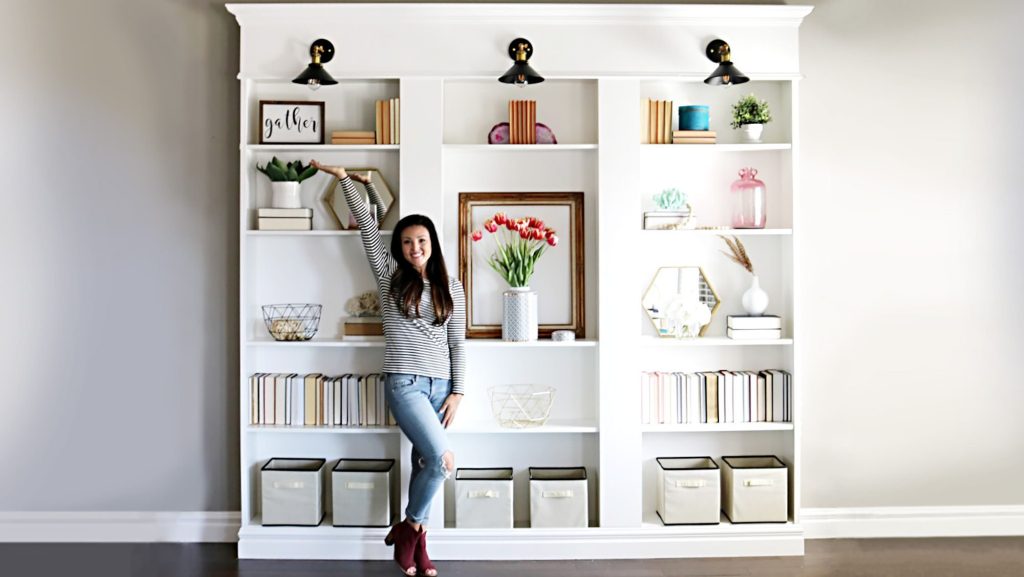
Transform the humble BILLY bookcase into a stunning built-in library that looks like it was always part of your home. Start by measuring your wall space and purchasing the appropriate number of BILLY bookcases. Remove the baseboards where the bookcases will sit, and secure them to the wall using L-brackets. Add crown molding to the top and paint the entire unit to match your wall color for a seamless look.
For an extra touch of elegance, consider adding LED strip lighting underneath each shelf. This not only highlights your book collection but also creates a warm ambient glow in the evening. You can also customize the shelves by adding wallpaper or contact paper to the back panels, creating visual interest and depth.
2. LACK Coffee Table Makeover
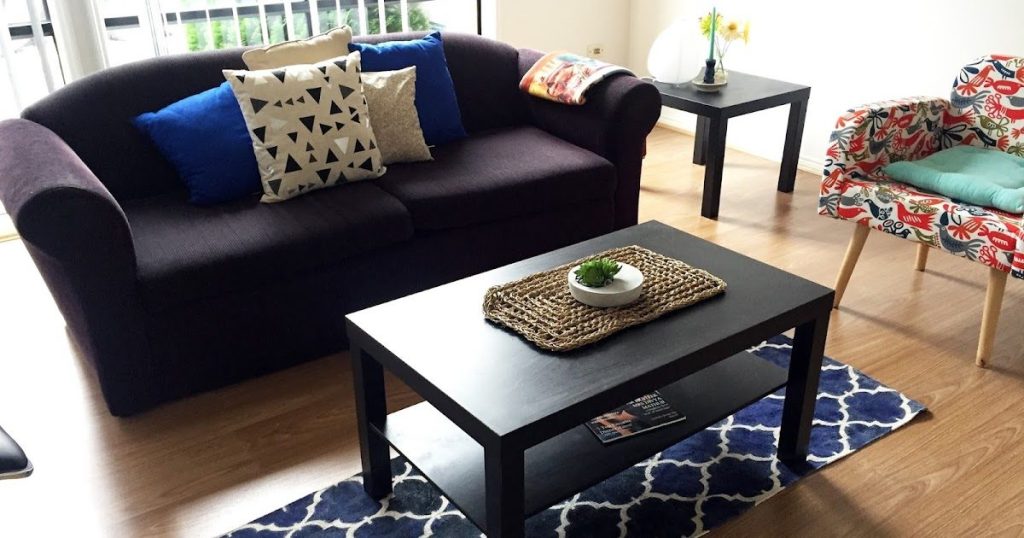
Give the simple LACK coffee table a luxurious upgrade with some creative touches. Begin by applying a layer of wood veneer to the tabletop, using contact cement for a secure bond. Once dry, sand the edges for a smooth finish. Next, paint the legs in a metallic gold or brass shade for a high-end look.
To elevate the design further, consider adding decorative molding around the edges of the tabletop. This can be attached with wood glue and small nails, then painted to match the legs. Finally, seal the entire piece with a clear polyurethane coating for durability. The result is a coffee table that looks far more expensive than its original price tag.
3. KALLAX Cube Storage Bench
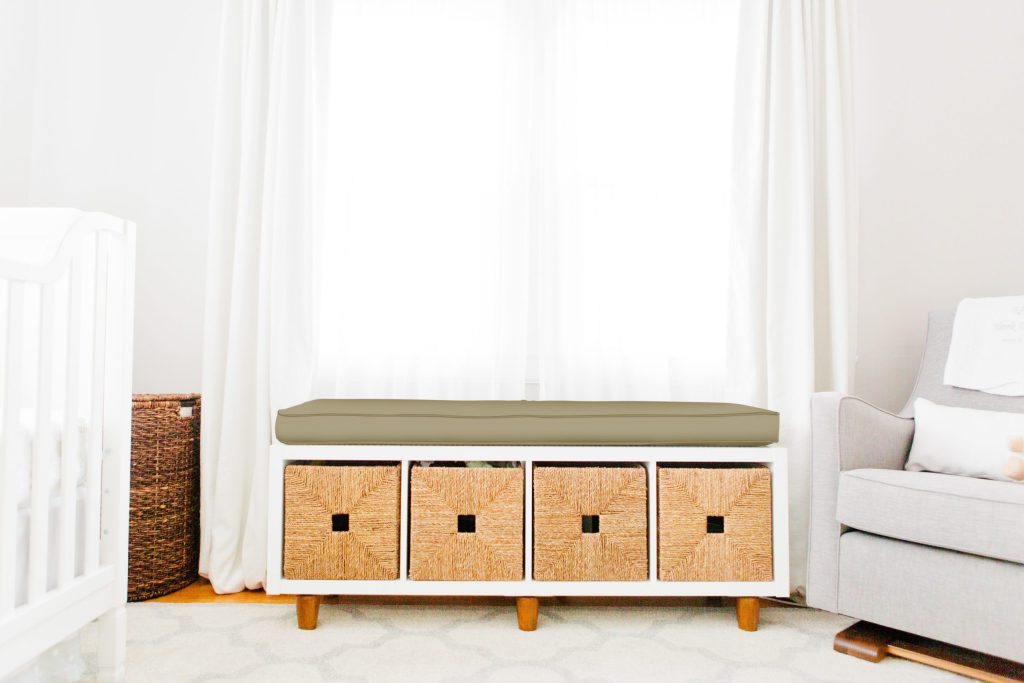
Turn a horizontal KALLAX shelf unit into a practical and stylish storage bench. Start by adding legs to the bottom of the unit for added height and a more furniture-like appearance. Next, create a cushioned top by cutting a piece of plywood to fit the top of the KALLAX, adding a layer of foam, and wrapping it all in a durable fabric of your choice.
To make the bench even more functional, add some KALLAX compatible drawers or baskets to some of the cubes for hidden storage. For the exposed cubes, consider adding decorative items or storage boxes that complement your decor. This versatile piece can serve as extra seating, a place to put on shoes, or even as a window seat with built-in storage.
Tip: Turn a KALLAX shelf unit into a statement room divider by adding cane webbing and a pivoting mechanism.
4. BESTA TV Stand Customization
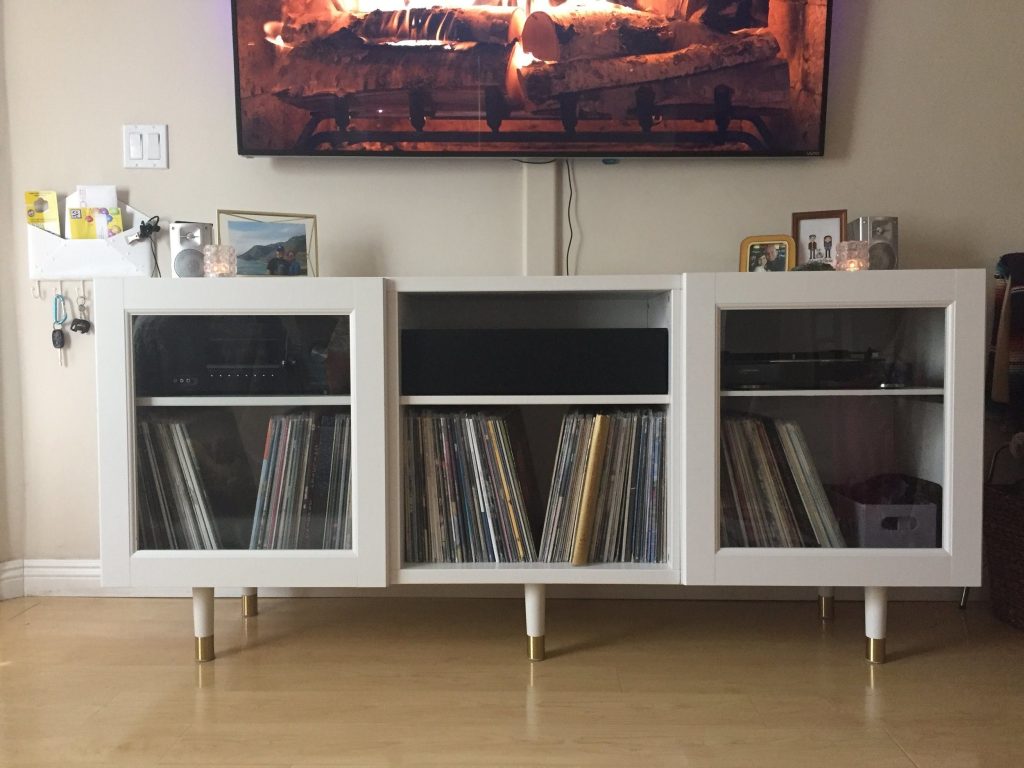
Elevate your BESTA TV stand by giving it a high-end, custom look. Begin by replacing the standard feet with sleek, modern legs or even hairpin legs for a mid-century vibe. Next, add a wooden top that extends slightly beyond the edges of the unit, creating an overhang that adds visual interest and a touch of warmth.
For the doors, consider replacing them with custom-made versions featuring cane webbing or rattan inserts. This adds texture and allows for better airflow if you’re storing electronics inside. Alternatively, you could create a slatted wood front using thin strips of wood attached to the existing doors. Finish the piece with new hardware in a complementary metallic finish to tie the look together.
5. FROSTA Stool Side Table

Transform the simple FROSTA stool into a chic side table that looks like it came from a high-end boutique. Start by disassembling the stool and sanding all parts smooth. Paint or stain the legs in your desired color, and for added interest, dip the bottom few inches of each leg in a contrasting color or metallic paint.
For the tabletop, replace the standard round top with a custom-cut piece of marble, quartz, or even a thick slice of wood with live edges. Seal the new top appropriately based on the material used. Reassemble the stool, ensuring the new top is securely attached. This versatile piece can function as a side table, plant stand, or even a compact dining table for small spaces.
6. VITTSJÖ Shelving Unit Glam-Up
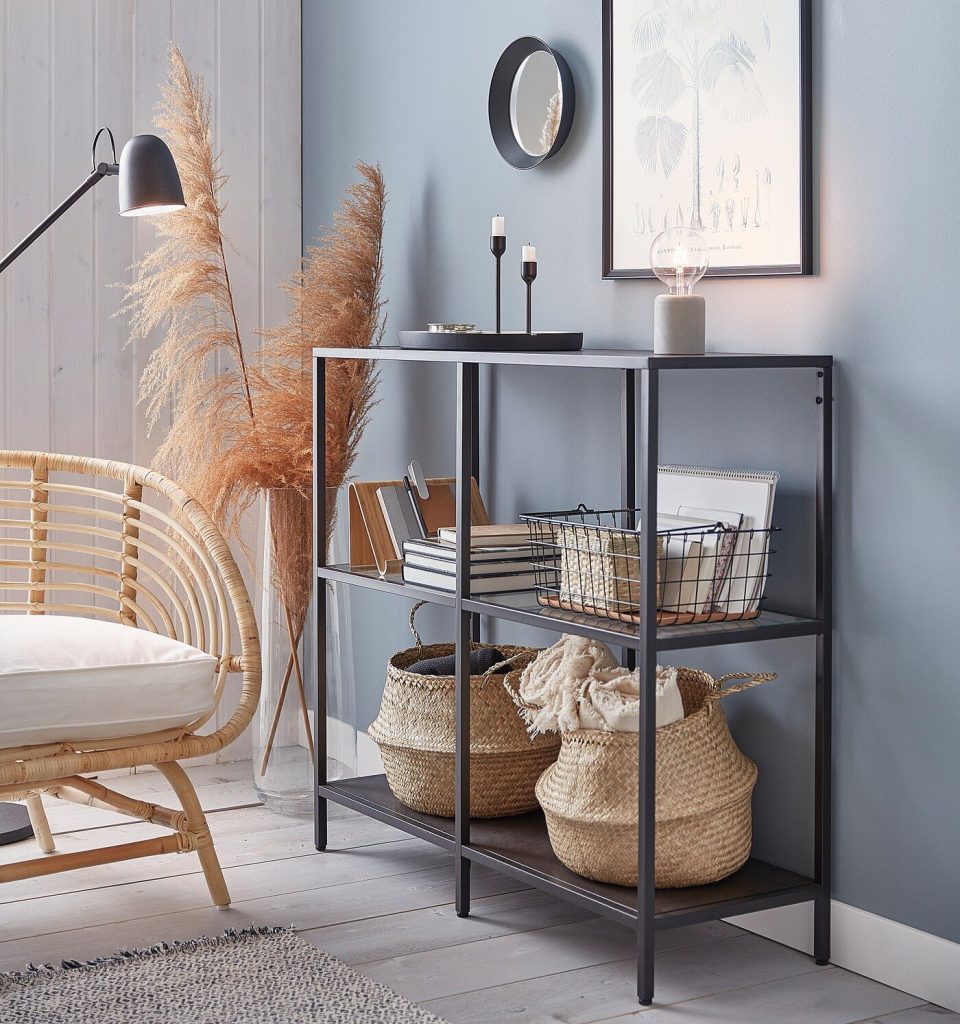
Give the industrial-style VITTSJÖ shelving unit a glamorous makeover. Begin by spray painting the metal frame in a luxe gold or copper finish. For the glass shelves, you have two options: either replace them with custom-cut mirror panels for a super glam look, or cover them with marble-patterned contact paper for a sophisticated touch.
To add even more visual interest, consider backing the unit with a bold wallpaper or a large mirror. This not only makes the piece stand out but can also help to make your space feel larger. Finally, style the shelves with a mix of books, decorative objects, and perhaps a small table lamp to create a curated display that showcases your personal style.
7. RAST Dresser Bar Cabinet
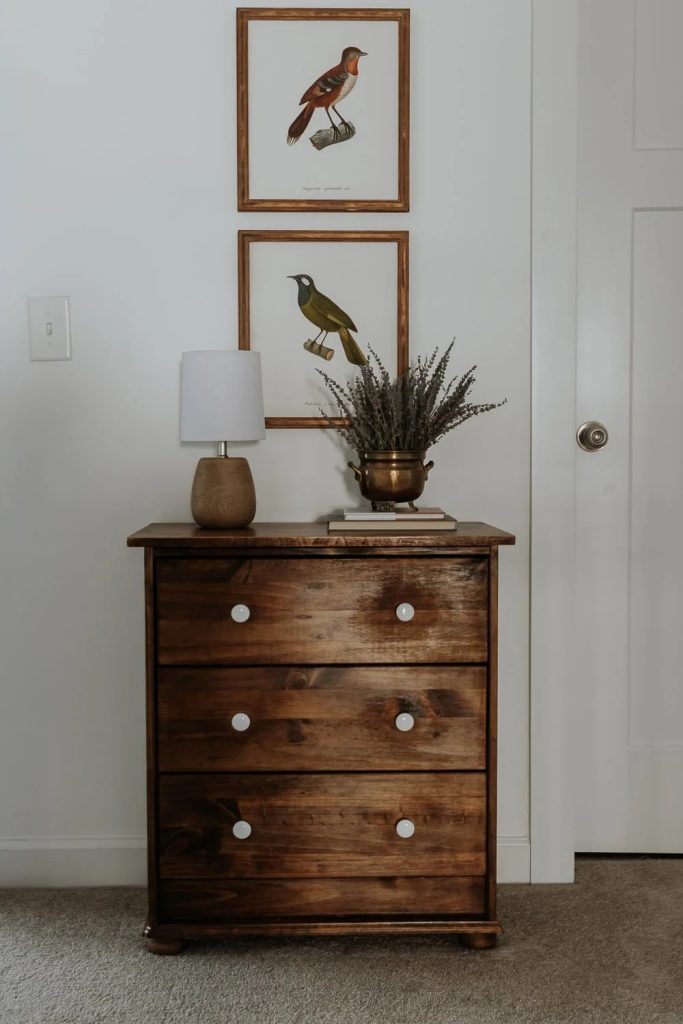
Transform the basic RAST dresser into a stylish bar cabinet that will be the centerpiece of your next gathering. Start by staining or painting the dresser in a rich, dark color. Replace the standard knobs with more upscale hardware, such as brass pulls or leather straps.
Inside, add a mirrored backing to reflect light and create a sense of depth. Install wine glass racks underneath the top surface, and add dividers in the drawers to safely store bottles and bar tools. On top, create a serving area by adding a piece of marble or a trendy concrete surface. Finally, consider adding casters to the bottom for easy mobility during parties.
8. LACK Side Table Trunk
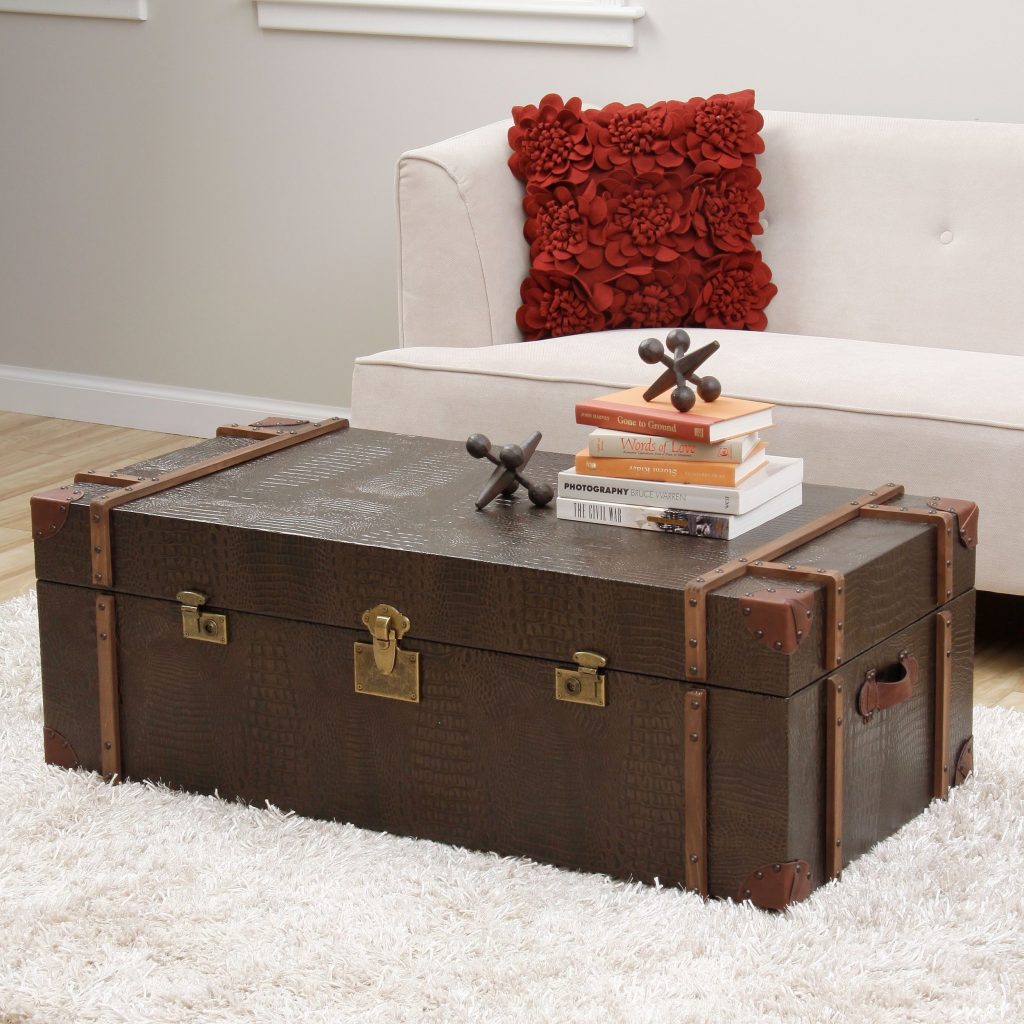
Give the ubiquitous LACK side table a vintage-inspired makeover by turning it into a faux trunk. Begin by covering the entire table with faux leather or a textured vinyl fabric, securing it with strong adhesive. Add decorative nailhead trim along the edges for an authentic look.
Create the illusion of a lid by adding a hinged top made from a piece of thin plywood covered in the same material as the table. Attach leather straps or metal brackets to the sides for a classic trunk appearance. Inside, line the “trunk” with a luxurious fabric like velvet or silk. This unique piece adds both style and hidden storage to your living room.
9. EKBY ALEX Drawer Unit Floating Desk
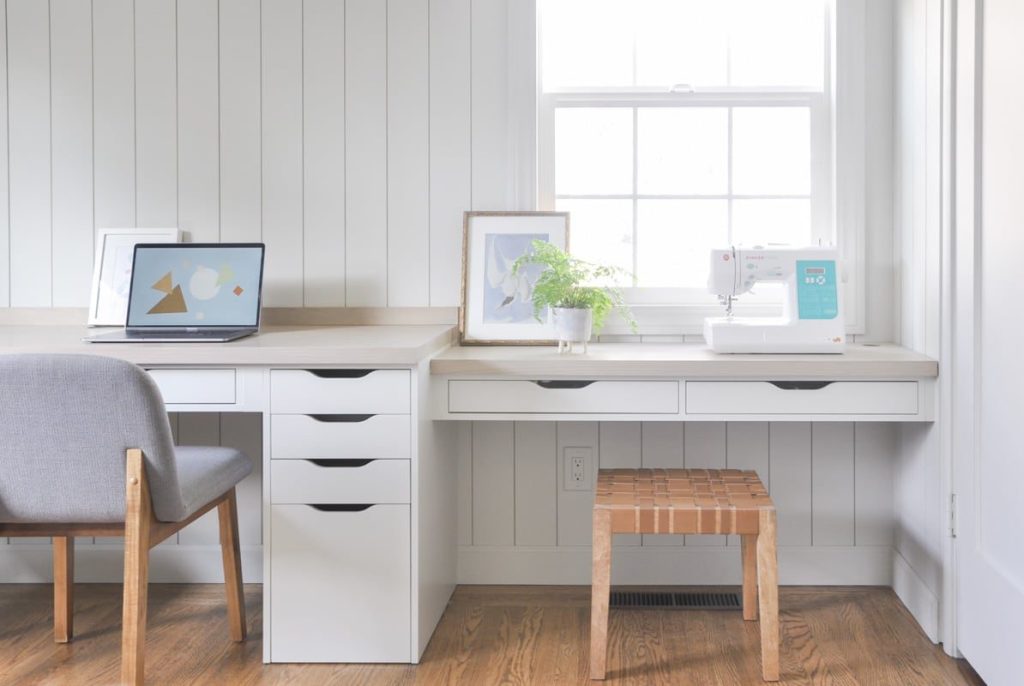
Create a sleek, floating desk using the EKBY ALEX drawer unit. Start by mounting the unit securely to the wall at your desired height. Then, extend the work surface by attaching a custom-cut piece of wood or laminate to the top, creating an overhang on three sides.
Underneath, install some discreet LED strip lighting to illuminate your workspace. To keep cables tidy, drill a hole in the new desktop for a grommet, allowing wires to be fed through to the drawers below. Finally, consider adding a small shelf or pegboard above the desk for additional storage and organization.
10. POÄNG Chair Reupholstery
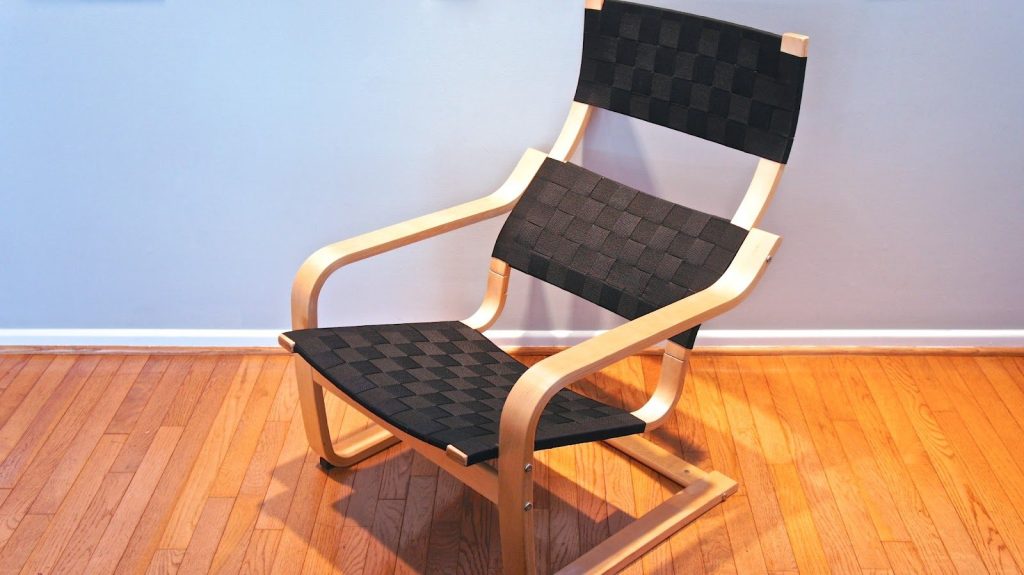
Give new life to the classic POÄNG chair by reupholstering it in a luxurious fabric. Remove the existing cover and use it as a pattern to cut your new fabric. Choose a material that complements your decor, such as a rich velvet or a patterned linen.
For added comfort, consider adding an extra layer of foam padding before applying the new fabric. You can also update the wooden frame by staining it a different color or painting it for a completely new look. Complete the transformation by adding a small lumbar pillow in a coordinating fabric for extra support and style.
Bedroom Hacks
11. MALM Dresser Luxury Upgrade
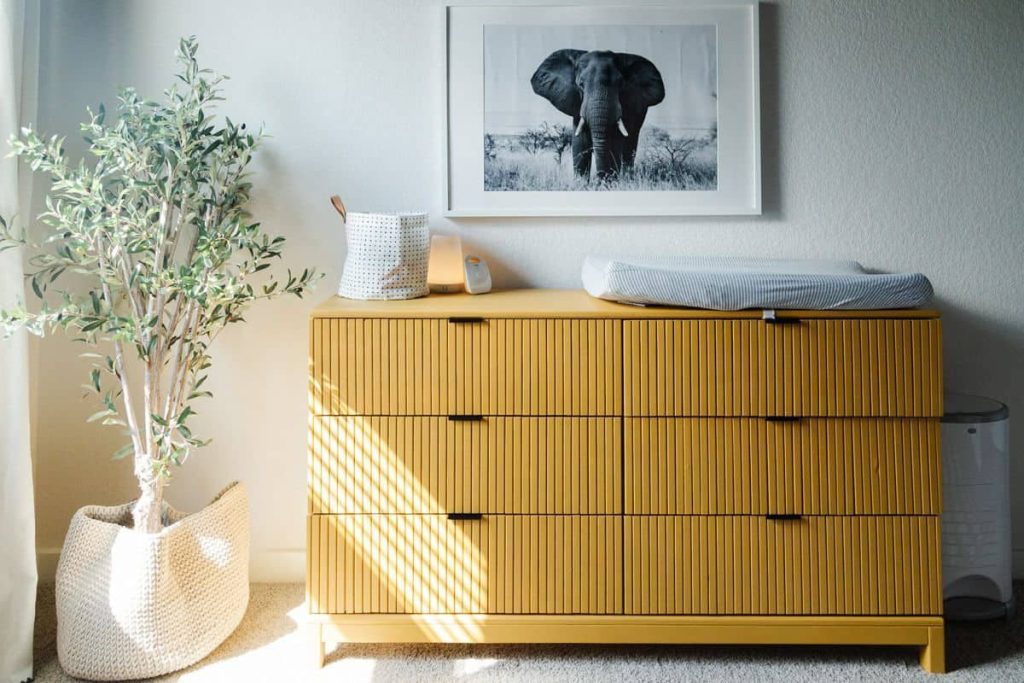
Transform the simple MALM dresser into a high-end piece of furniture that looks like it belongs in a luxury hotel. Start by applying wood veneer to the drawer fronts and top of the dresser. Sand the edges for a smooth finish and stain the veneer in your desired shade.
Next, replace the standard drawer pulls with elegant brass or crystal knobs. For an extra touch of sophistication, add decorative overlays to the drawer fronts using thin pieces of wood or MDF cut into geometric patterns. Paint these overlays in a contrasting color or metallic finish. Finally, consider adding a glass top to protect the surface and add a touch of glamour.
12. KURA Bed Treehouse
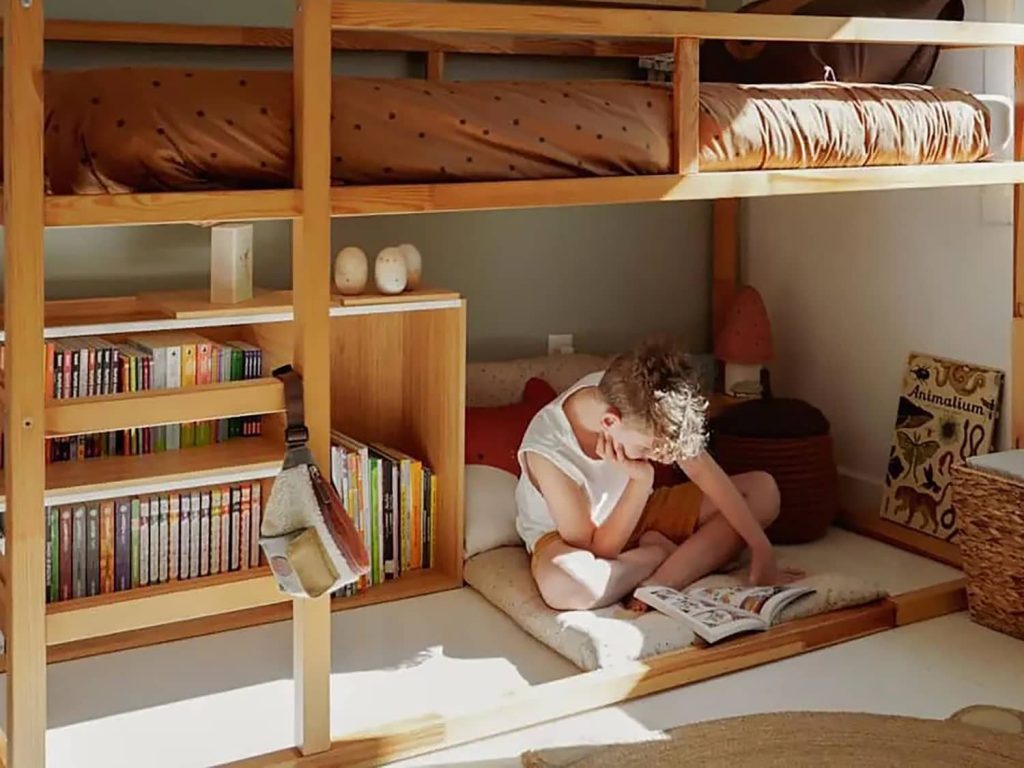
Turn the reversible KURA bed into a magical treehouse retreat for your child. Start by painting the bed frame in earthy colors to mimic a tree trunk. Add “branches” using thin pieces of wood or even pool noodles covered in brown fabric, attaching them securely to the frame.
Create a canopy using green fabric or artificial leaves to give the impression of a leafy treetop. Add fairy lights for a magical nighttime glow. On the sides of the bed, attach small shelves or pockets to serve as “nests” for stuffed animal friends. Finally, create a ladder or rope climb for easy access, ensuring it’s sturdy and safe for your little one.
13. HEMNES Nightstand Charging Station
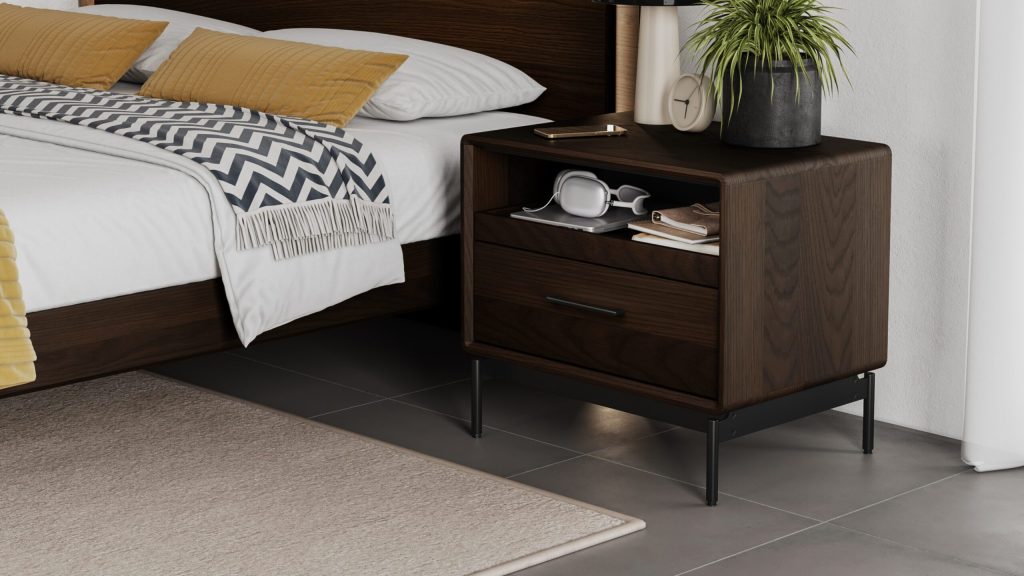
Upgrade your HEMNES nightstand into a modern charging station without sacrificing its classic look. Start by drilling a hole in the top of the nightstand for a grommet. This will allow you to feed charging cables through from the drawer below.
Inside the drawer, install a power strip and use adhesive cable clips to keep cords organized. You can also add a wireless charging pad on top of the nightstand for compatible devices. To maintain the nightstand’s aesthetic, consider using a decorative box or tray on top to discreetly house the wireless charger and any visible cables.
14. PAX Wardrobe Walk-In Closet
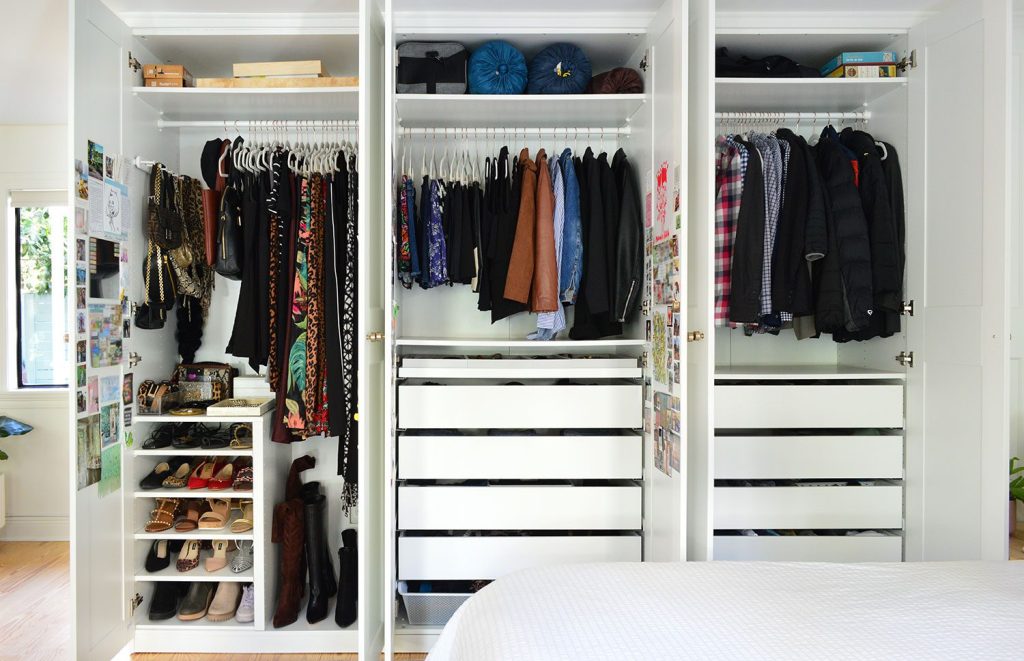
Create a custom walk-in closet using the versatile PAX wardrobe system. Start by planning your space and selecting the appropriate PAX components to fit your needs. Install the wardrobes along the walls of your chosen room, leaving space in the center for a dressing area.
Customize the interiors with a mix of hanging rods, shelves, and drawers to maximize storage. Add pull-out trays for accessories and shoe racks for footwear. For a luxurious touch, install LED lighting strips inside the wardrobes and under shelves. Finally, place a LACK table or MALM dressing table in the center of the room to create an island for folding clothes or displaying accessories.
15. TARVA Dresser Mid-Century Mod
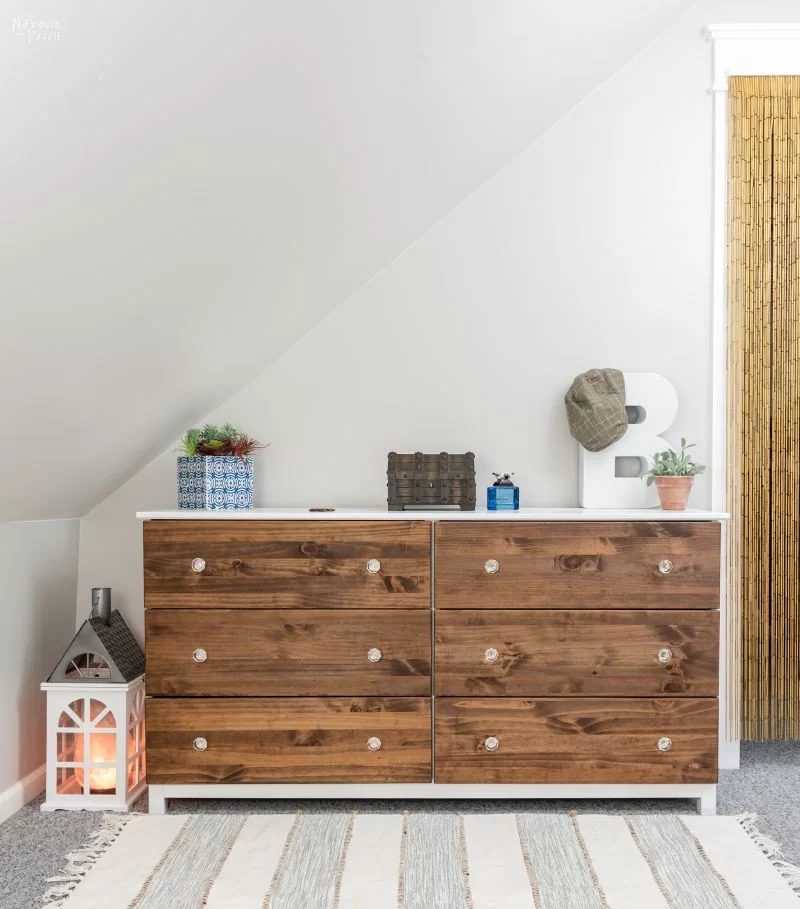
Give the pine TARVA dresser a mid-century modern makeover. Begin by staining the dresser in a rich, warm tone. Replace the simple wooden knobs with sleek, brass pulls in a starburst or geometric design.
To achieve the characteristic mid-century look, add tapered legs to the base of the dresser. You can find these at most hardware stores or online. For an extra touch of authenticity, create a subtle pattern on the drawer fronts using thin strips of wood arranged in a chevron or diamond design. Stain these in a slightly darker shade for contrast.
16. RAST Nightstand Glam
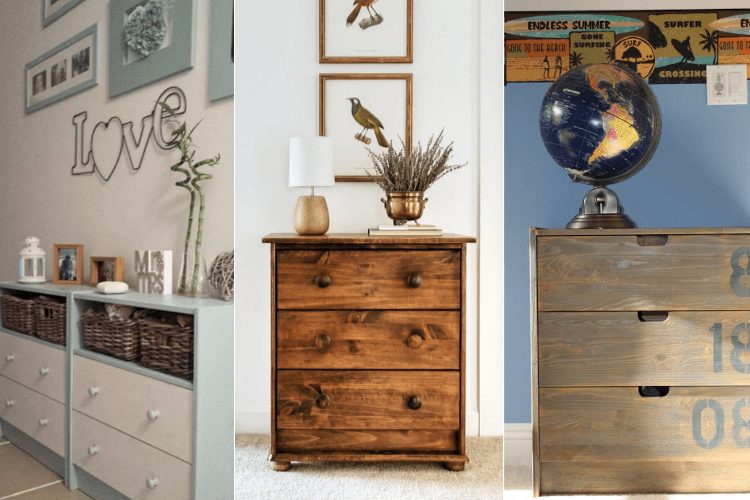
Transform the basic RAST nightstand into a glamorous bedside companion. Start by painting the entire piece in a high-gloss white or black lacquer. For added texture, apply mirror mosaic tiles or mother-of-pearl veneer to the drawer fronts.
Replace the standard wooden knobs with crystal or gold-toned handles for a touch of luxury. Add decorative molding around the top edge and base of the nightstand, painting it to match. Finally, place a piece of mirror or glass on top to protect the surface and add an extra layer of glamour.
17. BRIMNES Headboard Storage Upgrade
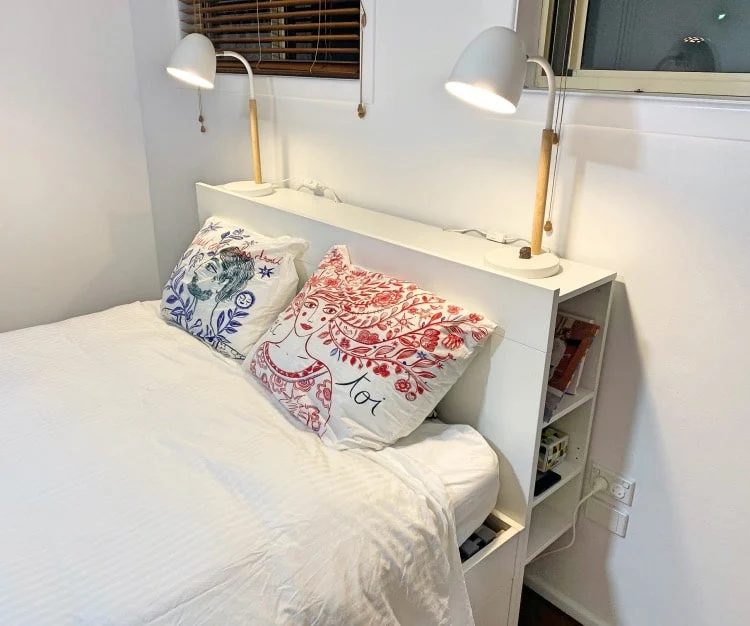
Enhance the BRIMNES headboard’s storage capabilities while giving it a custom look. Start by removing the standard doors and replacing them with custom-made versions featuring cane webbing or rattan inserts. This adds texture and visual interest while still allowing for some visibility of the items stored inside.
Next, add LED strip lighting inside the storage compartments, connecting them to a switch for easy access. Install small hooks or a rod inside each compartment for hanging jewelry or scarves. Finally, add a cushioned panel to the front of the headboard for extra comfort when sitting up in bed.
18. NORDLI Modular Dresser Room Divider
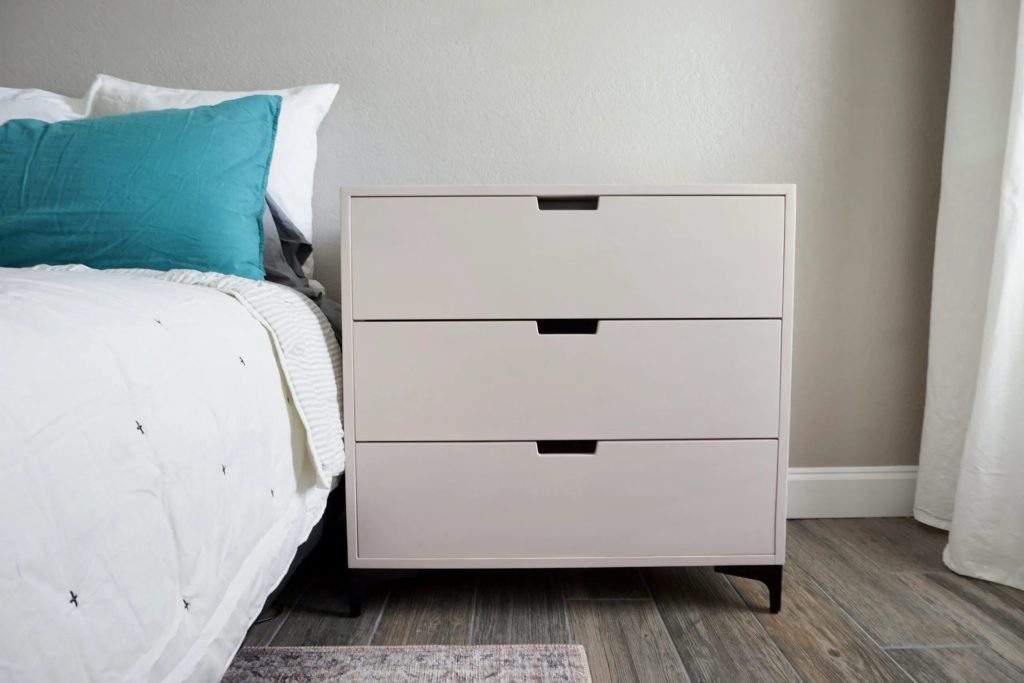
Use the modular NORDLI dresser system to create a functional room divider that provides both storage and separation in a studio apartment or large bedroom. Arrange the NORDLI units in a configuration that suits your space, alternating the direction of some units to create interest and allow access from both sides.
On top of the dresser units, add a custom-cut piece of wood to create a continuous surface that can serve as a desk, vanity, or display area. Install some of IKEA’s SKÅDIS pegboards on the ends of the unit for additional storage and to help anchor the piece visually. Finally, add some tall plants or a folding screen on top to increase privacy without sacrificing light.
19. MOSSLANDA Picture Ledge Floating Nightstand
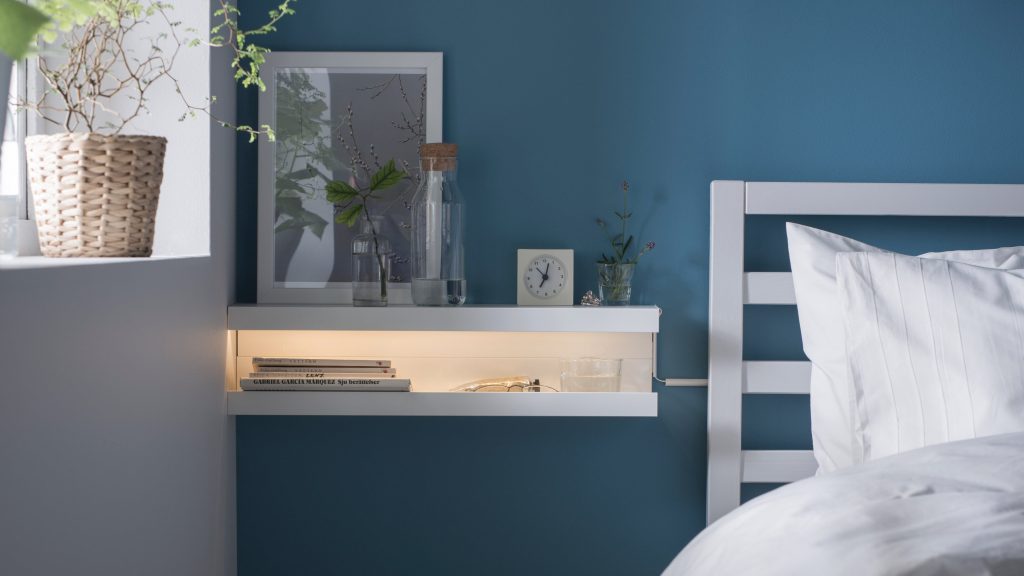
Create a minimalist floating nightstand using the MOSSLANDA picture ledge. Mount two or three ledges vertically on the wall next to your bed, spacing them about 12 inches apart. Paint or stain the ledges to match your decor.
Use the top ledge as a surface for a small lamp and your phone, the middle ledge for books or a water carafe, and the bottom ledge for decorative items. To add a power source for charging, install a small shelf below the ledges to hold a power strip, and drill a small hole in the top ledge for cable management.
20. FJELLSE Bed Frame Canopy Bed
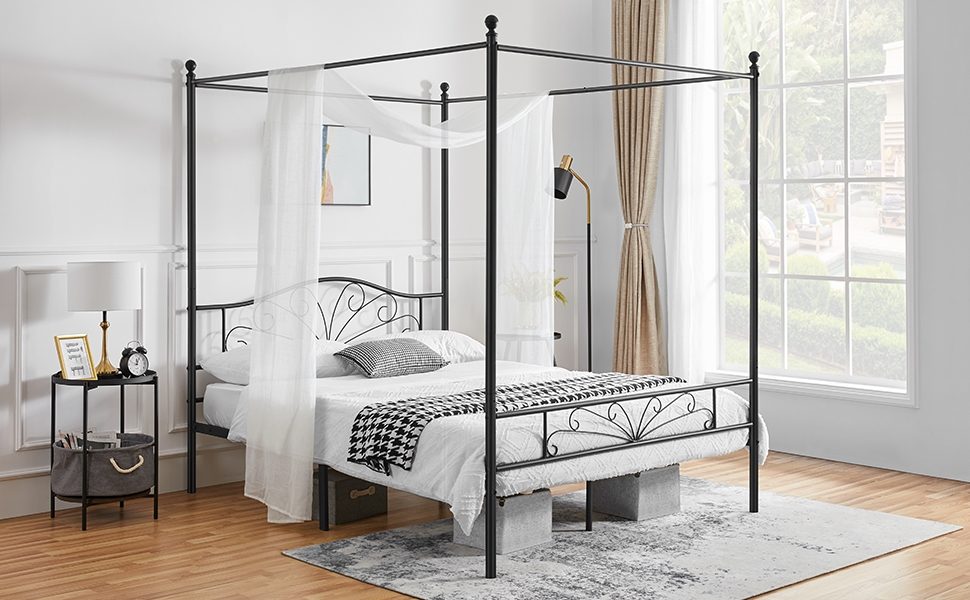
Transform the simple FJELLSE bed frame into a dreamy canopy bed. Start by staining or painting the frame in your desired color. Next, extend the four corner posts by securely attaching additional lengths of wood, ensuring they’re sturdy enough to support fabric.
Create a canopy frame by connecting the tops of the posts with wooden beams or sturdy curtain rods. Drape sheer curtains or mosquito netting over the frame for a romantic, ethereal look. For a more structured appearance, use heavier fabric panels and tie them back with decorative ropes or tassels during the day.
Kitchen Hacks
21. BEKVÄM Kitchen Island
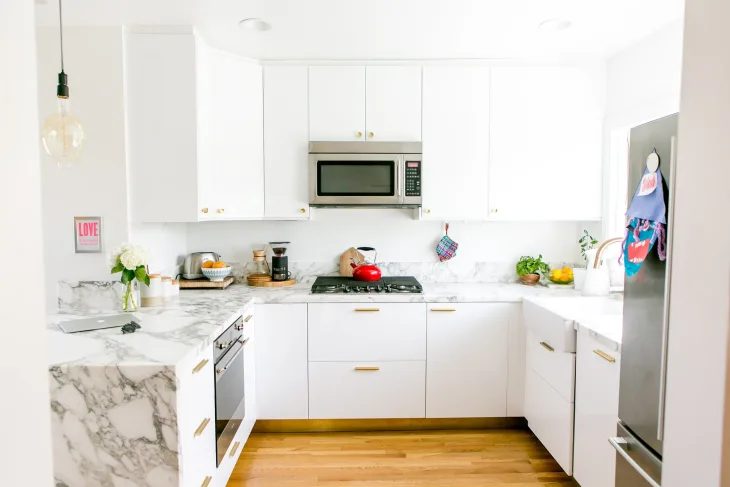
Turn the humble BEKVÄM kitchen cart into a stylish and functional kitchen island. Start by staining or painting the cart in a color that complements your kitchen decor. For added durability, consider applying a coat of polyurethane after painting.
Replace the standard top with a larger, custom-cut butcher block or stone surface to increase the workspace. This overhang can also accommodate bar stools for casual seating. Add hooks to the sides for hanging utensils or towels, and install a towel bar on one end. For extra storage, attach a magnetic knife strip or a small spice rack to one side.
22. BILLY Bookcase Pantry
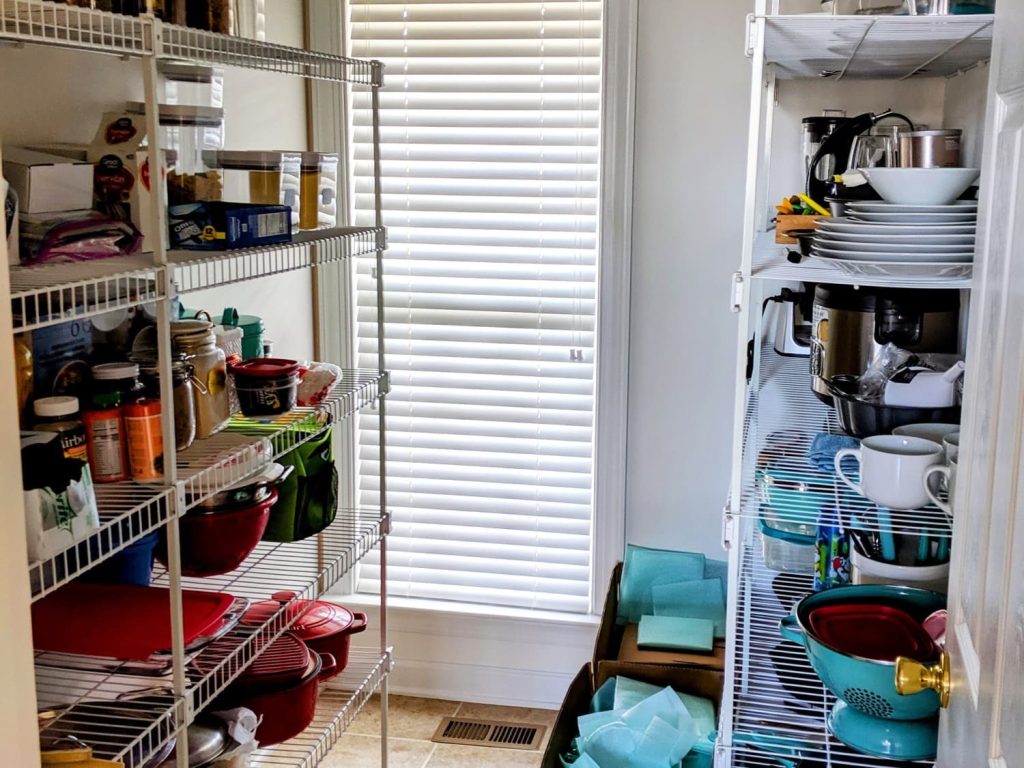
Repurpose a BILLY bookcase into a spacious and organized pantry. Begin by adding casters to the bottom for easy mobility. Paint the entire unit in a color that matches your kitchen cabinets for a built-in look.
Install additional shelves to maximize vertical storage, and add clear acrylic shelf risers for better visibility of items at the back. Use clear storage containers and labels to keep everything organized and easily accessible. For a finishing touch, add battery-operated LED puck lights under each shelf to illuminate your newly organized pantry.
Hidden Cabinet Tip: Create a hidden liquor cabinet by installing a BILLY bookcase with a secret pivoting section.
23. KALLAX Wine Rack
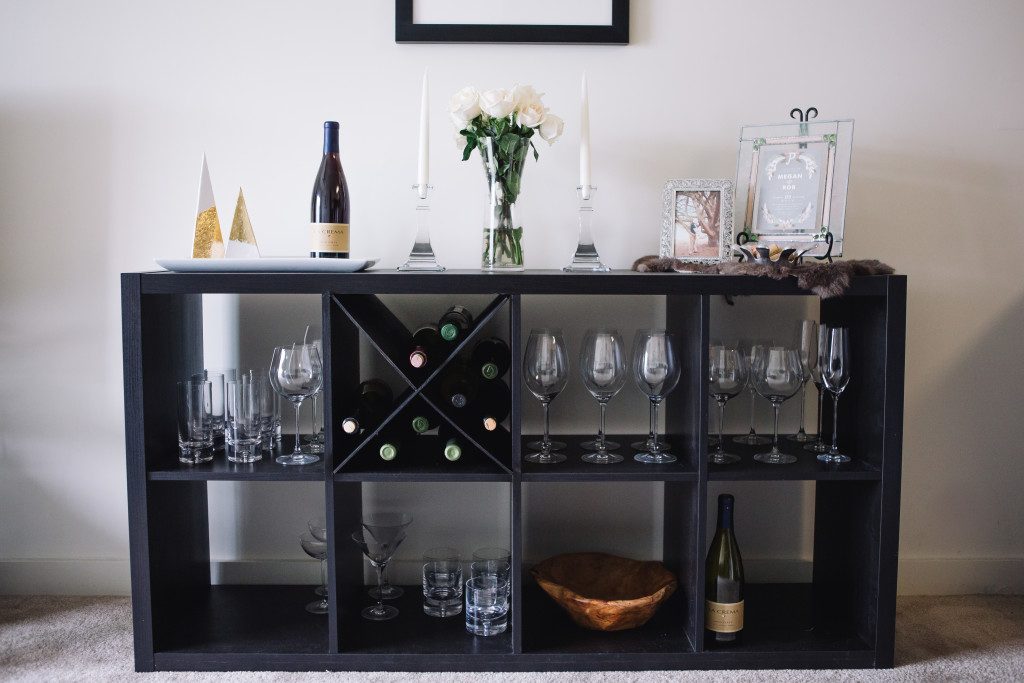
Transform a KALLAX shelf unit into a sophisticated wine storage solution. Start by laying the unit on its side and removing some of the vertical dividers to create larger openings for wine bottles. Cut pieces of plywood to fit these openings, and drill angled holes sized to hold wine bottles securely.
Paint or stain the entire unit and the new inserts to match. For added functionality, install a countertop on the upper surface, creating a space for wine glasses and a serving area. Consider adding LED lighting to showcase your wine collection and create ambiance.
24. RÅSKOG Utility Cart Coffee Station
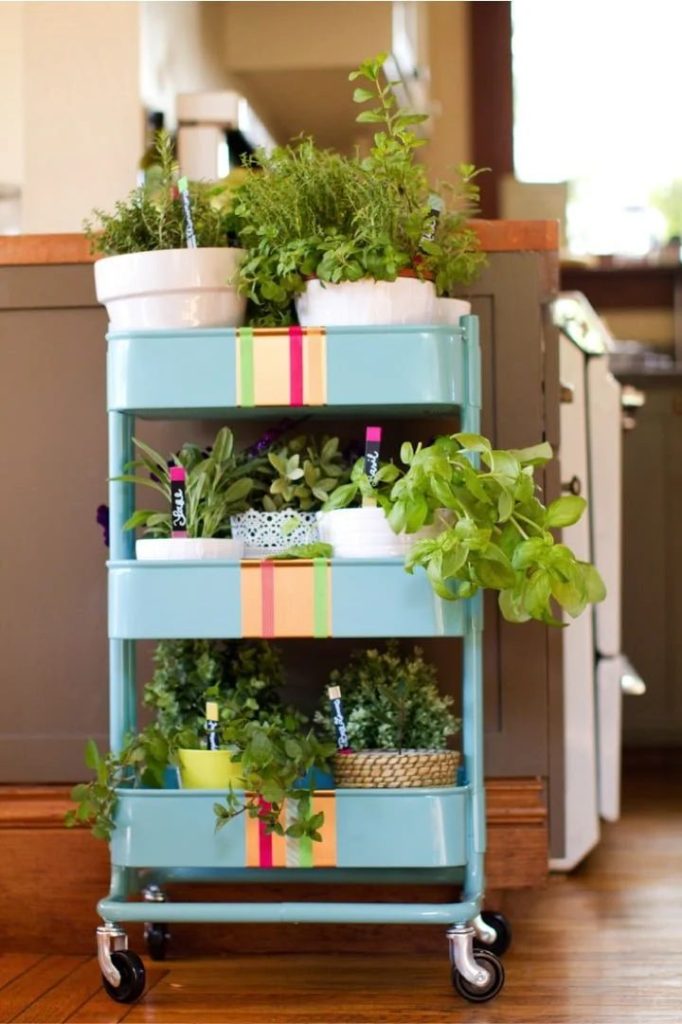
Turn the versatile RÅSKOG utility cart into a mobile coffee station. Paint the cart in a color that complements your kitchen decor. On the top tier, create a stable surface for your coffee maker by adding a custom-cut piece of wood or a tray.
Use the middle tier to store mugs, syrups, and other coffee accessories. The bottom tier can hold larger items like bags of coffee beans or a grinder. Add hooks to the sides of the cart for hanging measuring spoons or small storage baskets. Finally, attach a paper towel holder to one end for easy cleanup.
25. LACK Side Table Kitchen Trolley
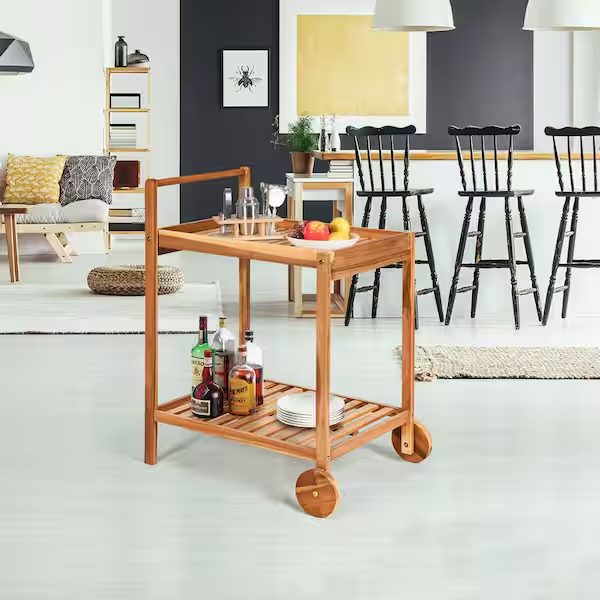
Repurpose the LACK side table into a practical kitchen trolley. Start by adding casters to the bottom of the legs for mobility. Paint the table in a color that complements your kitchen decor. Add a towel bar to one side and hooks to another for hanging utensils or small baskets.
Create additional storage by attaching a magnetic knife strip under the tabletop. For the surface, consider replacing the standard top with a cutting board or tile for a more practical work area. This compact trolley can serve as extra counter space or a mobile prep station in smaller kitchens.
26. FINTORP Rail System Backsplash
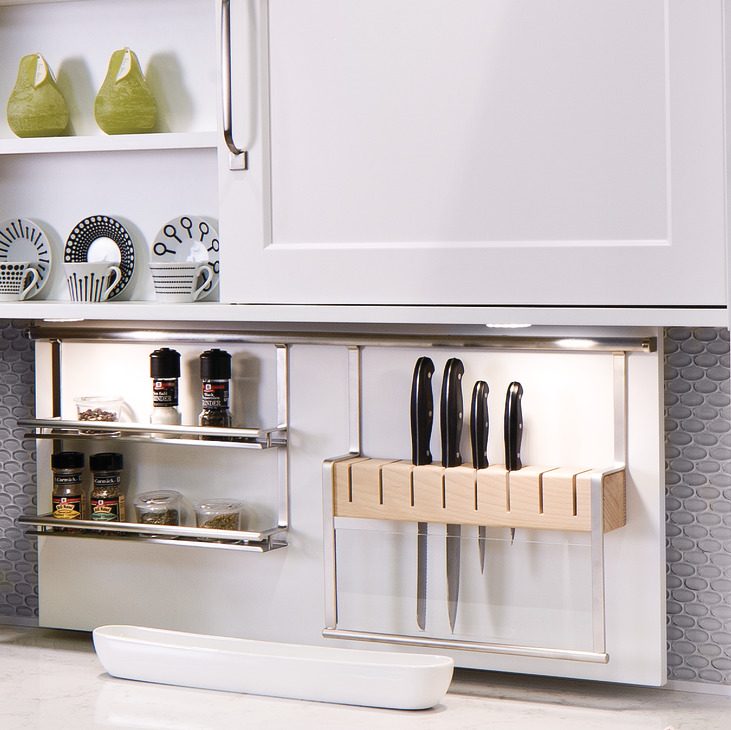
Create a functional and stylish backsplash using the FINTORP rail system. Install multiple rails horizontally across your backsplash area. Use FINTORP hooks, containers, and shelves to organize your kitchen tools, spices, and frequently used ingredients.
For a cohesive look, paint the wall behind the rails in a contrasting color or apply peel-and-stick tiles. This system not only adds visual interest to your kitchen but also keeps essential items within easy reach while cooking. You can easily rearrange the components as your needs change.
27. KNUFF Magazine Holder Vertical Herb Garden
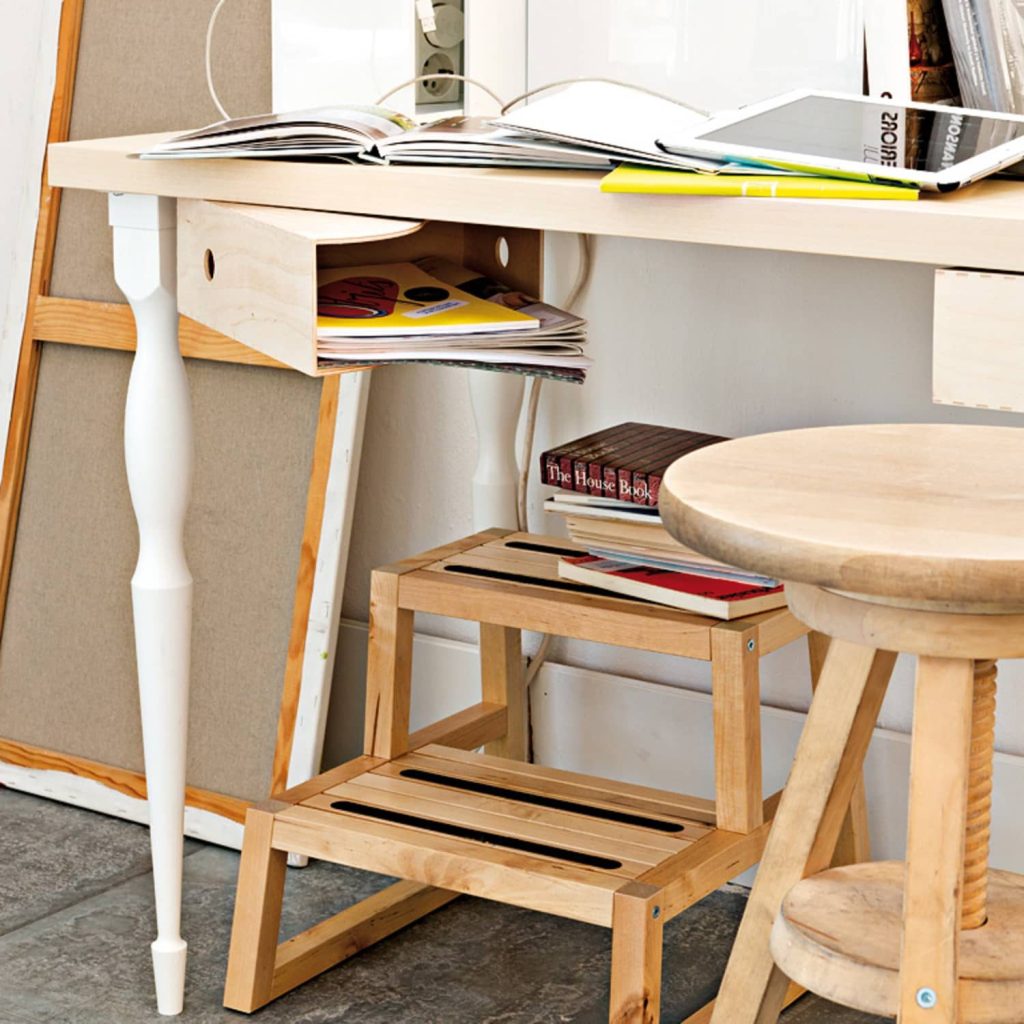
Transform KNUFF magazine holders into a vertical herb garden for your kitchen. Paint or stain the holders in colors that complement your decor. Drill drainage holes in the bottom of each holder and line them with plastic to protect the wood.
Mount the holders vertically on a kitchen wall or the side of a cabinet, ensuring they’re securely fastened. Fill with potting soil and plant your favorite herbs. Label each holder with chalkboard paint or small signs. This living wall adds freshness to your kitchen and keeps herbs handy for cooking.
28. ORDNING Utensil Holder Lighting Fixture
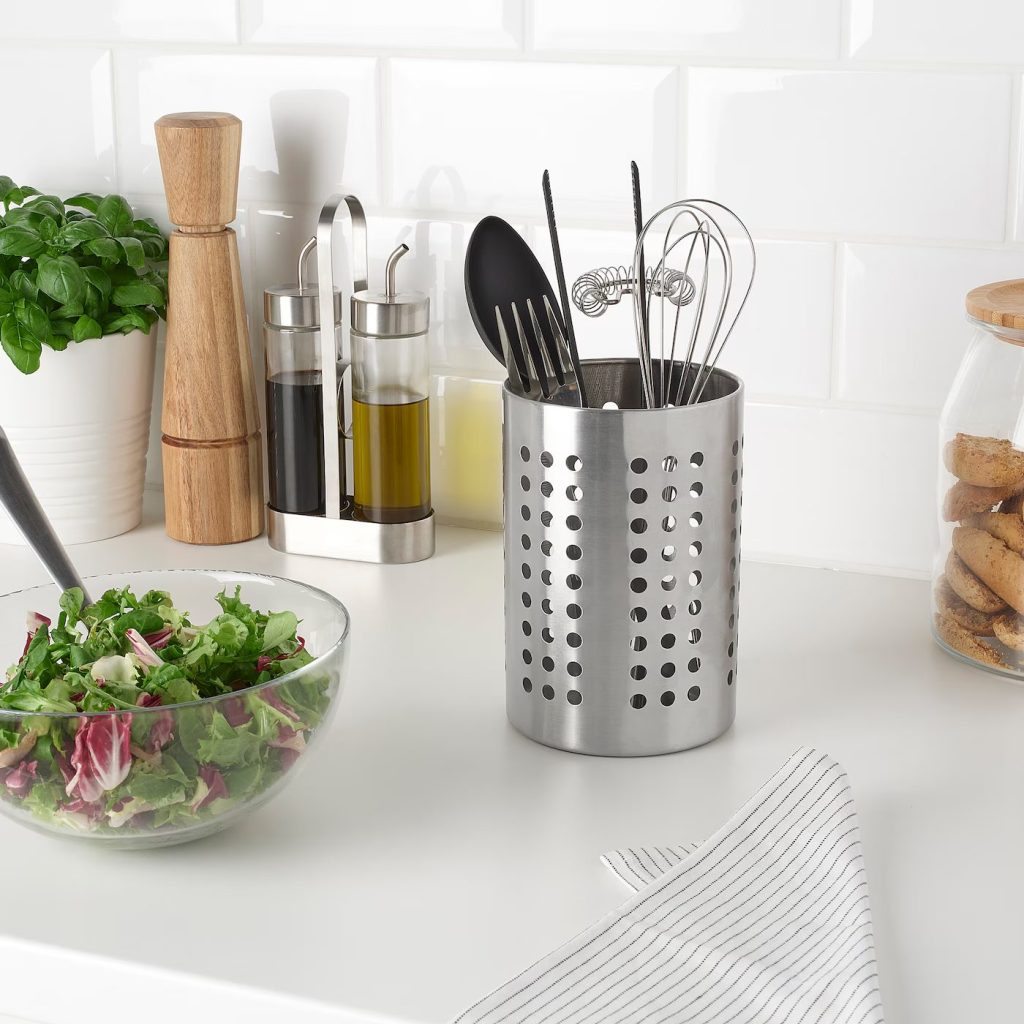
Turn the stainless steel ORDNING utensil holder into a unique pendant light. Drill a hole in the bottom of the holder for the electrical cord and another in the lid for hanging. Thread the cord through and install a light socket inside.
For a more industrial look, leave the holder as is, or spray paint it in a color that matches your decor. Create interesting light patterns by drilling decorative holes in the sides of the holder. Hang several at different heights for a dramatic effect over a kitchen island or dining table.
29. VARIERA Plastic Bag Dispenser File Organizer
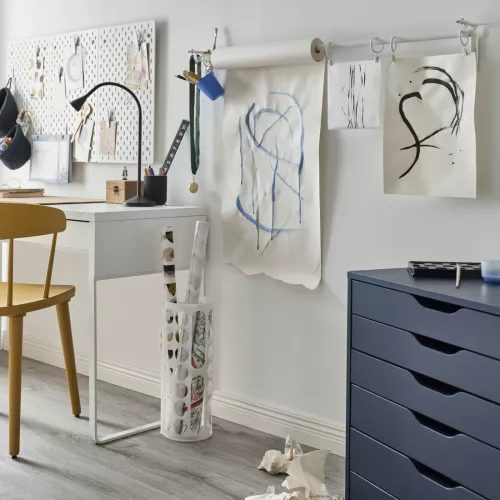
Repurpose the VARIERA plastic bag dispenser into a sleek file organizer for your kitchen. Paint the dispenser in a color that matches your decor. Mount it horizontally on the inside of a cabinet door or on the wall.
Use it to store cutting boards, baking sheets, or even important documents like takeout menus and appliance manuals. Label the front for easy identification. This hack keeps your kitchen organized and makes use of often overlooked vertical space.
Related Guide: 100 Easy DIY Furniture Makeover Ideas
30. RIMFORSA Tablet Stand Cookbook Holder
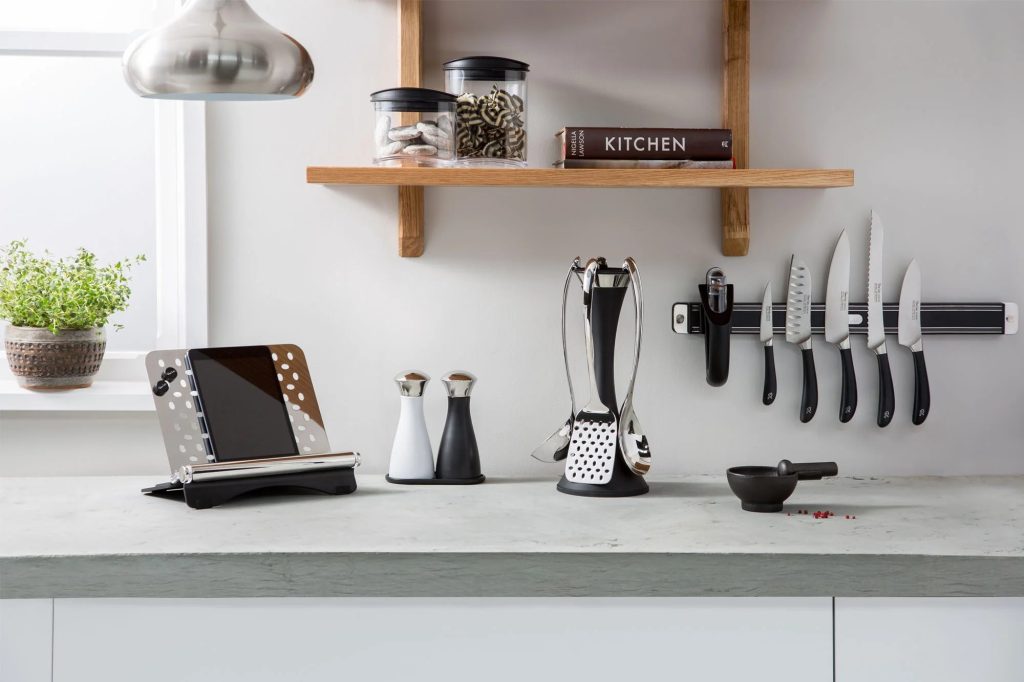
Modify the RIMFORSA tablet stand to create a sturdy cookbook holder. Add a clear acrylic sheet to the front to protect your cookbooks from splatters while still allowing you to read the recipes. Install a clip at the top to hold the pages open.
For added functionality, attach a small LED light to the top of the stand for better visibility. This hack keeps your favorite recipes at eye level and protects them from kitchen messes, all while freeing up valuable counter space.
Bathroom Hacks
31. GODMORGON Vanity Upgrade
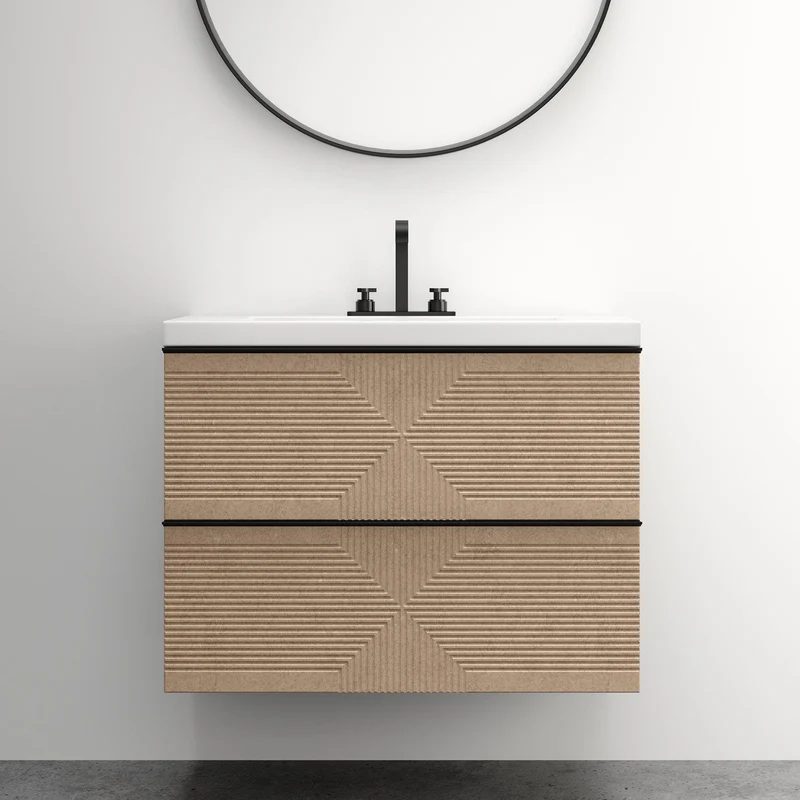
Give your bathroom a luxurious makeover by upgrading the GODMORGON vanity. Start by replacing the standard top with a custom-cut marble or quartz countertop. This immediately elevates the look of the entire piece and adds durability.
Next, swap out the drawer fronts for custom-made versions in a textured material like rattan or fluted wood. This adds visual interest and a bespoke feel. Replace the standard hardware with elegant brass or matte black pulls to complement your new drawer fronts.
For added functionality, install a backlit mirror above the vanity. This not only provides better lighting for grooming tasks but also creates a spa-like ambiance in your bathroom. Finally, add some under-cabinet lighting to illuminate the floor space and create a floating effect.
32. RÅGRUND Towel Rack Ladder Shelf
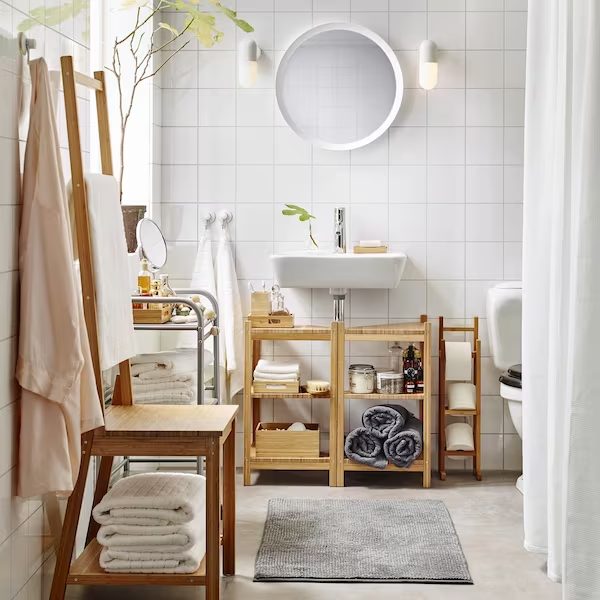
Transform the RÅGRUND towel rack into a versatile ladder shelf for your bathroom. Start by sanding the bamboo surface and applying a water-resistant sealant to protect it from moisture. For a more modern look, you could paint it in a color that complements your bathroom decor.
Add extra rungs between the existing ones to create more shelf space. These can be made from matching bamboo or contrasting metal rods for an industrial touch. Use these new shelves to display decorative items, store toiletries, or hang additional towels.
At the base of the ladder, add a small tray or shelf to hold bath essentials or a small plant. This hack not only provides additional storage in a compact footprint but also adds a decorative element to your bathroom.
33. ALGOT Laundry Station
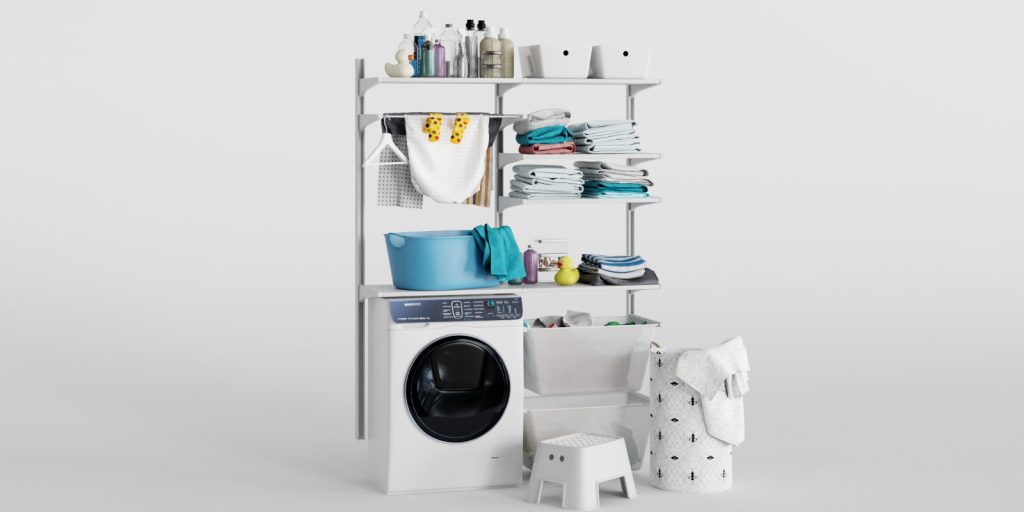
Repurpose the ALGOT shelving system into a comprehensive laundry station. Start by installing a clothes rod between two upright supports for hanging freshly ironed clothes. Below this, add wire baskets at different heights to sort laundry by color or fabric type.
Incorporate a fold-out ironing board that can be tucked away when not in use. This can be created by attaching a custom-cut ironing board to one of the shelves with hinges. Add hooks on the sides of the unit for hanging an iron, spray bottles, and other laundry accessories.
For a finishing touch, install a countertop over a section of the shelves to create a folding station. This ALGOT hack maximizes vertical space and turns your laundry area into an efficient, organized workspace.
34. LILLÅNGEN Sink Cabinet Medicine Cabinet
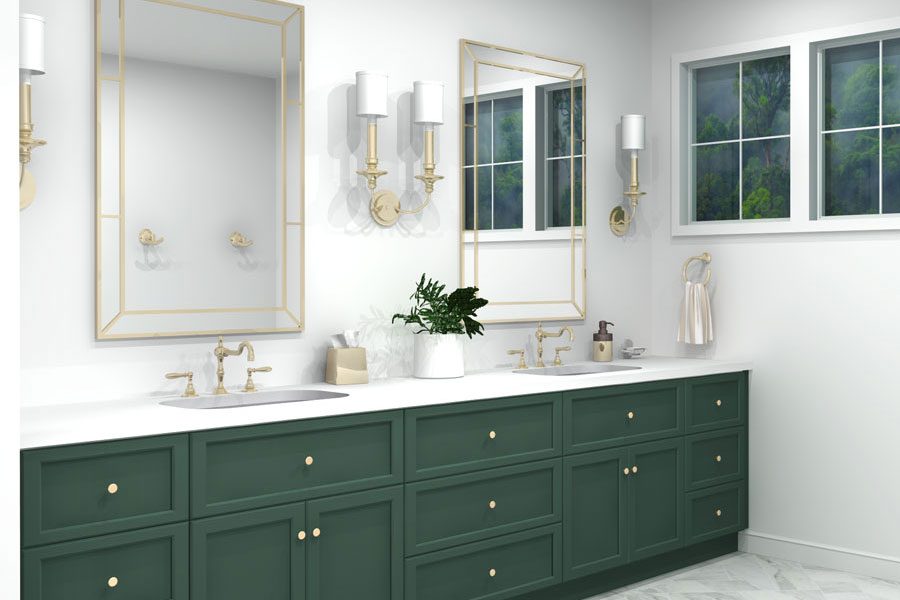
Convert a LILLÅNGEN sink cabinet into a spacious medicine cabinet with a twist. Remove the sink and plumbing fixtures, then mount the cabinet on the wall at eye level. Replace the solid door with a mirrored one to maintain the functionality of a traditional medicine cabinet.
Inside, add extra shelves or small drawer units to maximize storage. Install LED strip lighting around the mirror for better visibility. For a unique touch, add a small digital clock or a Bluetooth speaker in one corner of the cabinet.
This hack provides ample storage for toiletries and medicines while freeing up valuable floor space in smaller bathrooms.
35. IMMELN Shower Caddy Vertical Garden
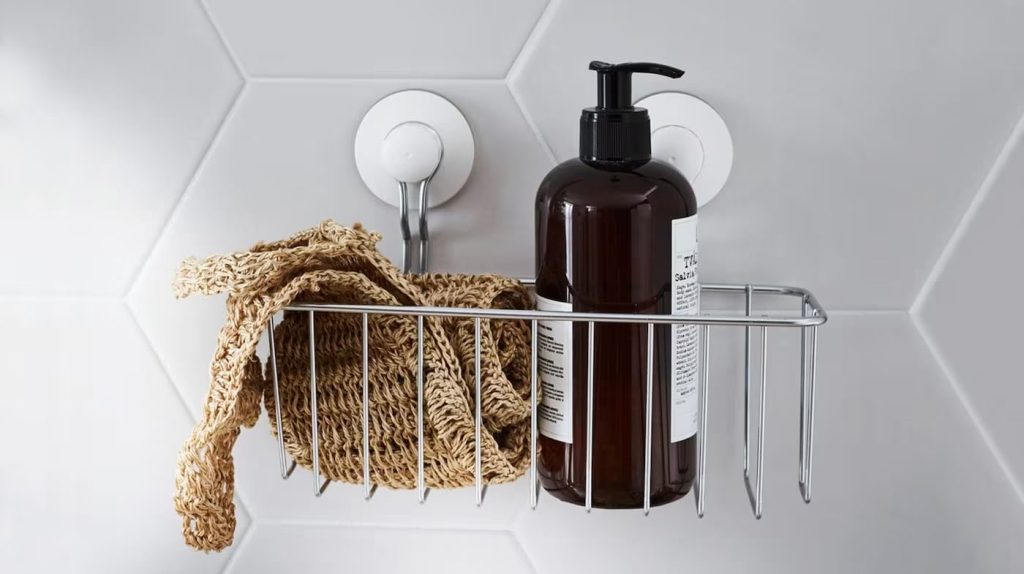
Transform the IMMELN shower caddy into a lush vertical garden for your bathroom. Start by drilling drainage holes in the bottom of each basket. Line them with coconut coir or another moisture-retaining material.
Fill the baskets with potting soil suitable for humid environments and plant moisture-loving plants like ferns, pothos, or air plants. Hang the caddies on your bathroom wall, making sure they’re securely fastened.
This living wall not only adds a spa-like feel to your bathroom but also helps purify the air and regulate humidity. Just be sure to choose plants that thrive in low-light, high-humidity environments.
36. BONDIS Wall Clock Shower Clock
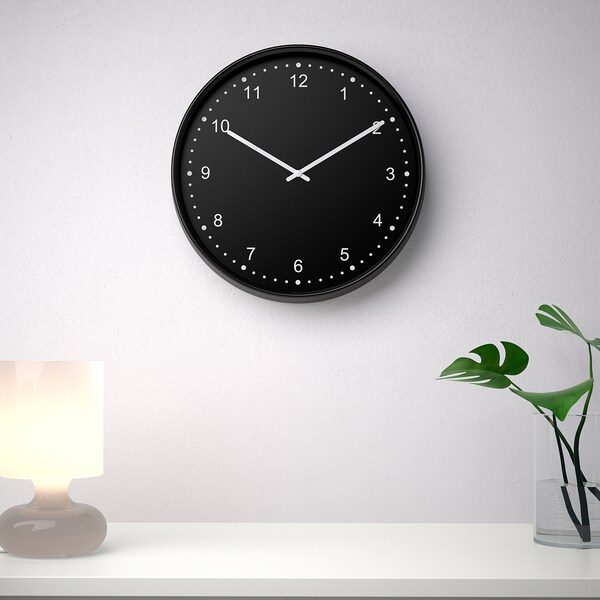
Waterproof the BONDIS wall clock to create a practical shower clock. Disassemble the clock and apply a waterproof sealant to all components, paying special attention to the battery compartment. Reassemble the clock and mount it in your shower area.
For added functionality, attach a small shelf below the clock to hold shower essentials. This can be made from a piece of acrylic or water-resistant wood. Paint or seal the shelf to match your bathroom decor.
This hack allows you to keep track of time while showering, helping you stay on schedule during busy mornings.
37. FRÄCK Mirror Fogless Shower Mirror
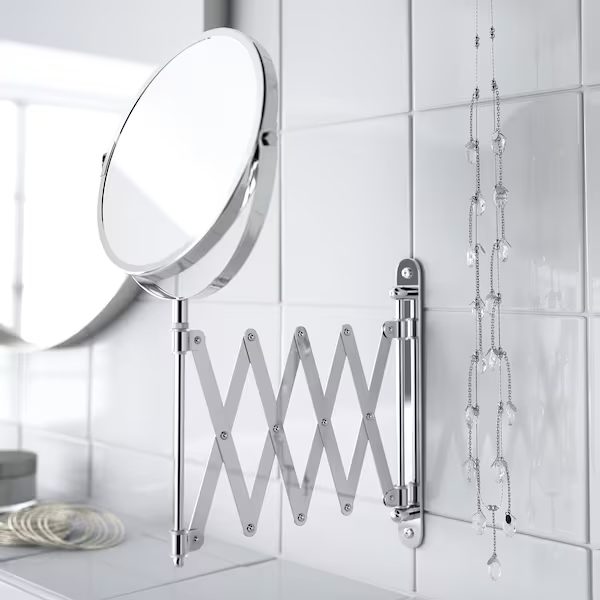
Convert the FRÄCK mirror into a fogless shower mirror. Remove the mirror from its stand and attach it to a plastic container filled with hot water. The hot water behind the mirror will keep it fog-free during your shower.
Create a waterproof seal around the edges of the mirror using silicone caulk. Attach suction cups to the back of the container for easy mounting on shower tiles.
This simple hack provides a clear reflection for shaving or applying face masks in the shower, adding convenience to your bathing routine.
38. VESKEN Shelf Unit Bathroom Storage Tower
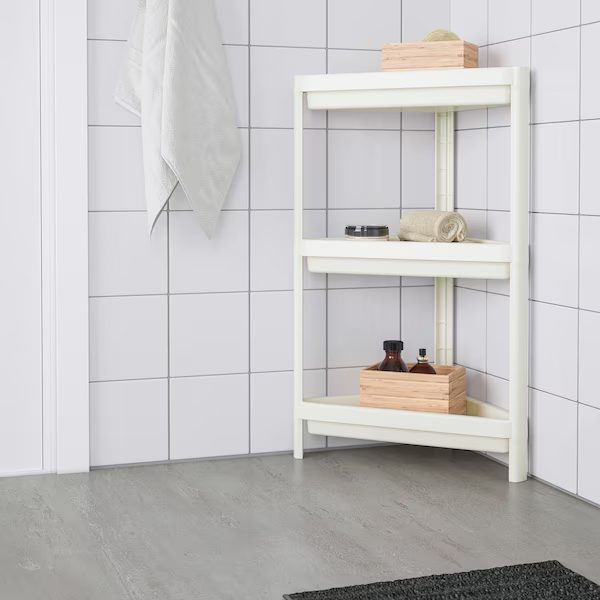
Transform the simple VESKEN shelf unit into a stylish and functional bathroom storage tower. Start by spray painting the unit in a color that complements your bathroom decor. For a more upscale look, consider using metallic paint or adding decorative contact paper to the shelves.
Add casters to the bottom for easy mobility. Create custom drawer fronts using thin plywood or acrylic sheets, and attach them to IKEA KUGGIS boxes that fit within the shelves. This provides hidden storage for personal items.
On the open shelves, use decorative baskets or IKEA DRAGAN boxes to store towels, toilet paper, and other bathroom essentials. Add hooks to the sides of the unit for hanging robes or towels. This hack maximizes vertical storage in small bathrooms while adding a decorative touch.
39. SKOGHALL Bath Mat Shower Mat
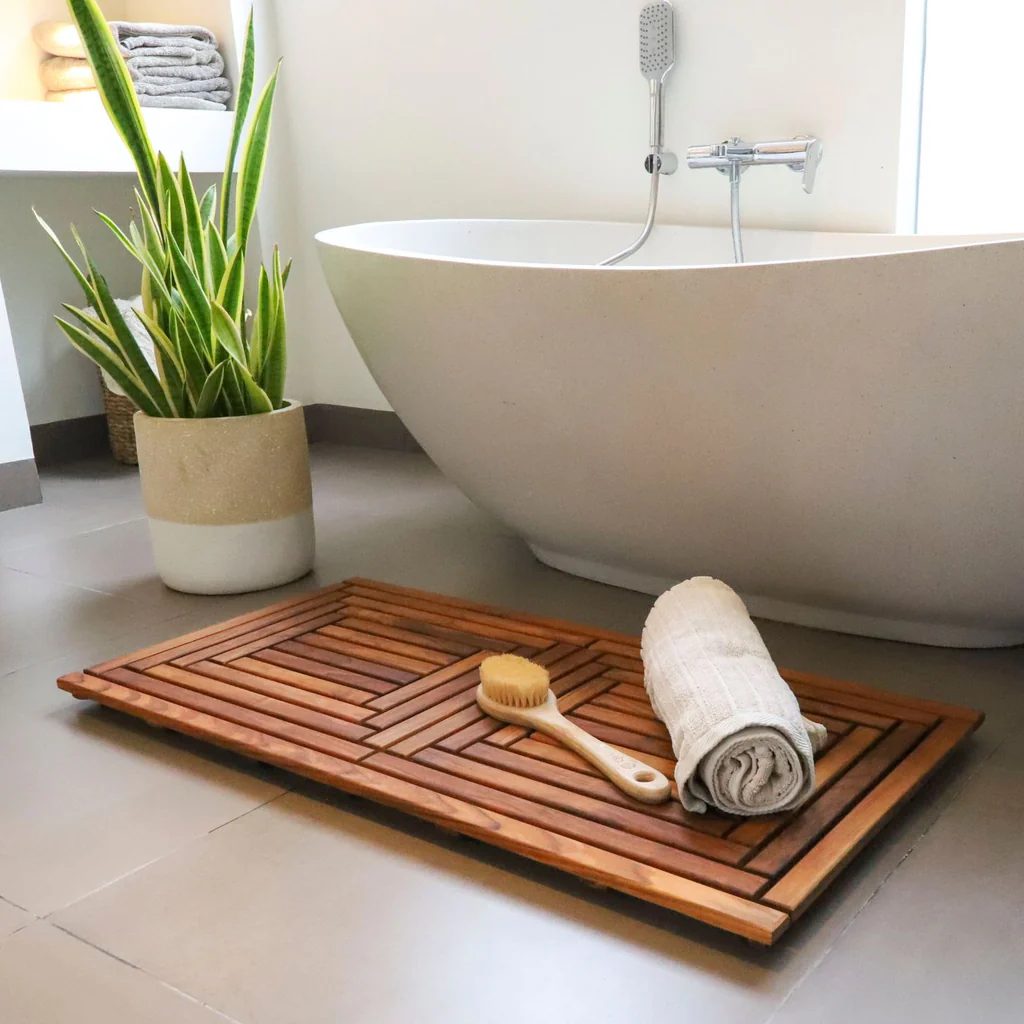
Repurpose the SKOGHALL bath mat into a non-slip shower mat. Start by thoroughly cleaning the mat and allowing it to dry completely. Apply several coats of clear, waterproof sealant to protect it from constant moisture.
Cut the mat to fit your shower floor, if necessary. For added grip, apply strips of silicone caulk to the bottom of the mat in a grid pattern. This will prevent the mat from sliding on wet tiles.
This hack provides a comfortable and safe surface to stand on while showering, and the wooden slats allow for proper water drainage.
40. FINTORP Paper Roll Holder Hairdryer Stand
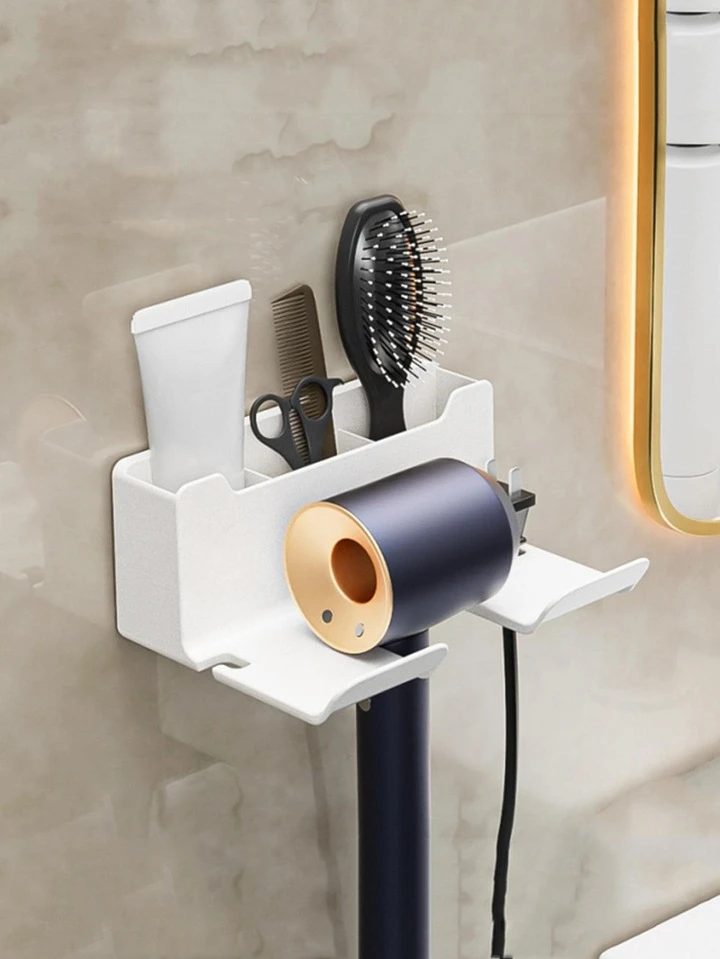
Convert a FINTORP paper roll holder into a convenient hairdryer stand. Mount the holder on the inside of a cabinet door or on the wall near an electrical outlet. The circular design perfectly cradles most hairdryer nozzles.
Add a small shelf or container below the holder to store styling products and brushes. This can be made from a piece of wood or acrylic, painted to match your bathroom decor.
This hack keeps your hairdryer easily accessible while freeing up valuable counter or drawer space.
Home Office Hacks
41. KALLAX Desk Combo
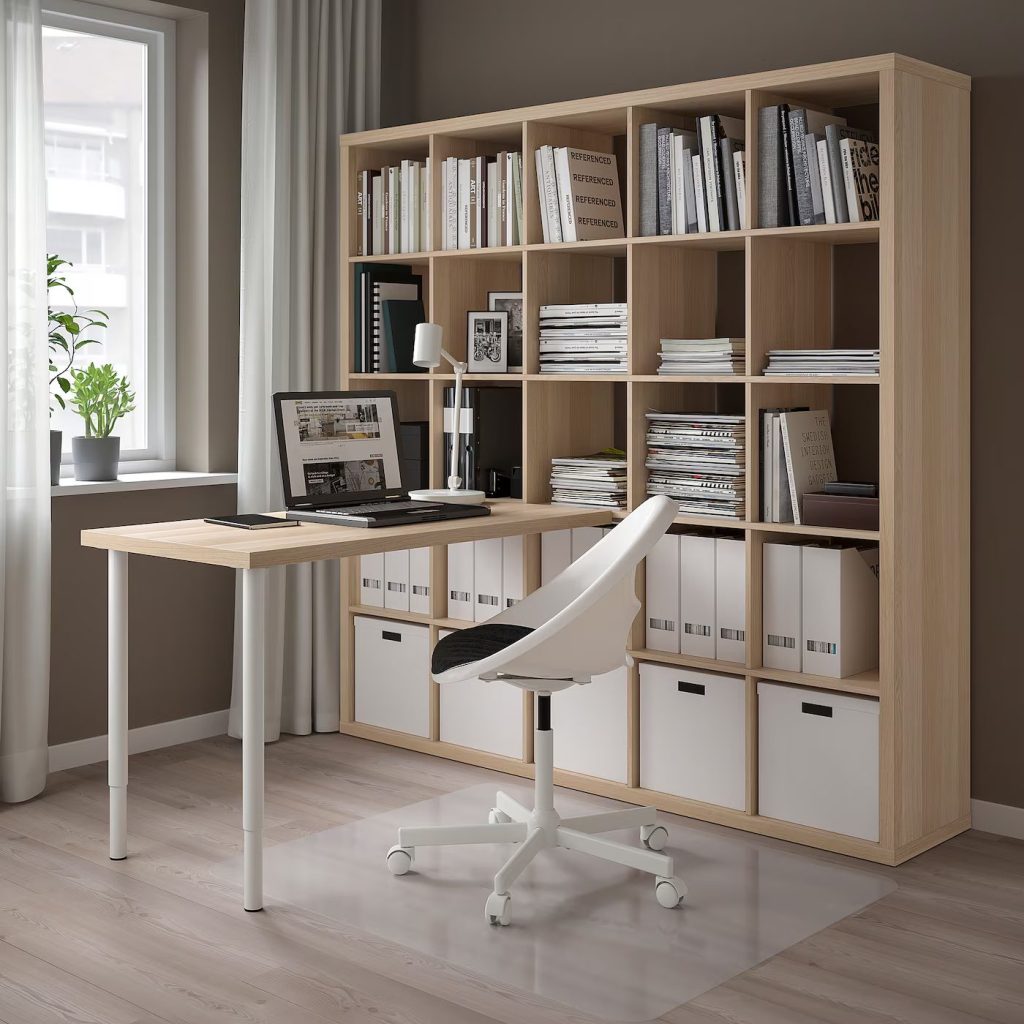
Create a spacious and organized home office setup using the KALLAX shelf unit. Place the unit on its side to serve as the base of your desk. Add legs to the exposed side for stability and height adjustment.
Top the unit with a custom-cut piece of wood or laminate to create a large desktop surface. This overhang can accommodate chairs on both sides, perfect for collaborative work or homeschooling setups.
Utilize the KALLAX cubes for storage, adding a mix of drawers, doors, and open shelving to suit your needs. Install LED strip lighting underneath the desktop overhang for a modern look and improved task lighting.
42. MICKE Desk Privacy Screen
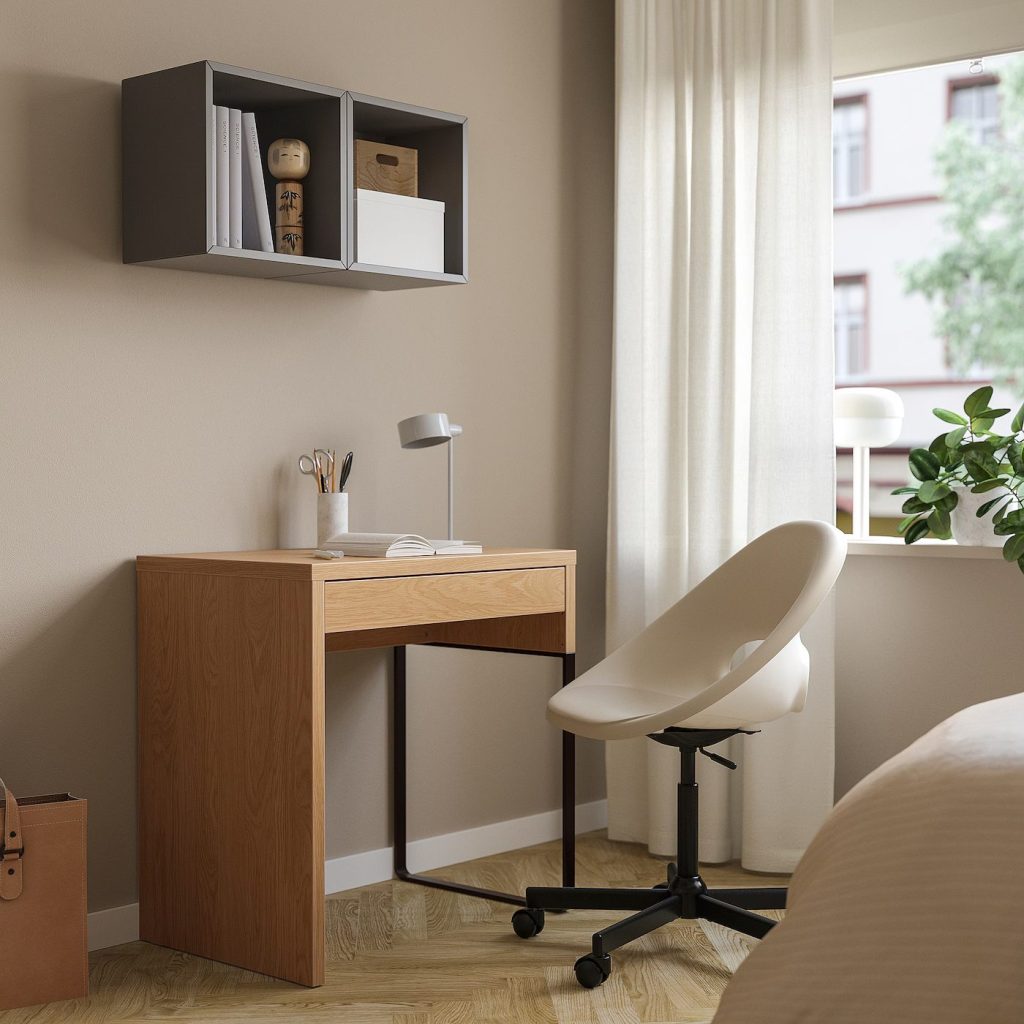
Transform the MICKE desk into a focused work area by adding a privacy screen. Start by measuring the width of your desk and cutting a piece of plywood or MDF to this size, with a height of about 18-24 inches.
Cover the board with fabric, using a staple gun to secure it at the back. For added functionality, cover one side with corkboard or magnetic paint before applying the fabric. This allows you to pin notes or attach magnetic organizers.
Attach the screen to the back of the desk using L-brackets or by creating a slot in the desktop for the screen to slide into. This hack not only provides privacy in shared workspaces but also helps reduce visual distractions.
43. ALEX Drawer Unit Standing Desk
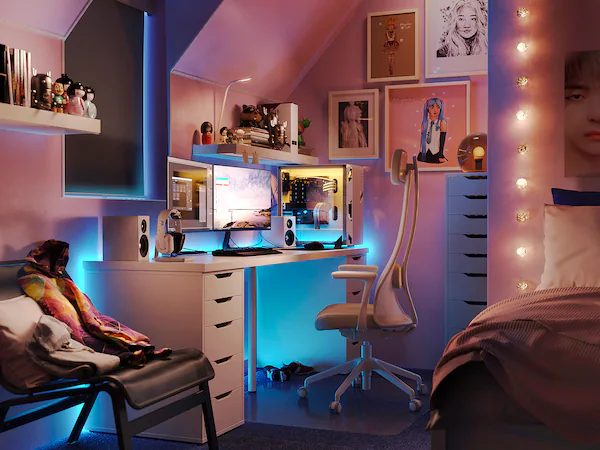
Convert an ALEX drawer unit into a component of a DIY standing desk. Start by adding casters to the bottom of the unit for mobility. Replace the top of the unit with a custom-cut piece of wood or laminate that extends beyond the drawer unit on all sides.
Create legs for the extended portion of the desktop using adjustable table legs or gas pistons. This allows you to adjust the height of your desk from sitting to standing positions.
Install a keyboard tray under the desktop for ergonomic typing. Add cable management solutions like adhesive cable clips or a wire basket under the desk to keep your workspace tidy.
44. LACK Wall Shelf Unit Floating Desk
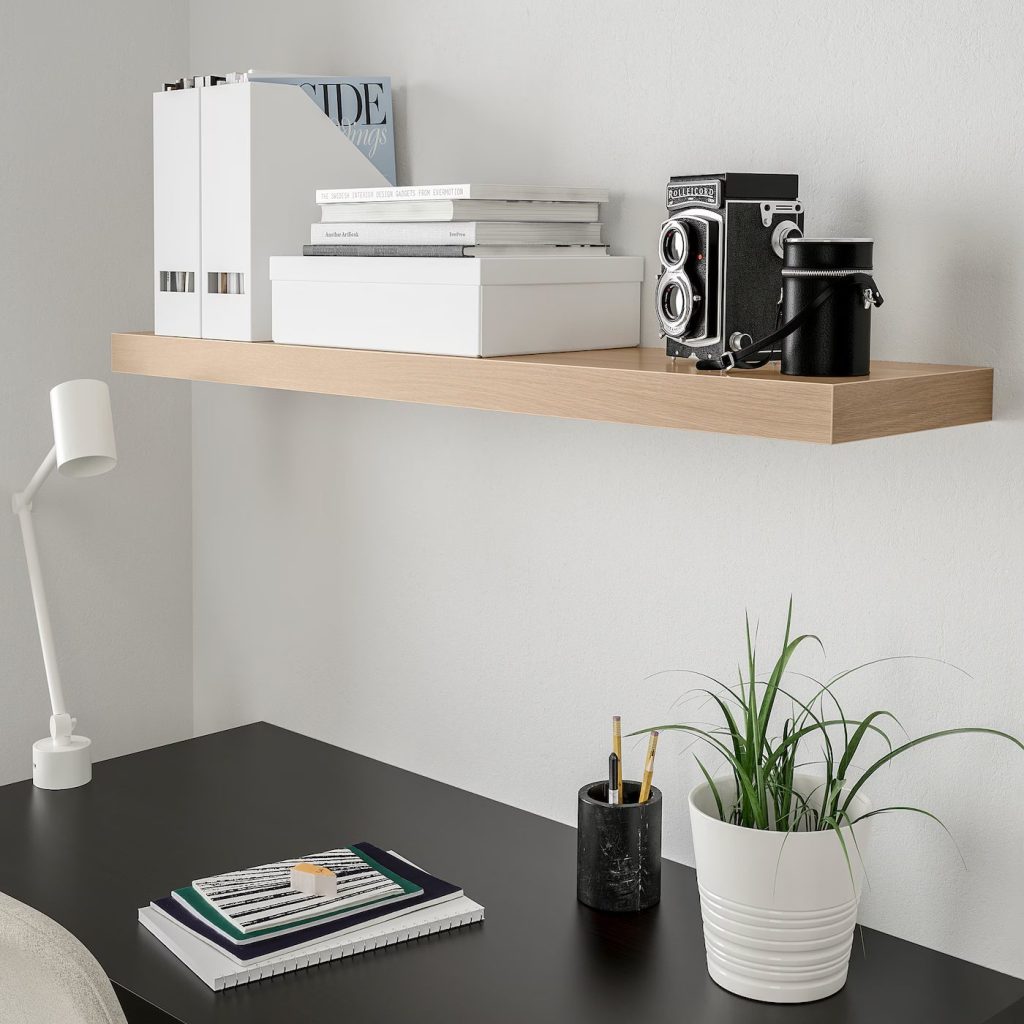
Transform a set of LACK wall shelf units into a sleek floating desk. Mount two or three LACK shelves vertically on the wall, spaced appropriately to create a desk surface and storage compartments.
Add a custom-cut desktop that spans across the LACK units, creating an integrated look. Secure the desktop to the LACK units using L-brackets for stability.
Install LED strip lighting underneath the upper shelves for task lighting. Use cable grommets and adhesive cable clips to manage wires and keep your floating desk looking clean and organized.
45. SKÅDIS Pegboard Cable Management
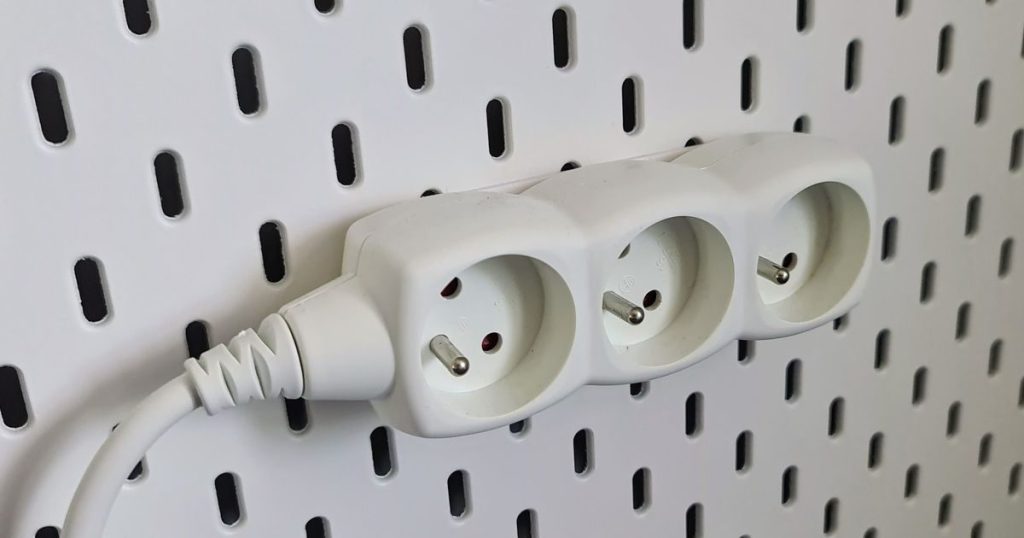
Utilize the SKÅDIS pegboard system to create a comprehensive cable management solution for your home office. Mount the pegboard on the wall behind your desk or on the side of your desk if it’s freestanding.
Use a combination of SKÅDIS accessories like hooks, clips, and containers to organize various cables, chargers, and small electronics. Label each section for easy identification.
Add small plants or decorative items to the pegboard to soften the utilitarian look. This hack not only keeps your cables tidy but also adds a decorative element to your workspace.
46. BESTA File Cabinet Makeover
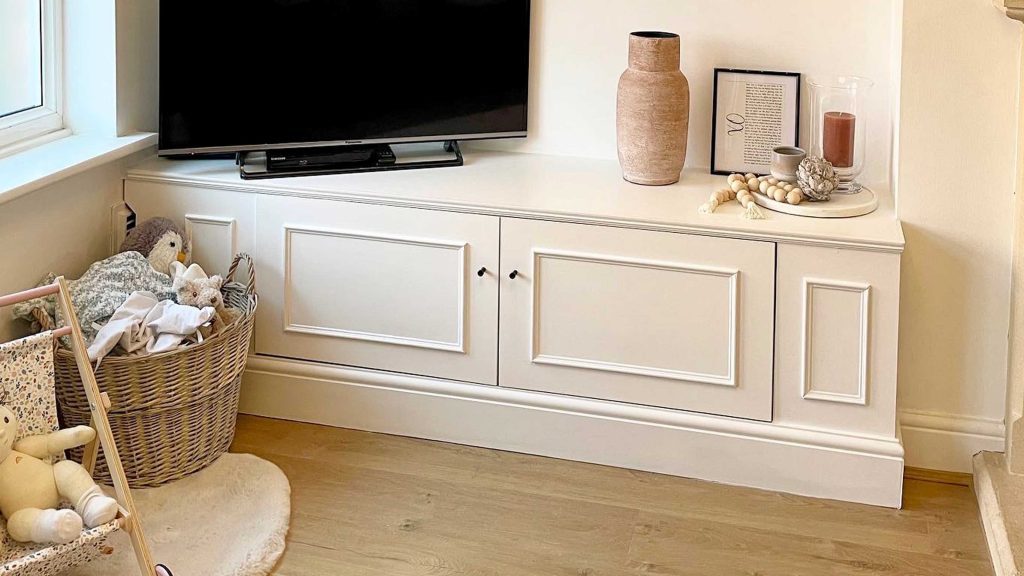
Transform a BESTA cabinet into a stylish and functional file cabinet. Start by adding casters to the bottom for mobility. Replace the standard doors with custom-made fronts featuring textures like cane webbing or fluted wood for a high-end look.
Inside, install hanging file frames to accommodate standard or legal-size files. On top, create a filing station by adding a custom wooden top with built-in sorters or trays.
For a finishing touch, replace the standard handles with modern pulls in a finish that complements your office decor. This hack provides ample file storage while looking like a piece of designer furniture.
47. IVAR Folding Desk
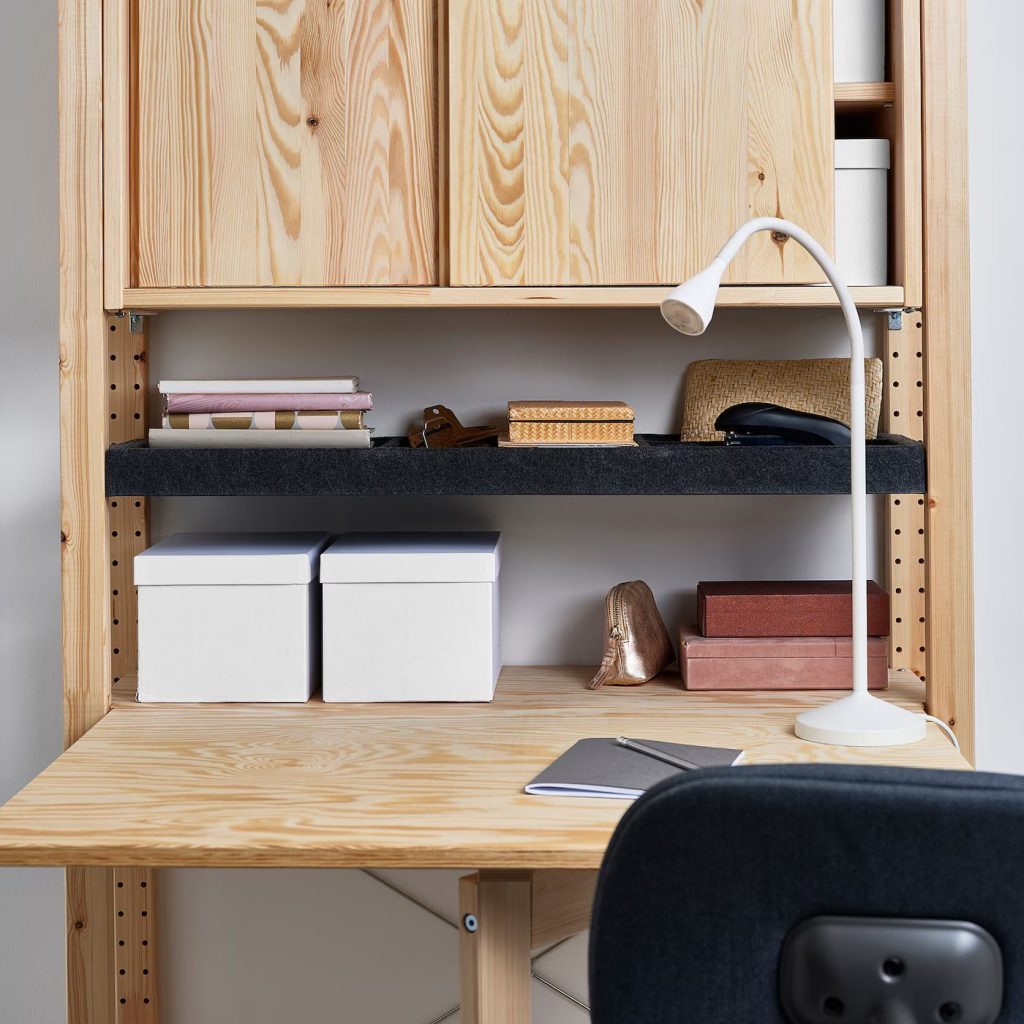
Create a space-saving folding desk using the IVAR side unit. Remove the standard shelves and replace them with a single shelf at desk height. Attach a larger piece of wood to this shelf using hinges, creating a fold-down desktop.
Add folding brackets underneath the desktop for support when it’s in use. When folded up, the desk takes up minimal space. Paint or stain the entire unit to match your decor.
Install a pegboard or magnetic board on the inside of the folded desktop to create a vertical organizer when the desk is not in use. This hack is perfect for small spaces or multi-purpose rooms.
Pro Tip: Upcycle IVAR shelves into a hanging herb garden with integrated grow lights for indoor gardening.
48. TERTIAL Lamp Microphone Stand

Repurpose the adjustable TERTIAL work lamp into a flexible microphone stand for podcasting or video conferencing. Remove the lamp head and replace it with a microphone clip or shock mount. You may need to use a small adapter to ensure a secure fit.
Paint the arm of the lamp to match your decor or to create a more professional look. The adjustable nature of the TERTIAL allows you to position your microphone perfectly for the best audio quality.
Add a pop filter by attaching a small embroidery hoop with stretched nylon fabric to one of the joints in the lamp arm. This hack creates a professional-quality microphone setup at a fraction of the cost of specialized equipment.
49. KVISSLE Letter Tray Charging Station
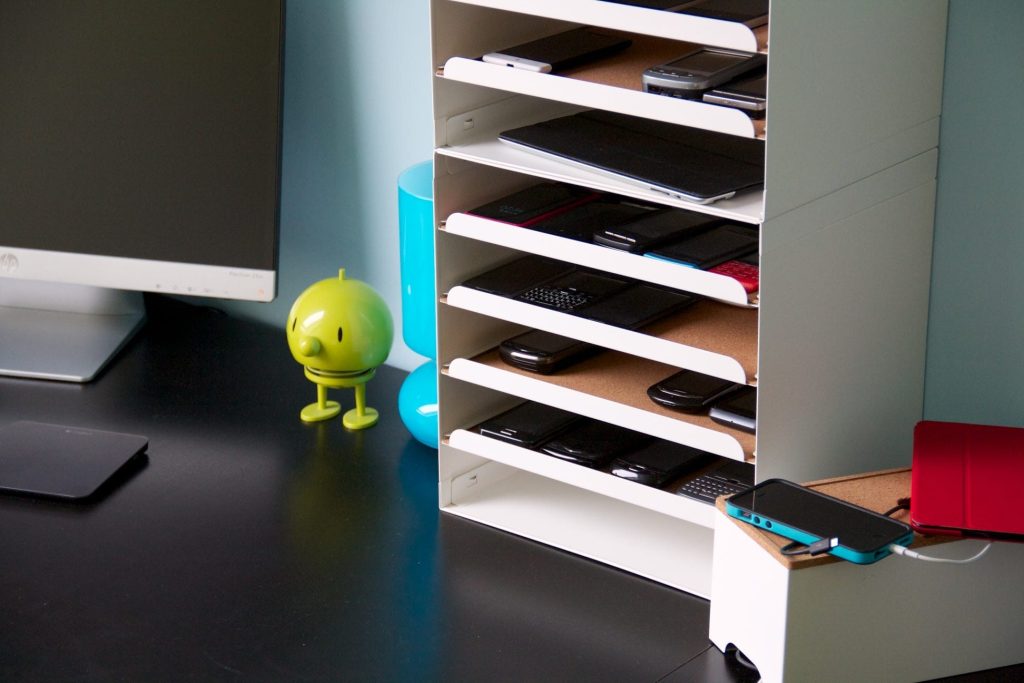
Convert the KVISSLE letter tray into a sleek charging station for your devices. Start by drilling holes in the bottom of each tray for cable management. Thread charging cables through these holes, securing them with cable clips.
Line the trays with felt or cork to protect your devices from scratches. The top tray can hold a wireless charging pad for compatible devices.
Label each tray for different family members or device types. This hack keeps your devices organized and charging in one central location, reducing clutter in your home office.
50. LINNMON Tabletop Whiteboard Desk
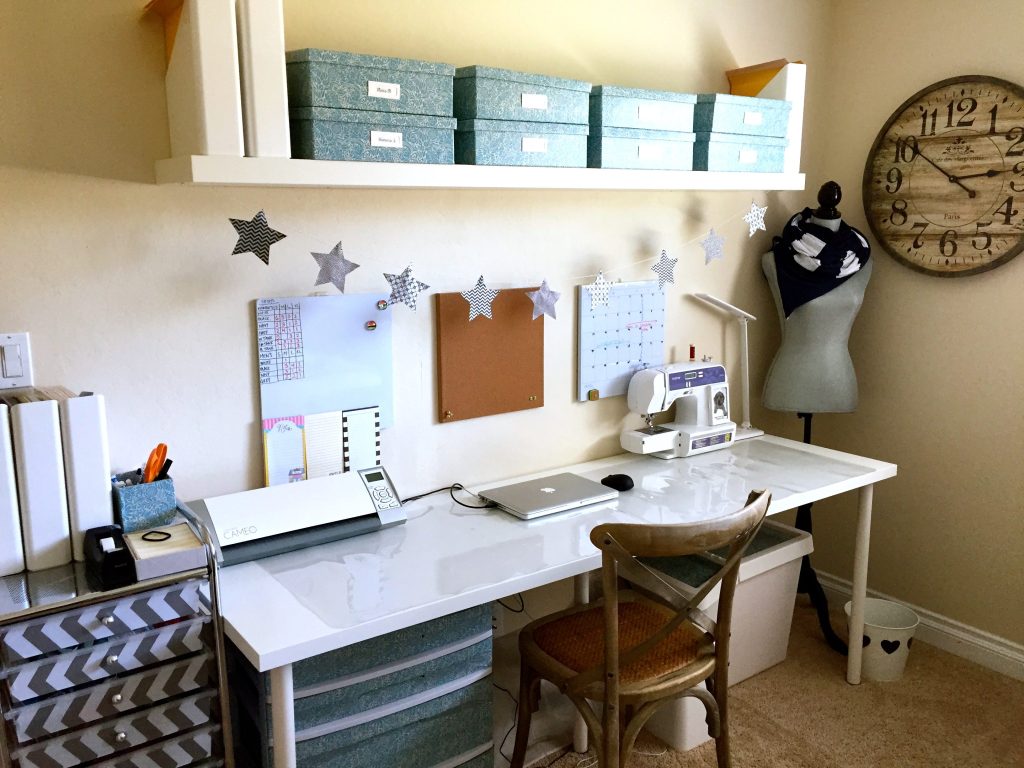
Transform a LINNMON tabletop into a whiteboard desk for brainstorming and note-taking. Start by painting the tabletop with white dry-erase paint, following the manufacturer’s instructions for proper application and curing.
Add a clear glass top over the painted surface to create a smooth writing surface and protect the paint. Secure the glass to the tabletop using clear silicone adhesive.
Attach ADILS legs or other IKEA table legs to complete the desk. This hack creates a large writable surface perfect for visual thinkers and project planning.
Entryway Hacks
51. TRONES Shoe Cabinet Command Center
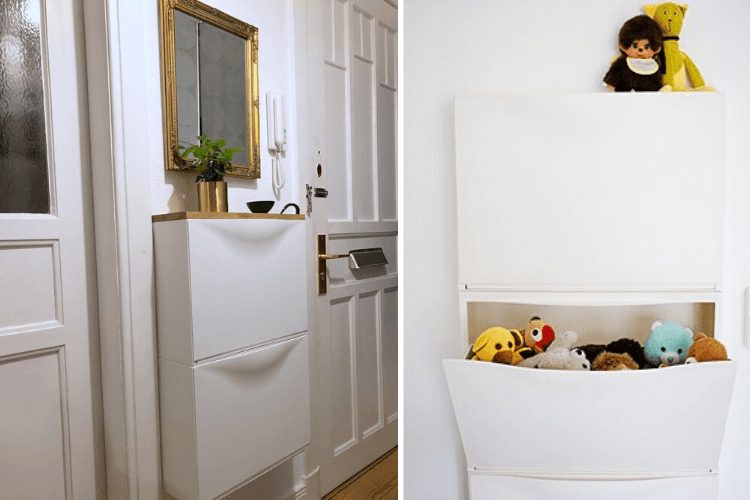
Transform the slim TRONES shoe storage cabinet into a comprehensive entryway command center. Start by mounting the cabinets at a comfortable height for easy access. Paint or apply contact paper to the cabinet fronts to match your decor.
Above the cabinets, install a large corkboard or magnetic board for pinning notes, calendars, and important documents. Add hooks or a small shelf above this for keys and sunglasses.
Attach a mail sorter to the side of the cabinets for incoming and outgoing mail. Use the interior of the cabinets not just for shoes, but also for storing seasonal items like gloves and scarves.
This hack creates a compact, all-in-one organization station perfect for keeping your entryway tidy and functional.
52. LACK Shelf Unit Bench
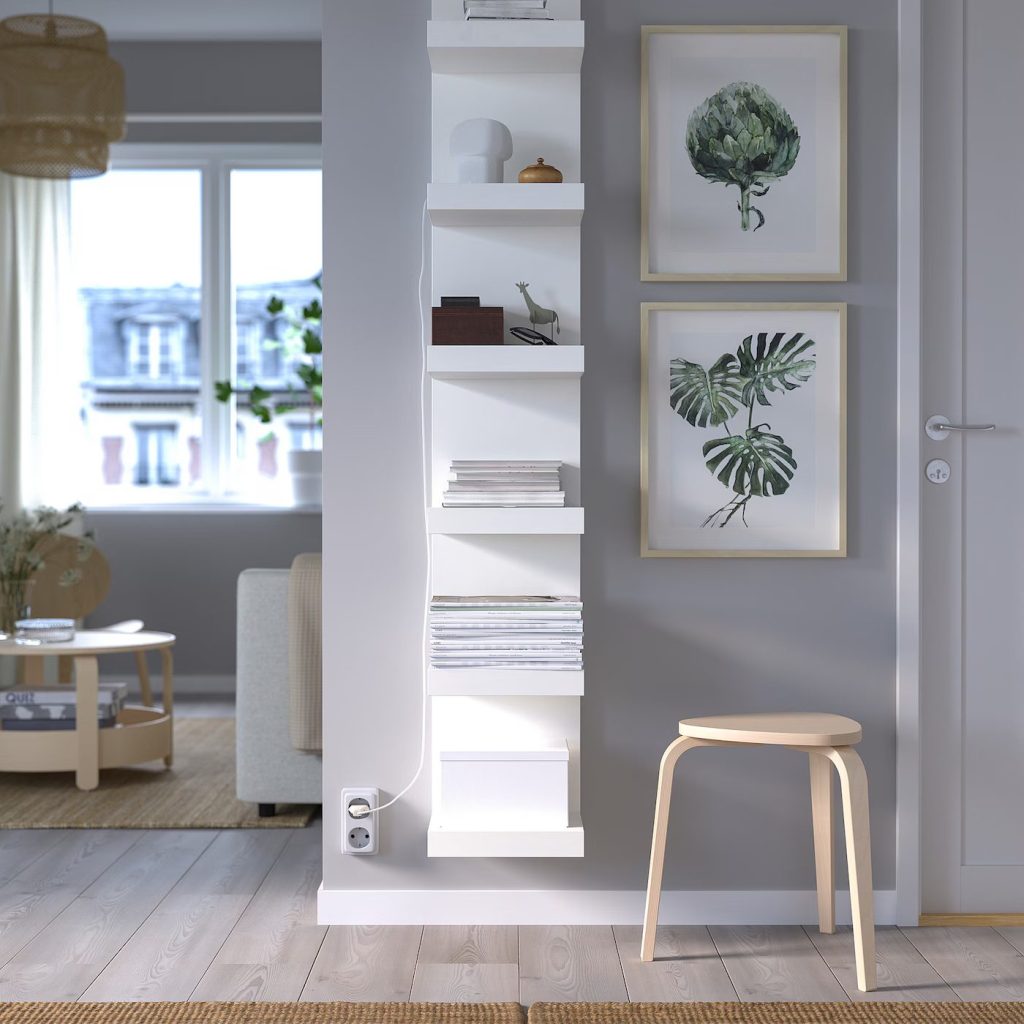
Convert a LACK shelf unit into a stylish entryway bench with storage. Start by laying the unit on its side and adding sturdy legs or casters for mobility. Reinforce the structure with L-brackets if necessary.
Create a comfortable seating area by adding a custom-cut piece of foam to the top, covered with a durable fabric. Secure the fabric using a staple gun, ensuring a smooth, taut surface.
Use the cubbies for storage baskets to hold shoes, bags, or seasonal items. Add hooks to one side of the unit for hanging coats and bags. This hack provides both seating and storage in a compact footprint, perfect for small entryways.
53. BJÄRNUM Folding Hook Coat Rack

Create a sleek, space-saving coat rack using BJÄRNUM folding hooks. Mount a long, narrow piece of wood or a metal bar horizontally on your entryway wall. Attach multiple BJÄRNUM hooks along the length of this base.
Paint the wood or metal to match your decor, and consider staining or painting the aluminum hooks for a cohesive look. When not in use, the hooks fold flat against the wall, maintaining a streamlined appearance.
Add a small shelf above the coat rack for additional storage or decorative items. This hack provides ample hanging space without permanently protruding into your entryway.
54. KALLAX Entryway Divider

Use a KALLAX shelf unit as a room divider to create a defined entryway in an open floor plan. Place the unit perpendicular to your entrance wall, using it to separate the entryway from the living area.
On the entryway side, use a mix of KALLAX inserts like drawers and door inserts for hidden storage. On the living room side, leave some cubbies open for displaying decorative items.
Add a custom-cut top to the KALLAX unit to create a console table surface. Install hooks or a floating shelf on the wall above for additional storage and decor. This hack not only provides storage but also helps to define your home’s entrance.
55. SKUBB Organizer Wall Pockets
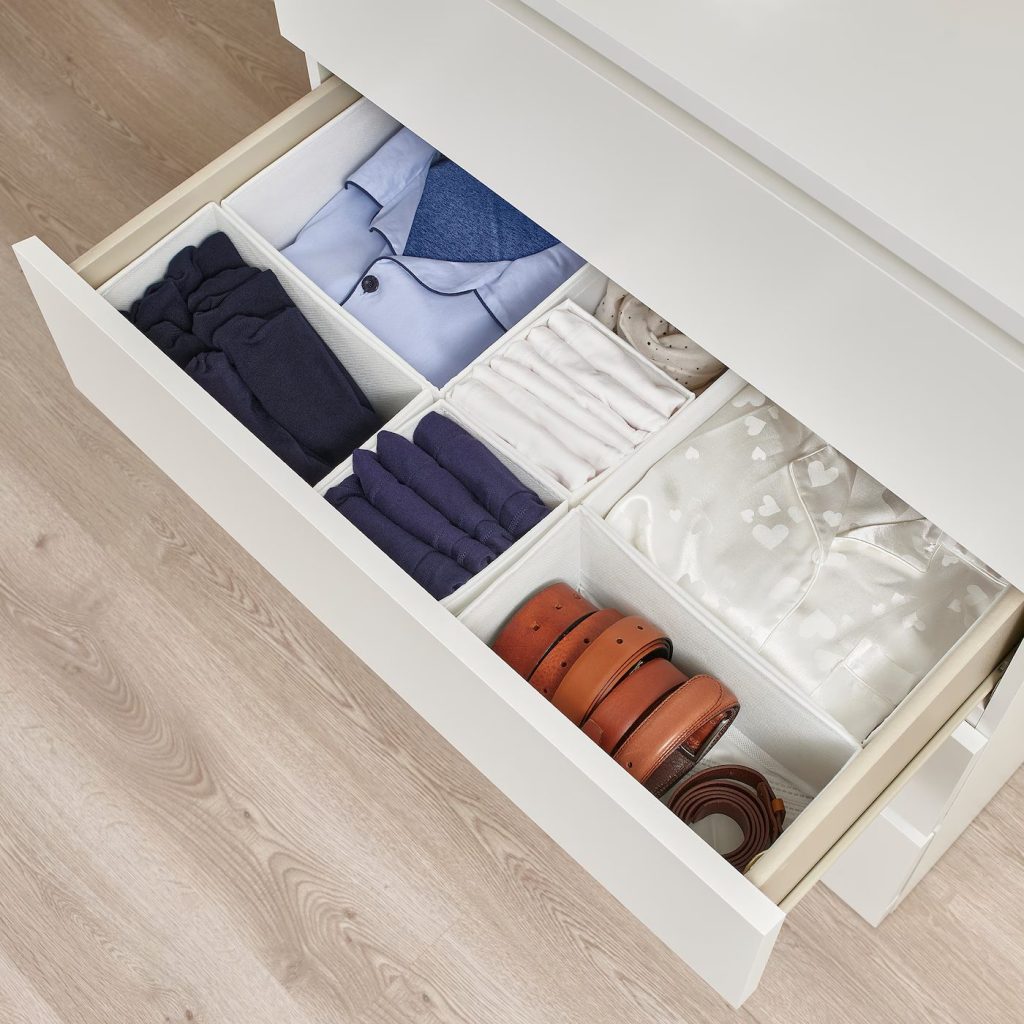
Repurpose SKUBB organizers into wall-mounted storage pockets for your entryway. Cut the organizer into individual pockets and reinforce the edges with bias tape for durability.
Mount these pockets on your entryway wall using a sturdy backing board or directly onto the wall with heavy-duty adhesive strips. Label each pocket for different family members or types of items (e.g., gloves, scarves, dog leash).
Add a coat of fabric paint or appliqués to customize the pockets and match your decor. This hack provides easy-to-access storage for small items that often clutter entryways.
56. HEMNES Shoe Cabinet Radiator Cover

Transform the HEMNES shoe cabinet into a dual-purpose radiator cover and entryway storage. If your radiator is low enough, place the HEMNES cabinet over it, ensuring proper clearance for heat circulation.
Modify the back of the cabinet by cutting out sections and replacing them with radiator grilles to allow heat to pass through. Paint the cabinet and grilles to match your decor.
Use the top of the cabinet as a console table, and the shoe compartments for their intended purpose or to store other entryway essentials. This hack cleverly conceals an unattractive radiator while adding functional storage to your entryway.
57. KUPOL Drawer Keyless Entry System
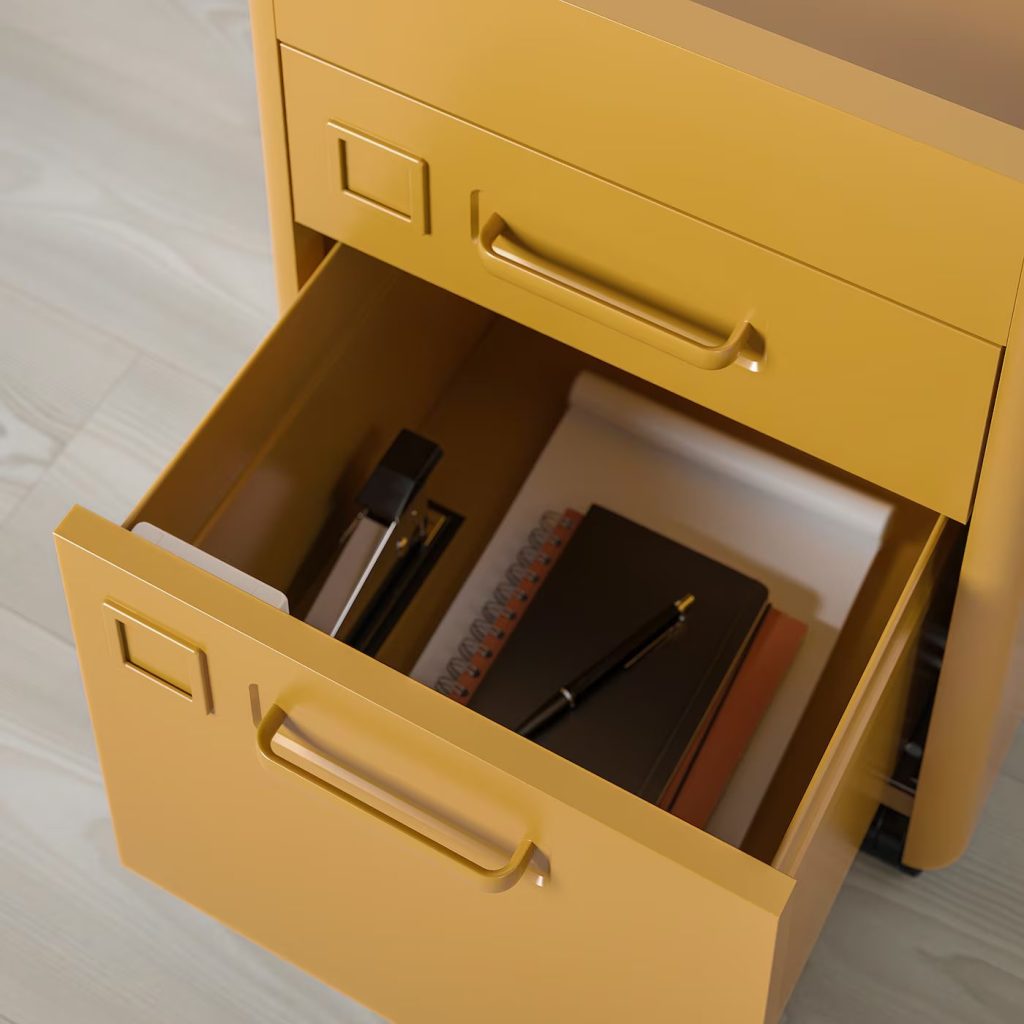
Repurpose a KUPOL drawer unit into a smart keyless entry system for your home. Remove the drawer front and install a small electronic keypad lock in its place. The interior of the drawer can house the lock’s mechanism and batteries.
Mount the unit next to your front door at a comfortable height. Use the remaining space inside the drawer to store spare keys or other small items.
Paint or wrap the exterior of the drawer unit to match your home’s exterior. This hack provides a secure, weather-resistant solution for keyless entry, perfect for rental properties or for eliminating the need to carry keys.
58. FINTORP Rail System Entryway Organizer
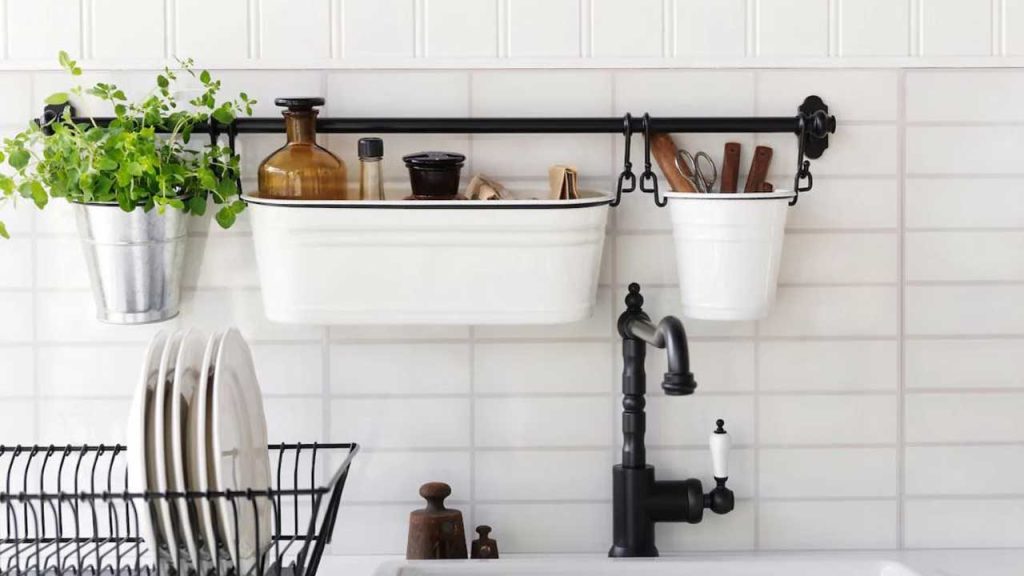
Install a FINTORP rail system in your entryway to create a customizable organization station. Mount multiple rails horizontally on your wall, using FINTORP accessories like hooks, containers, and small shelves to organize your entryway essentials.
Add a FINTORP magnetic knife rack to hold keys and metal accessories. Use FINTORP wire baskets to store mail or small items like gloves and scarves.
Paint the rails and accessories to match your decor for a cohesive look. This hack creates a flexible storage solution that can be easily adjusted as your needs change.
59. RÅSKOG Utility Cart Entryway Station
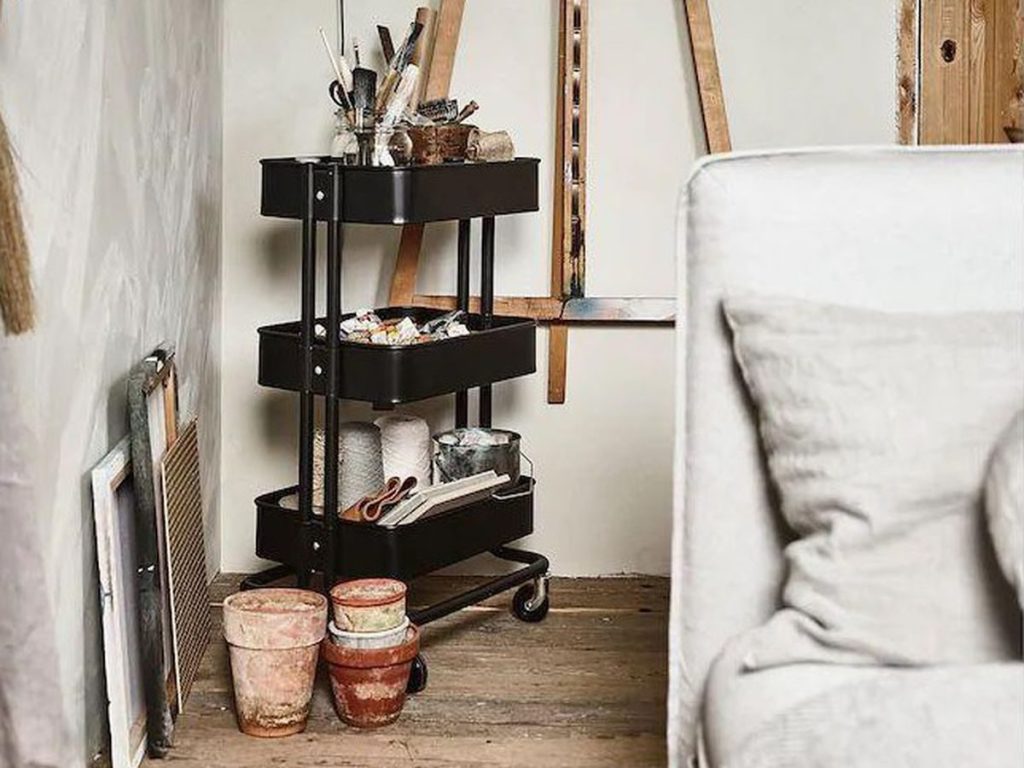
Transform the RÅSKOG utility cart into a mobile entryway station. Paint the cart to match your decor or leave it in its original finish for an industrial look.
Use the top tier for a tray to hold keys, sunglasses, and other small items you grab on your way out. The middle tier can hold baskets for gloves, scarves, or pet supplies. The bottom tier is perfect for shoes or larger bags.
Add hooks to the sides of the cart for hanging umbrellas or reusable shopping bags. This hack creates a compact, mobile solution for entryway storage, perfect for small spaces or renters who can’t mount permanent fixtures.
60. MOSSLANDA Picture Ledge Key and Mail Organizer
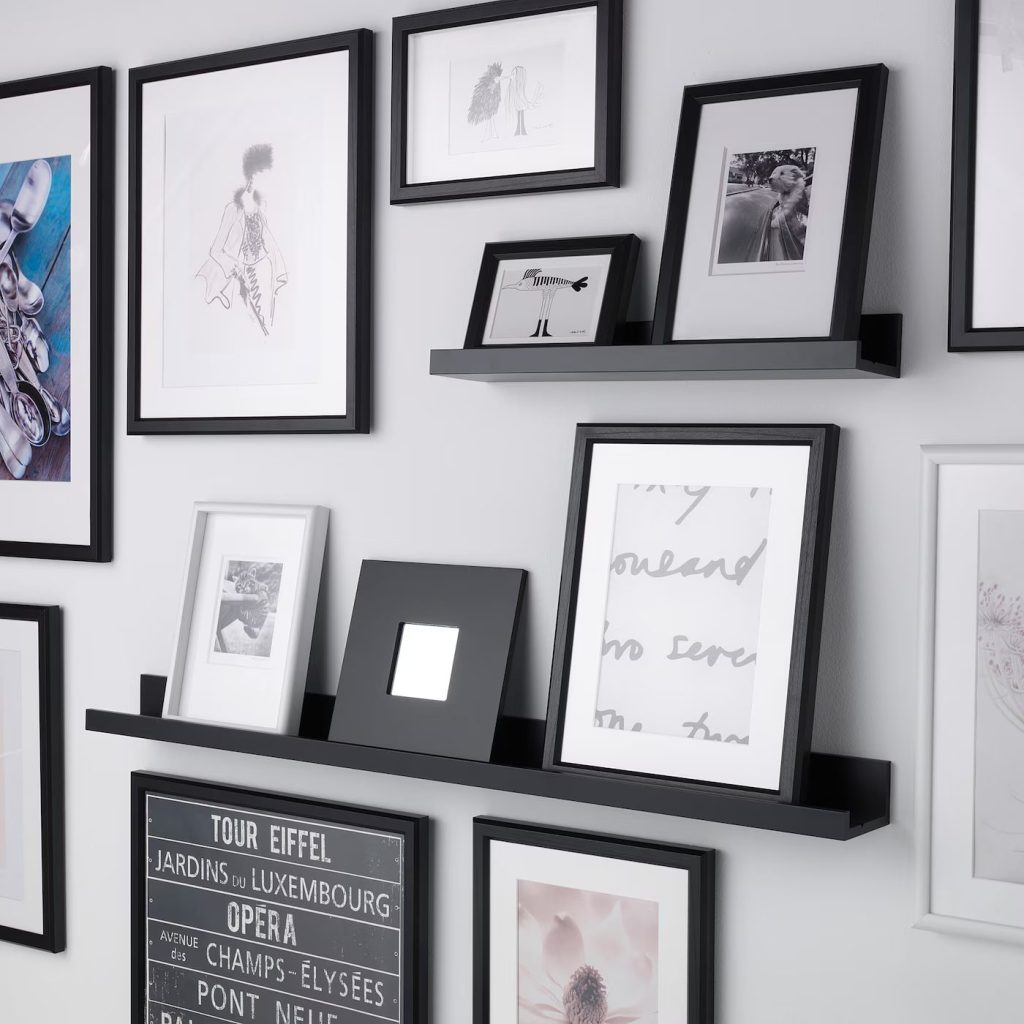
Repurpose the MOSSLANDA picture ledge into a sleek key and mail organizer for your entryway. Mount the ledge horizontally on your wall at eye level. Paint it to match your decor if desired.
Install small hooks along the bottom edge of the ledge for hanging keys. The ledge itself can hold mail, with the lip keeping envelopes from sliding off.
Add a small container or IKEA BOTTNA mini shelf insert on one end of the ledge to hold pens and note paper. This hack creates a simple, streamlined organization solution that keeps your entryway essentials easily accessible.
Dining Room Hacks
61. IVAR Cabinet Buffet
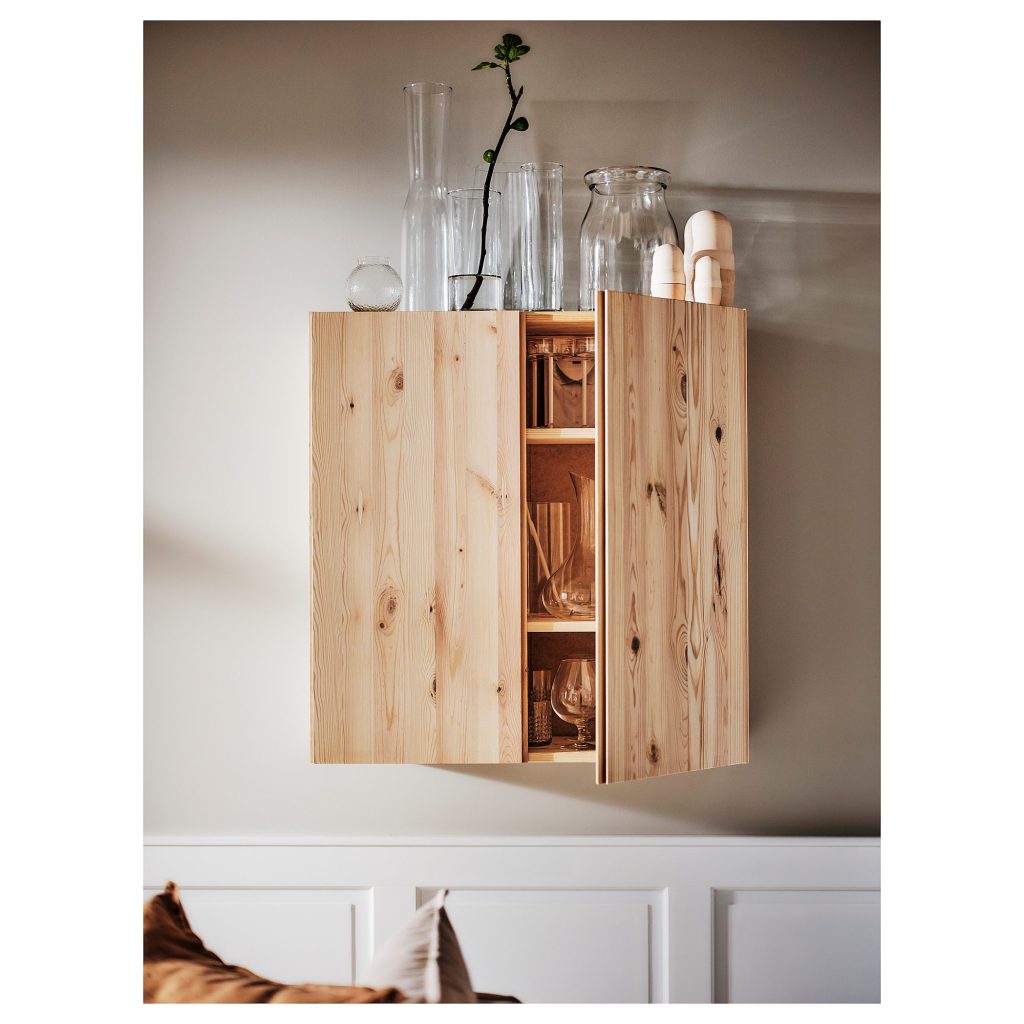
Transform the simple IVAR cabinet into an elegant dining room buffet. Start by assembling the cabinets in a configuration that fits your space. Add legs or a plinth base for a more finished look.
Replace the standard pine doors with custom-made fronts featuring intricate patterns or textured materials like rattan or fluted glass. Paint or stain the entire unit in a color that complements your dining room decor.
Install interior lighting and glass shelves to display fine china or glassware. Add a custom top made from marble, quartz, or butcher block for a luxurious finishing touch. This hack creates a high-end storage piece perfect for dining room essentials.
62. LACK Coffee Table Bench Seating
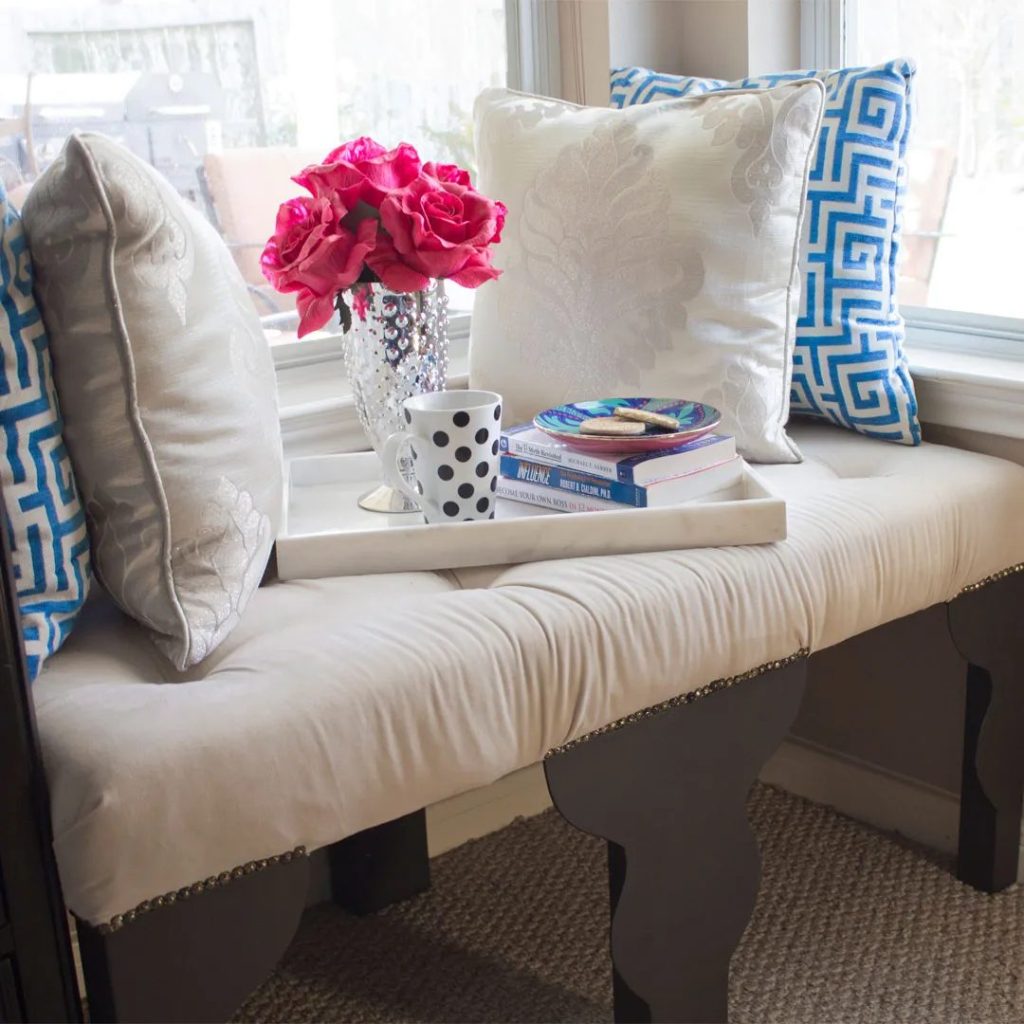
Repurpose LACK coffee tables into stylish bench seating for your dining area. Place two or more LACK tables side by side, ensuring they’re securely fastened together. Add legs to raise the height to standard bench seating level.
Create a comfortable seat by adding high-density foam cut to size, then cover with durable upholstery fabric. Secure the fabric using a staple gun, creating neat corners and edges.
For added storage, create hinged tops by cutting the existing tabletop and reattaching it with hinges. This allows the benches to double as storage units. This hack provides flexible, space-saving seating perfect for small dining areas or for accommodating extra guests.
63. KALLAX Room Divider with Built-in Bar

Use a KALLAX shelf unit to create a room divider with a built-in bar, perfect for separating your dining area from the living room. Place the KALLAX unit perpendicular to the wall, using it as a partition.
On the dining room side, remove some of the dividers to create larger openings for storing wine bottles and glassware. Install a fold-down countertop on this side to serve as a bar when entertaining.
On the living room side, use a mix of open cubbies and inserts like doors or drawers to create a visually interesting display. Add casters to the bottom of the unit for easy mobility when rearranging your space.
64. FROSTA Stool Stackable Dining Chairs

Transform FROSTA stools into modern, stackable dining chairs. Start by cutting the circular seat into a more ergonomic shape, rounding the front edge for comfort. Sand all edges smooth.
Create a backrest by cutting a piece of plywood to size, shaping it for comfort, and attaching it to the rear legs using strong brackets. Sand and paint or stain the entire chair to match your dining decor.
For added comfort, add thin cushions to the seat and backrest, securing them with heavy-duty adhesive or by creating removable covers. These chairs can be stacked when not in use, making them perfect for small spaces or for accommodating extra guests.
65. LÄMPLIG Trivet Elevated Serving Tray
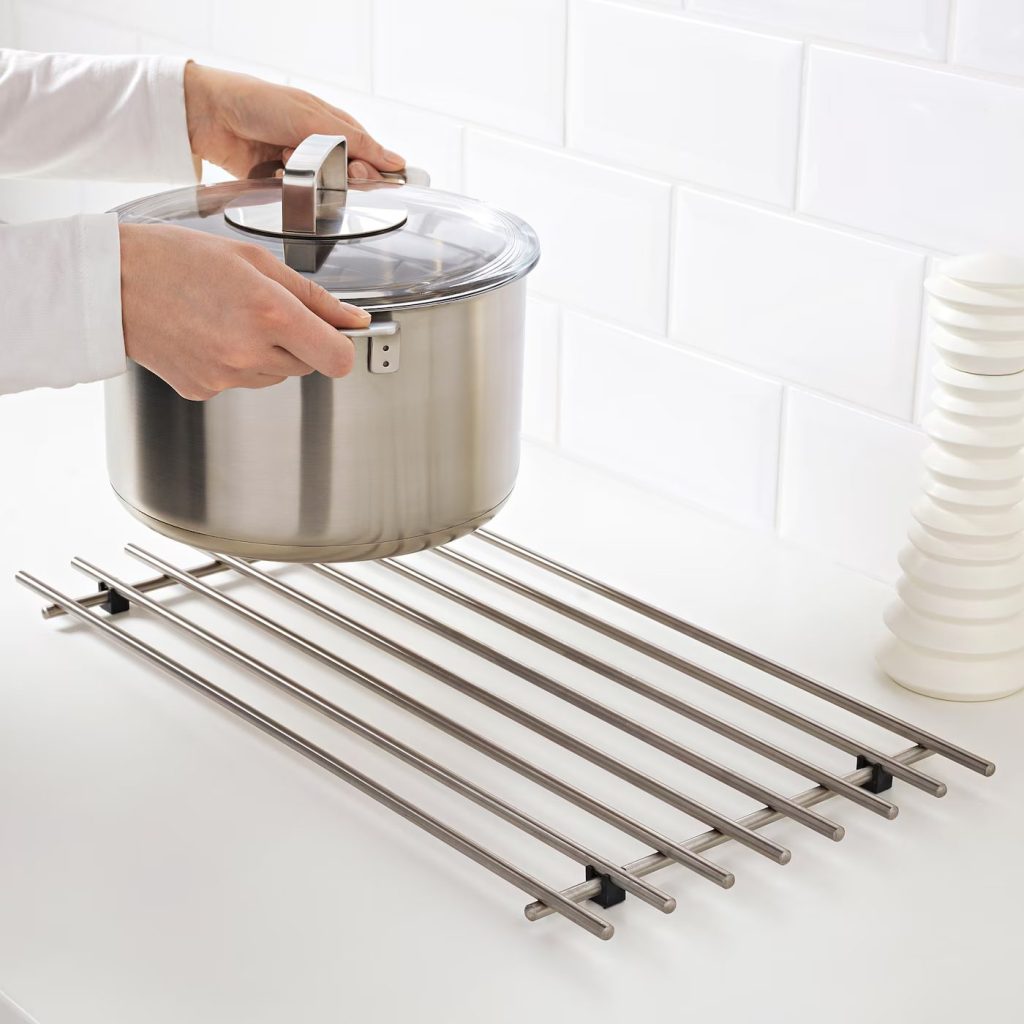
Convert the LÄMPLIG bamboo trivet into an elevated serving tray for your dining table. Start by attaching decorative furniture legs to the corners of the trivet using strong adhesive and screws for reinforcement.
Sand the bamboo surface and apply a food-safe wood sealant for protection. For a more modern look, you could paint the legs and edges of the tray in metallic or bold colors.
Add handles to the sides of the tray for easy carrying. This hack creates a stylish and functional serving piece perfect for presenting appetizers or desserts at your dinner parties.
66. HENRIKSDAL Chair Slipcover Upgrade
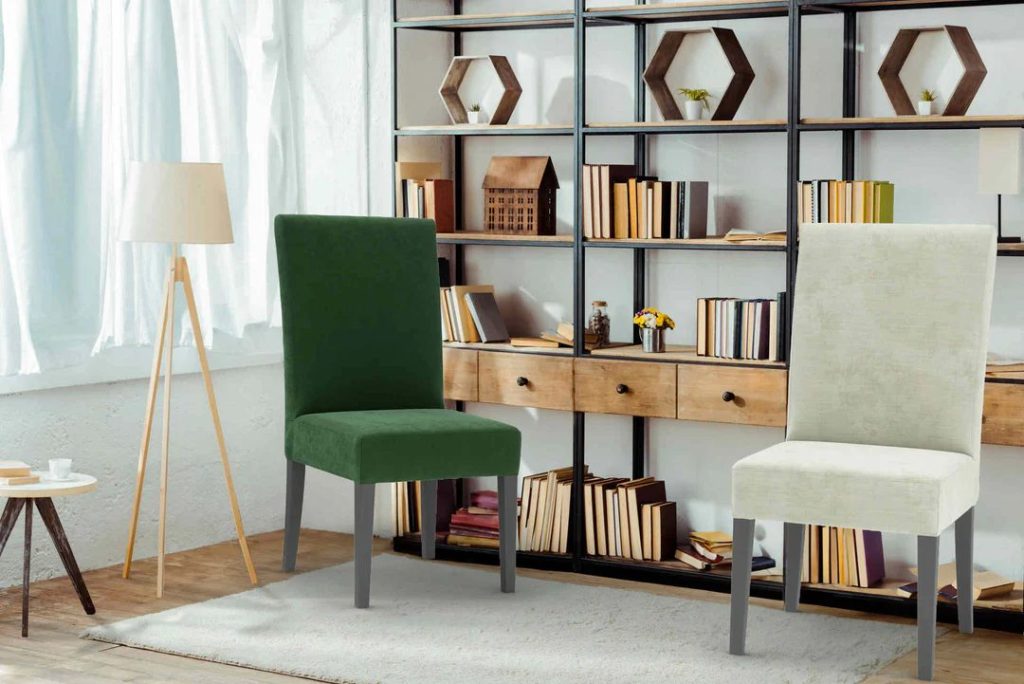
Give your HENRIKSDAL dining chairs a high-end makeover with custom slipcovers. Choose a luxurious fabric like velvet, linen, or a patterned material that complements your dining room decor.
Create a pattern using the existing slipcover, adding details like pleats, piping, or buttons for a more tailored look. Sew the new slipcovers, ensuring a snug fit over the chair frame.
For a cohesive look, create matching table runners or placemats using leftover fabric. This hack allows you to completely transform the look of your dining area without investing in new furniture.
67. NORBERG Wall-mounted Drop-leaf Table Buffet
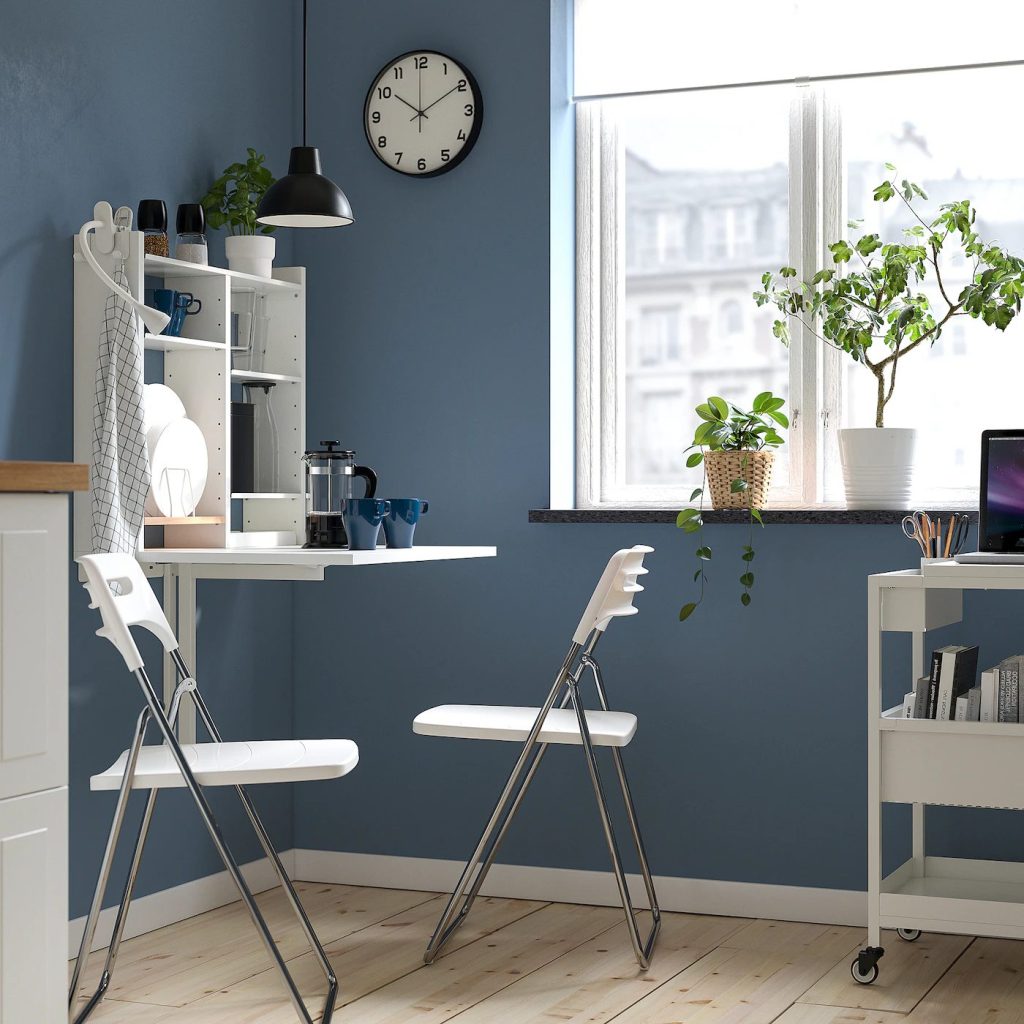
Repurpose the NORBERG wall-mounted drop-leaf table into a space-saving buffet for your dining area. Mount the table at counter height on your dining room wall. When folded down, it serves as a slim console table.
Create storage above and below the table by installing floating shelves or small cabinets. These can hold dining essentials like table linens, serving pieces, or bar accessories.
When hosting dinner parties, fold up the table to create additional serving space for a buffet-style meal. Add hooks underneath to hang serving utensils or small baskets for extra storage.
68. SATSUMAS Plant Stand Drink Cart
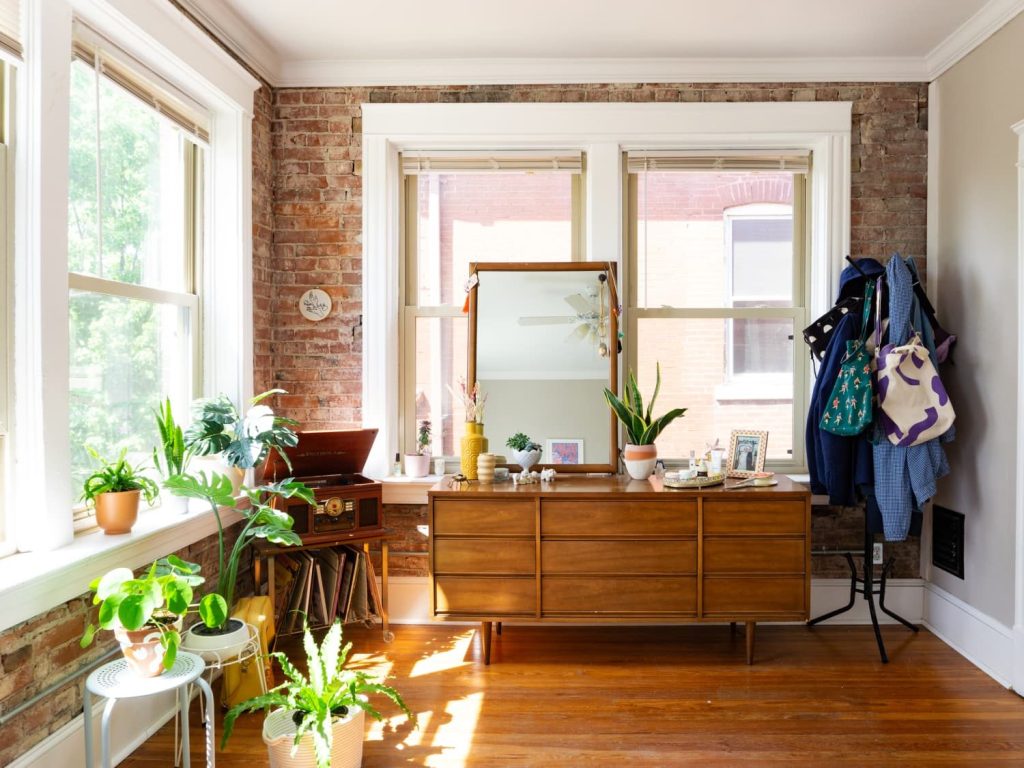
Transform the SATSUMAS plant stand into a chic drink cart for your dining area. Start by adding casters to the bottom for easy mobility. Paint the metal frame in a color that complements your decor, or leave it as is for an industrial look.
Replace the terracotta plant pots with round trays or shallow baskets to hold bottles, glasses, and bar accessories. Add a custom-cut piece of glass or wood to the top tier to create a smooth mixing surface.
Install a towel bar or hooks on one side for hanging bar towels or cocktail recipe cards. This hack creates a versatile bar cart that can be easily moved from the dining room to the patio for outdoor entertaining.
69. MOSSLANDA Picture Ledge Plate Rack
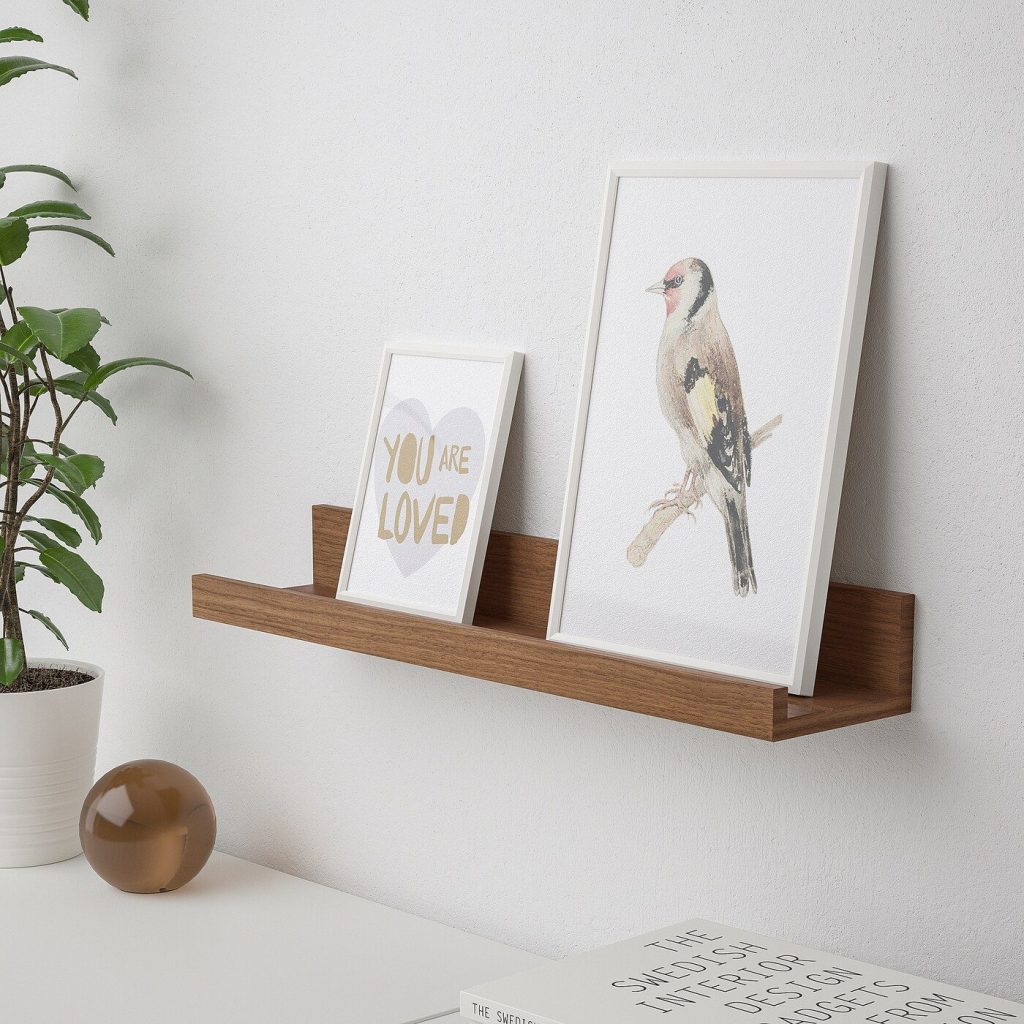
Repurpose MOSSLANDA picture ledges into stylish plate racks for your dining room. Mount multiple ledges horizontally on your wall, spacing them appropriately to accommodate different plate sizes.
Paint the ledges to match your wall color for a seamless look, or choose a contrasting color to make them a feature. The lip of the ledge perfectly supports plates, allowing you to display your favorite china or seasonal dinnerware.
For added functionality, install hooks underneath the bottom ledge to hang mugs or teacups. This hack not only provides storage but also creates a decorative display that can be easily changed.
Related Guide: 20 Ideas for Using Candle Sconces to Create a Cozy Atmosphere
70. IVAR Side Unit Room Screen
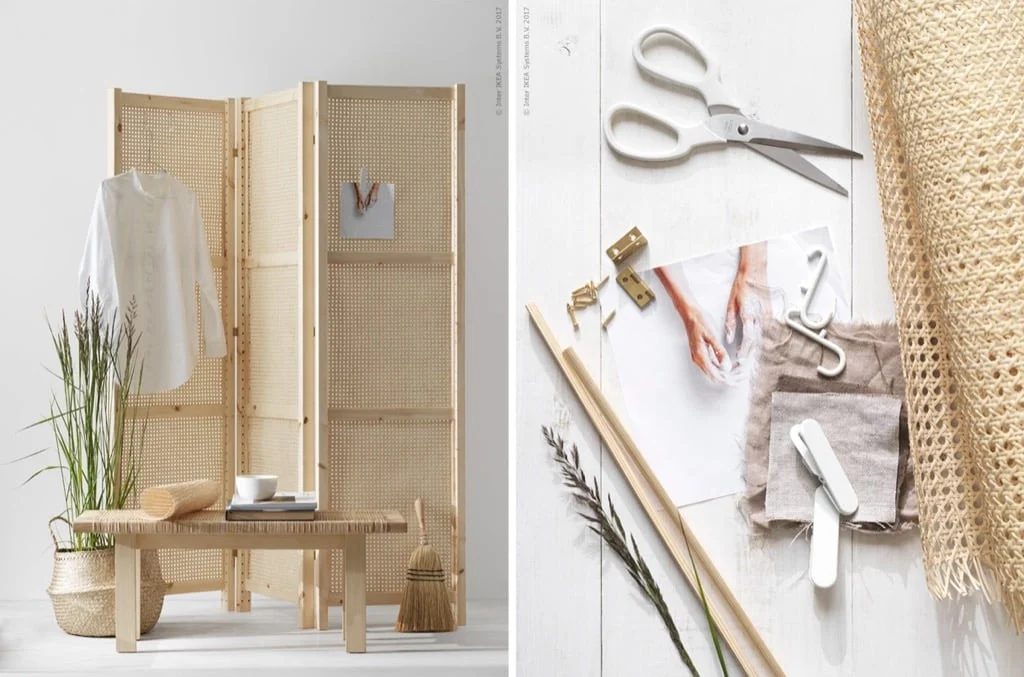
Create a decorative room screen using IVAR side units. Connect three or more units using hinges, allowing the screen to be folded and repositioned as needed. Sand the pine surface and stain or paint it to match your decor.
Replace some of the solid panels with cane webbing, decorative fabric, or even stained glass for added visual interest. Add casters to the bottom of each unit for easy mobility.
Use this screen to create a more intimate dining area within a larger space, or to hide storage areas when entertaining. This hack provides a flexible solution for defining spaces in open-plan homes.
Children’s Room Hacks
71. KURA Bed Castle
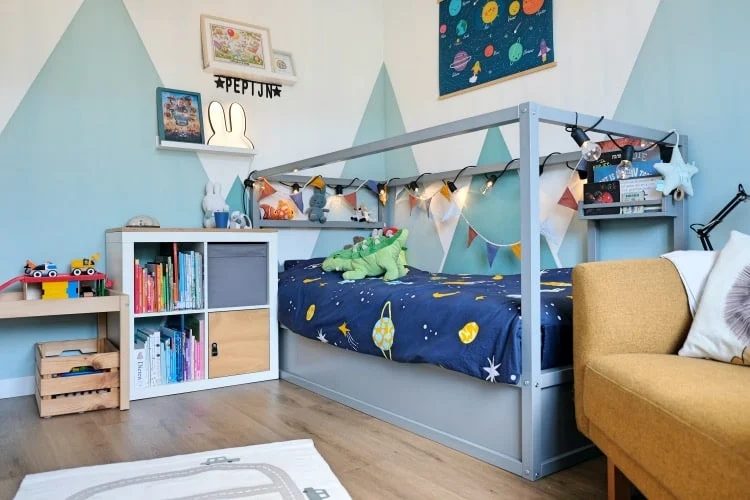
Transform the reversible KURA bed into a magical castle for your little prince or princess. Start by painting the bed frame in colors that match your castle theme – perhaps stone gray for the base and white or pale blue for the top.
Create crenellations along the top edge of the bed using foam board or thin plywood, painted to match. Add a drawbridge-style headboard using a piece of wood attached with hinges, complete with painted chains and a handle.
For the finishing touches, hang sheer curtains around the sides of the upper bunk to create a canopy effect, and add battery-operated LED lights for a magical glow. This hack turns bedtime into an enchanting adventure.
72. TROFAST Storage System Reading Nook
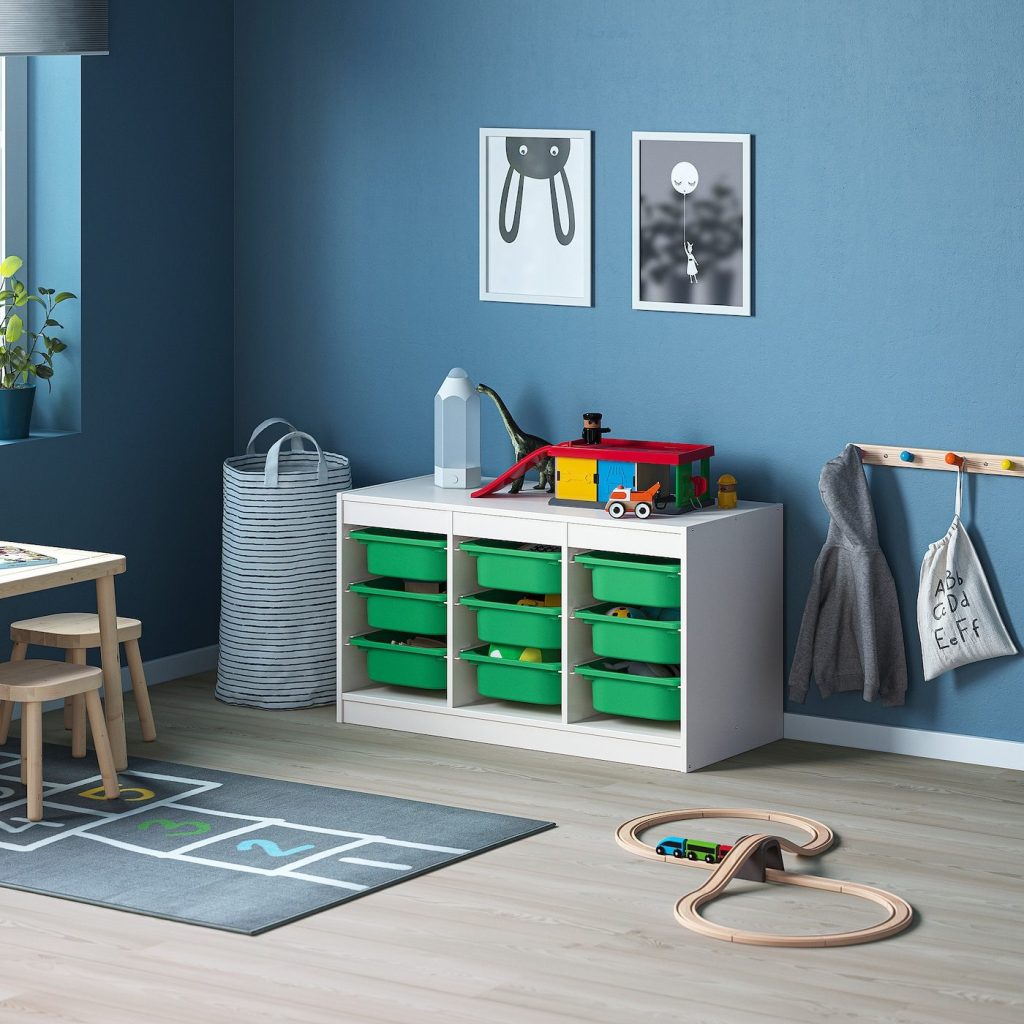
Convert a TROFAST storage unit into a cozy reading nook. Remove some of the bins to create a seating area, and add a custom-cut cushion for comfort. Use the remaining bins for book storage or to hold toys.
Create a canopy over the seating area using a curved curtain rod and fabric that complements the room’s decor. Add soft lighting with string lights or a small lamp to create a warm, inviting atmosphere.
Paint the exterior of the unit in a fun color or add decals to match your child’s interests. This hack creates a multi-functional piece that combines storage with a special place for reading and relaxation.
73. LACK Side Table Sensory Play Station
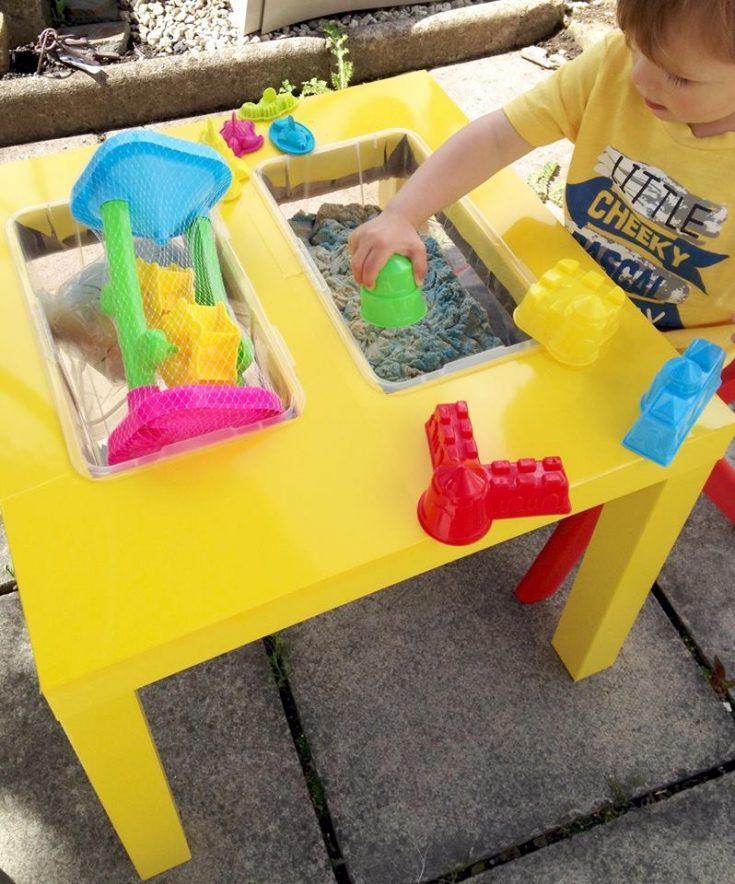
Transform a LACK side table into an engaging sensory play station for toddlers. Start by flipping the table upside down so that the legs point upwards. Paint the entire unit in bright, child-friendly colors.
Attach different sensory elements to each leg, such as bells, textured fabrics, or safe mirrors. On the tabletop (now the base), create sections for different activities like a mini sandbox, a magnetic board, or a chalkboard surface.
Add casters to the corners for easy mobility. This hack creates a contained play area that stimulates various senses and can be easily moved around the room or house.
74. KALLAX Workstation and Toy Storage
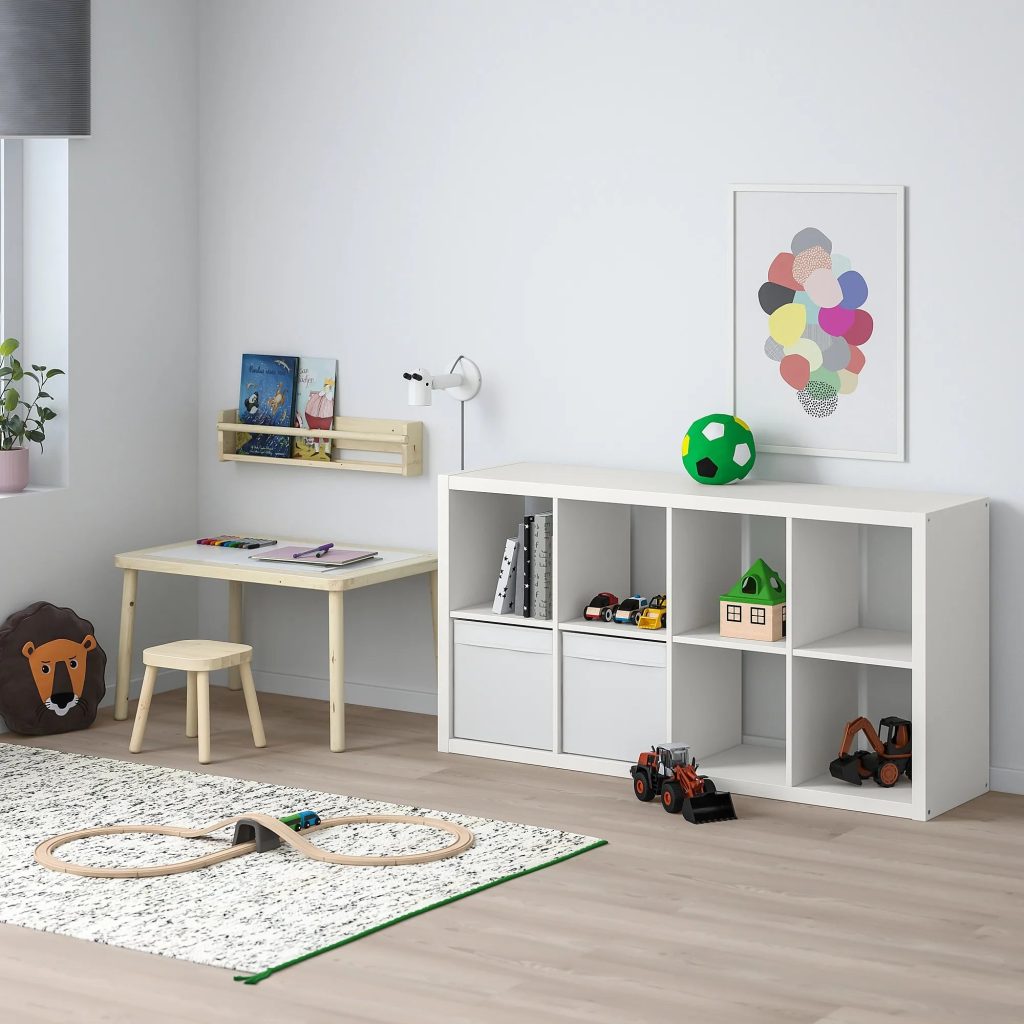
Convert a KALLAX shelf unit into a combination workstation and toy storage system. Place the unit on its side and add a custom-cut desktop that extends beyond the shelves to create a workspace.
Use a mix of KALLAX inserts like drawers and doors to create hidden storage for toys and craft supplies. Leave some cubbies open for displaying books or favorite toys.
Add a pegboard to one side of the unit for hanging frequently used items like scissors, rulers, or small baskets. Paint the entire unit in a color that complements the room’s decor. This hack creates a multi-functional space that grows with your child.
75. STUVA Wardrobe Dress-Up Station
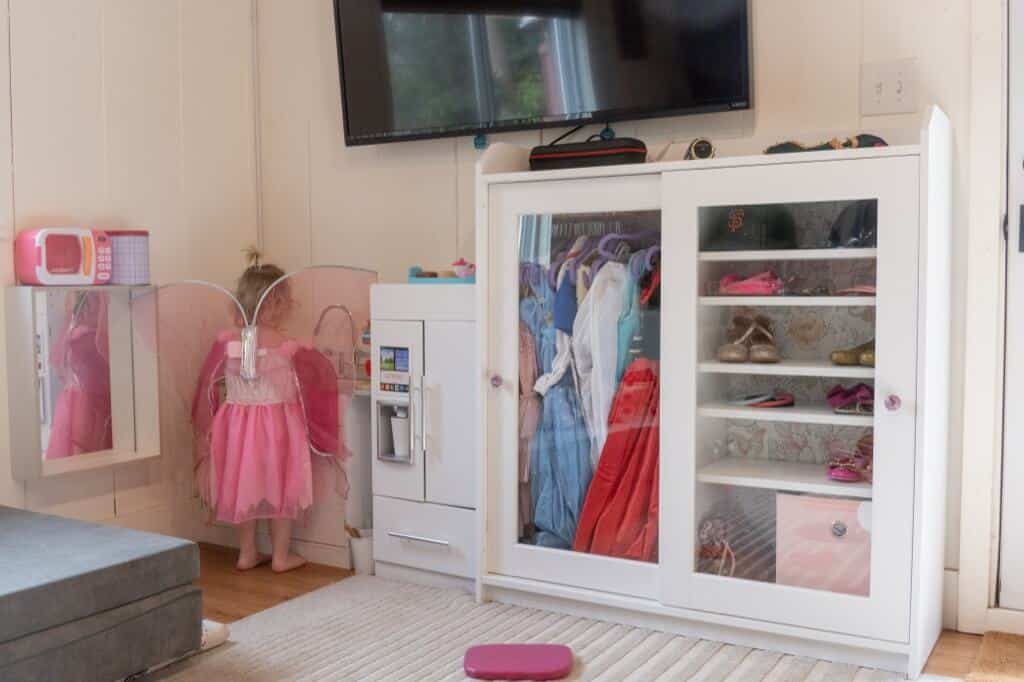
Repurpose a STUVA wardrobe into a fun dress-up station for imaginative play. Remove the doors and paint the interior and exterior in bright, inviting colors.
Install a rod at child-height for hanging costumes. Add hooks on the sides for accessories like hats, wands, or masks. Place a mirror on the inside of one door panel, and use the other door panel to create a “stage” backdrop that can be easily changed.
Use the drawers at the bottom to store additional accessories or less frequently used items. This hack encourages creative play while keeping costumes organized and easily accessible.
76. FLISAT Table Art Center
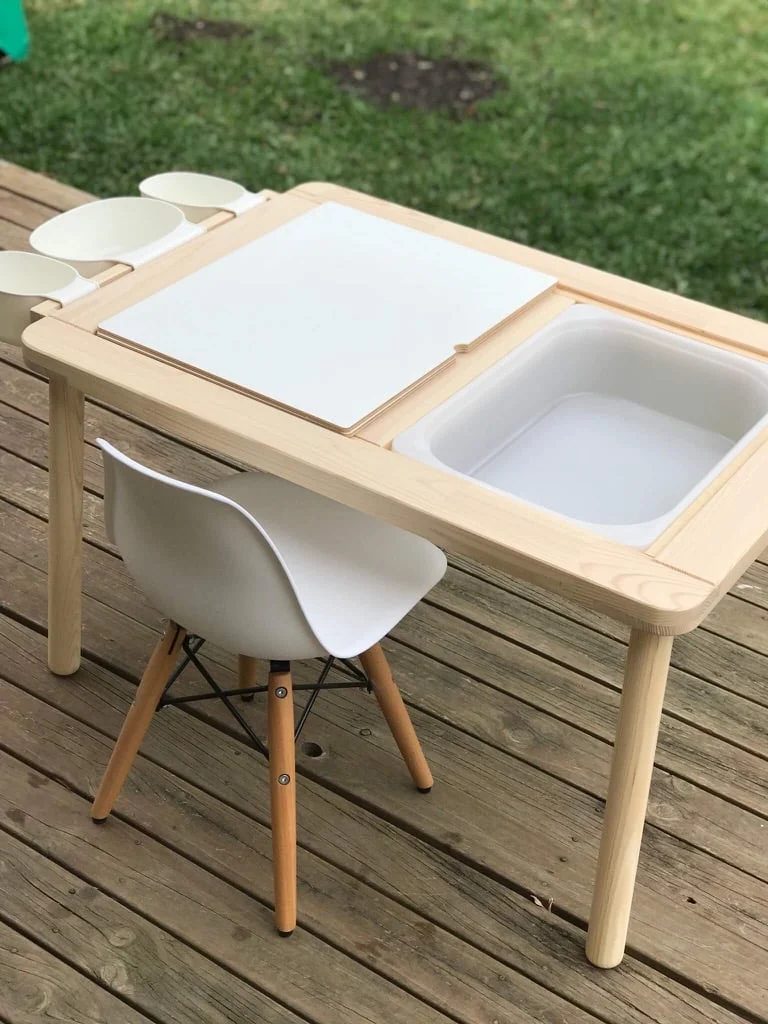
Transform the FLISAT children’s table into a comprehensive art center. Start by painting the table in a color that complements the room. Replace the standard plastic bins with mason jars or small metal buckets to hold art supplies.
Create a paper roll holder by installing a dowel rod between the table legs on one end. Add clips or a string with clothespins across the table to display finished artwork.
Attach a small pegboard to one side of the table for hanging paintbrushes, scissors, and other tools. This hack creates a dedicated space for artistic expression that keeps supplies organized and within reach.
77. BEKVÄM Step Stool Learning Tower
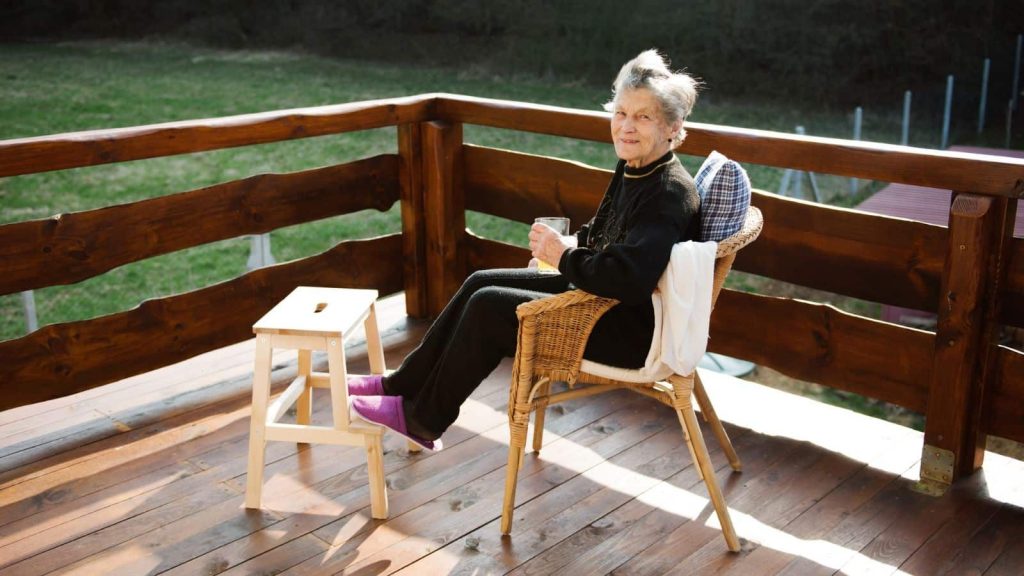
Convert the BEKVÄM step stool into a safe learning tower for little helpers in the kitchen. Start by adding two additional steps between the existing ones to create a more gradual climb.
Attach side panels made from plywood or sturdy MDF board to prevent falls. Cut decorative shapes into these panels to reduce weight and add visual interest. Sand all edges smooth and paint the entire tower in a child-friendly, non-toxic paint.
Add a back panel with a cute cut-out for extra safety. This hack creates a sturdy platform that allows children to safely participate in kitchen activities at counter height.
78. SUNDVIK Changing Table Homework Desk
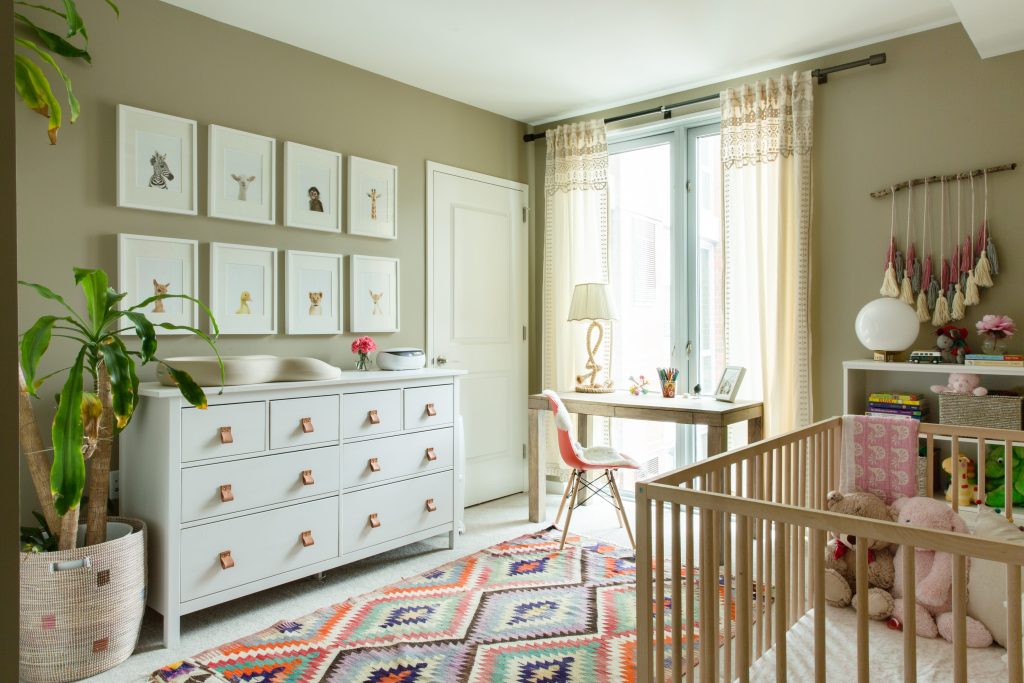
Repurpose the SUNDVIK changing table into a homework desk as your child grows. Remove the changing pad and paint the unit in a color that suits your child’s preferences.
Replace the top shelf with a custom-cut desktop that extends beyond the unit’s edges to create a larger work surface. Add a cork board or magnetic board to the wall above for pinning important papers or artwork.
Use the shelves below for storage, adding baskets or boxes to organize school supplies and books. This hack creates a dedicated study space that utilizes furniture you already own.
79. GÖRLÖSE Rug Interactive Play Mat
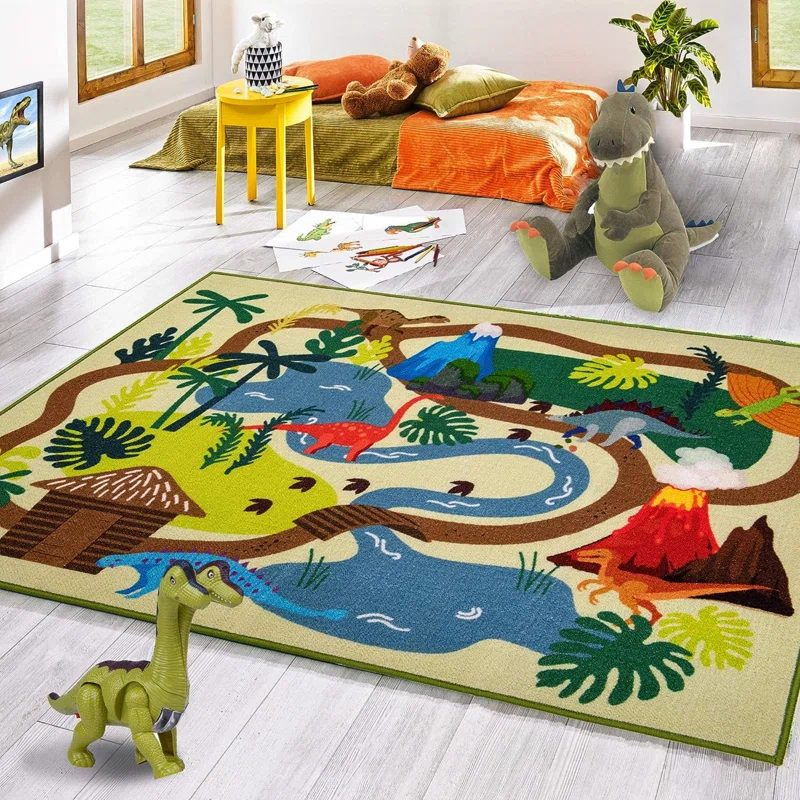
Transform the GÖRLÖSE rug into an interactive play mat for young children. Use fabric paint or iron-on patches to create a cityscape or farm scene on the rug. Add roads, buildings, fields, and other elements to encourage imaginative play.
Create 3D elements like trees or buildings using felt, attaching them to the rug with Velcro for easy removal and reconfiguration. Add a border around the edge of the rug using grosgrain ribbon for a finished look.
This hack turns a simple rug into an engaging play space that can be easily rolled up and stored when not in use.
80. DUKTIG Play Kitchen Garden Extension
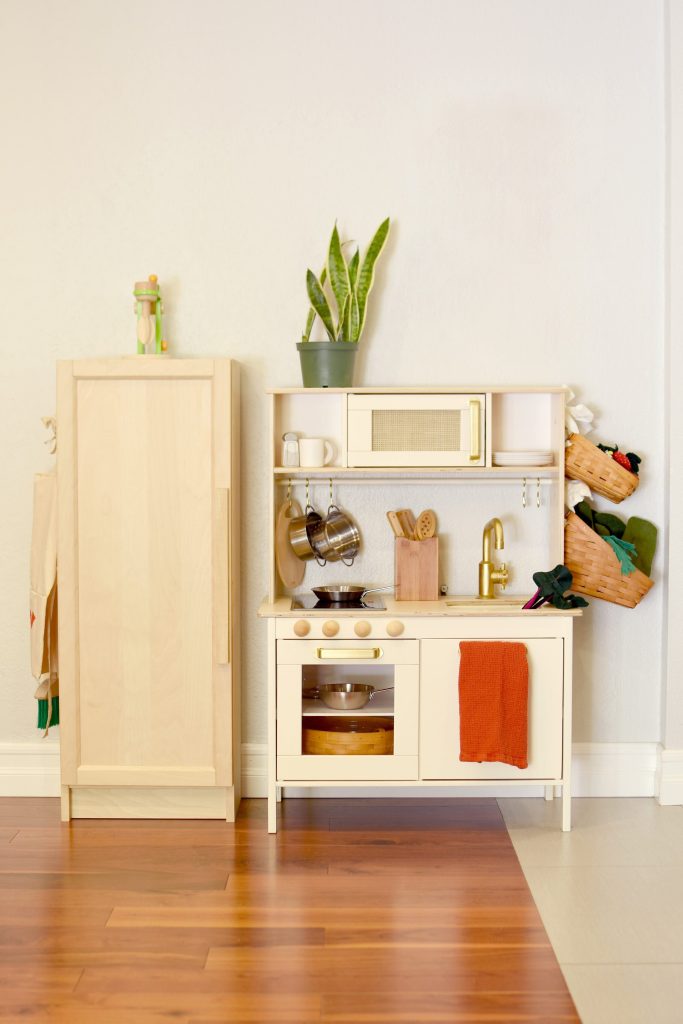
Expand the popular DUKTIG play kitchen with a garden extension for little chefs. Start by attaching a small LACK side table to the side of the kitchen at the same height as the counter.
Create a “planter box” on top of the LACK table using a shallow wooden box. Fill it with faux plants or use it as a sensory bin with kinetic sand or water beads. Add a small watering can and toy gardening tools.
Paint the extension to match the play kitchen and add fun details like a garden gnome or painted insects. This hack encourages imaginative play and teaches children about where food comes from.
Outdoor and Patio Hacks
81. ÄPPLARÖ Bench Planter Box Combo
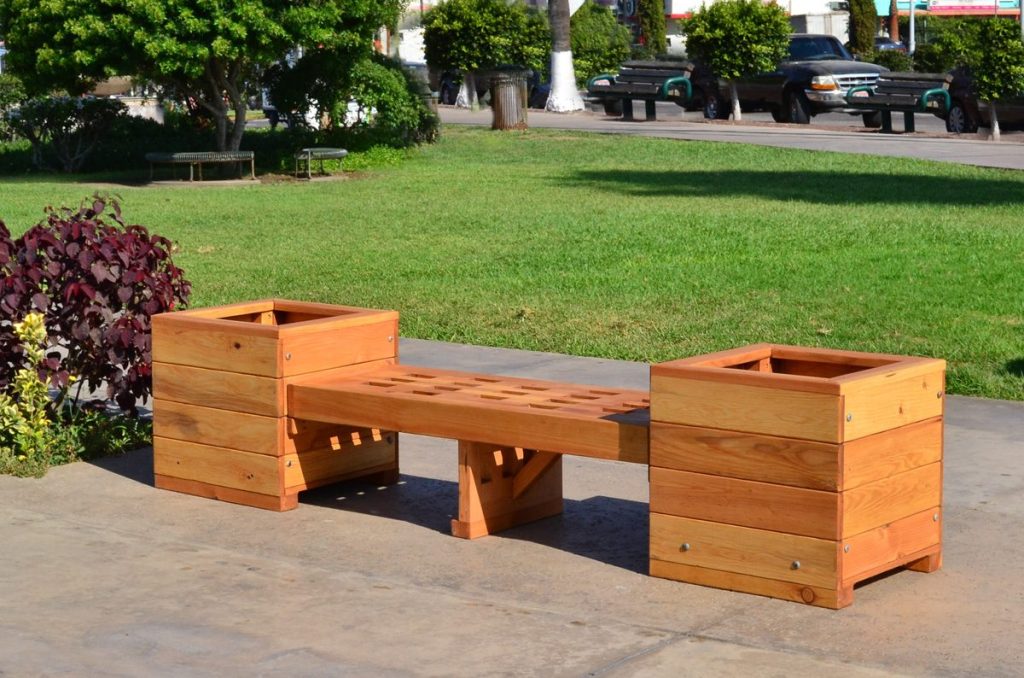
Transform the ÄPPLARÖ bench into a multi-functional seating and planting solution for your patio or balcony. Start by building a planter box that fits snugly against the back of the bench using weather-resistant wood.
Paint or stain both the bench and the planter box to protect them from the elements. Line the planter box with landscape fabric before filling it with soil and plants.
Add outdoor cushions to the bench for comfort. Choose plants that provide privacy or fragrance, such as tall grasses or lavender. This hack creates a cozy seating area with built-in greenery, perfect for small outdoor spaces.
82. HYLLIS Shelving Unit Vertical Garden
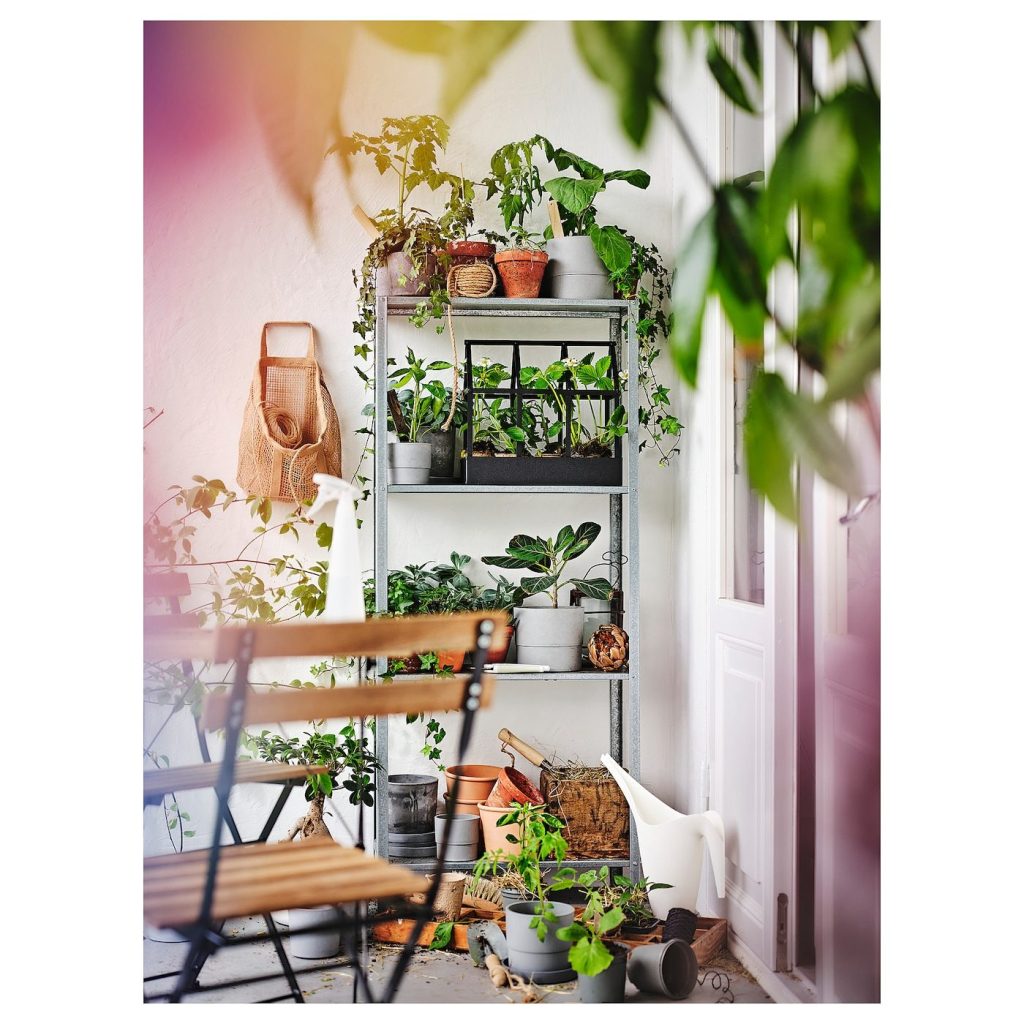
Convert the HYLLIS shelving unit into a space-saving vertical garden. Start by mounting the unit securely to an outdoor wall or fence. Paint the frame with rust-resistant paint for added durability.
Replace the standard shelves with custom-cut wooden slats, leaving gaps for drainage. Line each shelf with landscape fabric and fill with potting soil. Plant a variety of herbs, succulents, or small flowers in each level.
Install a drip irrigation system for easy watering, or hang small watering cans nearby. This hack maximizes growing space in small outdoor areas and adds a beautiful, living wall to your patio or balcony.
83. TORKIS Laundry Basket Compost Bin
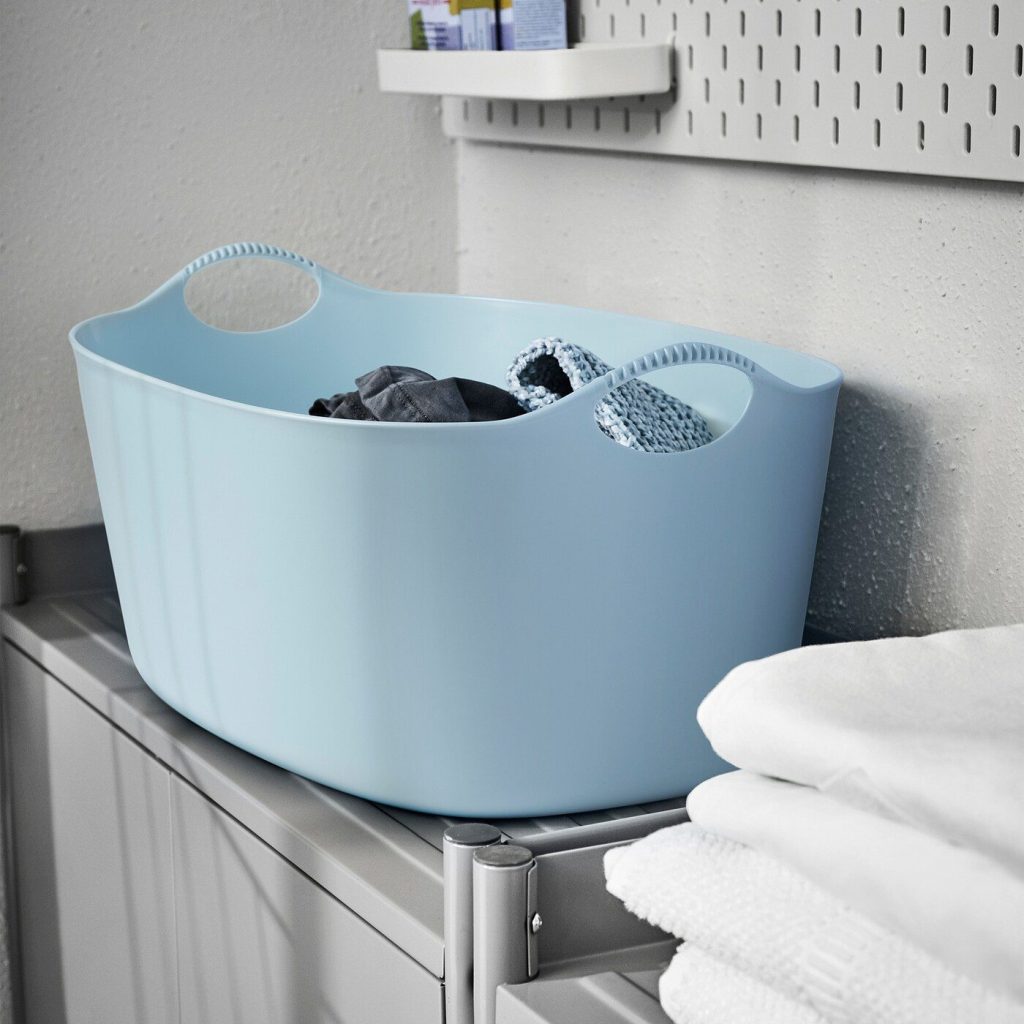
Repurpose the TORKIS flexible laundry basket into an outdoor compost bin. Start by drilling numerous small holes all around the basket for aeration and drainage. Paint the exterior with outdoor-grade paint in a color that blends with your garden.
Create a secure lid using a piece of plywood cut to size, attached with hinges. Add a latch to keep animals out. Line the bottom of the basket with landscape fabric to prevent compost from falling through.
Place the bin in a convenient location in your yard. This hack creates an affordable, lightweight compost bin that’s easy to move and helps reduce kitchen waste.
84. KLÄMTARE Box Outdoor Storage Bench
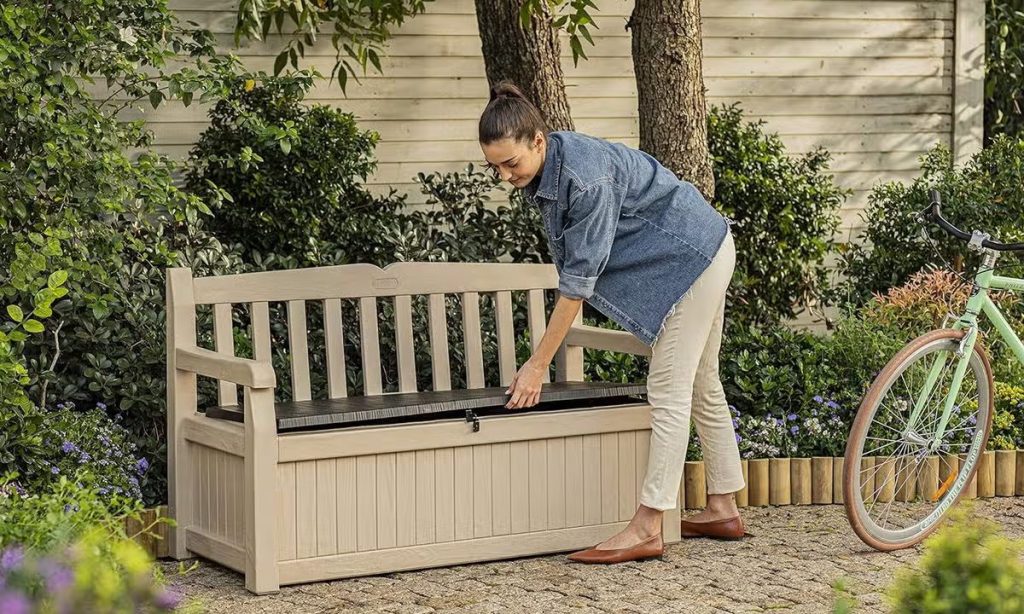
Transform the KLÄMTARE outdoor storage box into a comfortable seating bench. Start by reinforcing the lid with a piece of plywood for added strength. Create a cushion for the top using outdoor foam and weather-resistant fabric.
Add legs to the box to raise it to a comfortable seating height. These can be made from pressure-treated lumber or metal brackets designed for outdoor use. Paint or stain the entire unit to match your outdoor decor.
Install hydraulic hinges to make opening and closing the lid easier. This hack creates additional seating with hidden storage for outdoor cushions, gardening supplies, or children’s toys.
85. SOLVINDEN Solar Lamp Pathway Lights
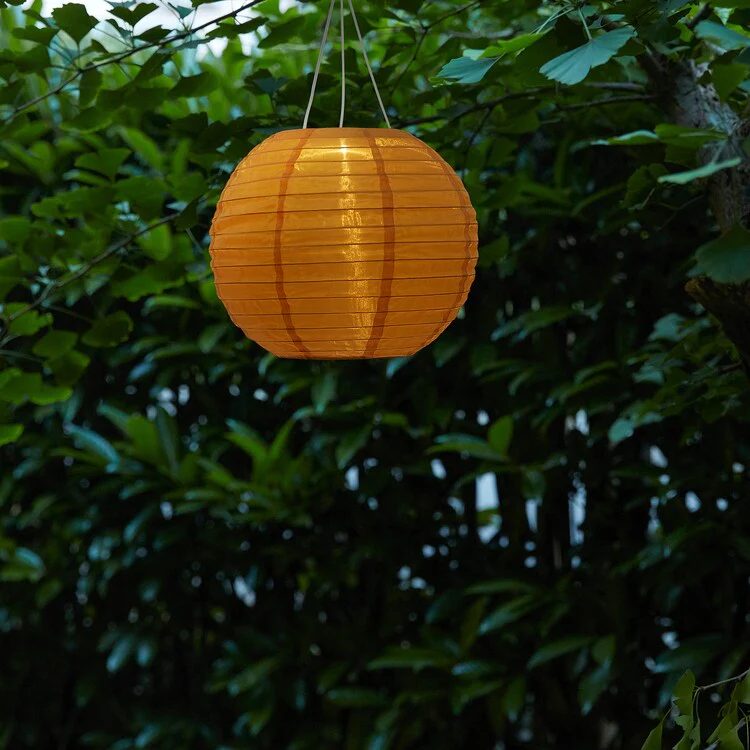
Convert SOLVINDEN table solar lamps into charming pathway lights. Remove the base of each lamp, leaving just the upper light portion. Create new stakes for the lamps using wooden dowels or metal rods, ensuring they’re long enough to anchor securely in the ground.
Paint the stakes and lamp bases in coordinating colors that complement your garden. Arrange the lights along your garden path or around your patio for soft, ambient lighting.
For added whimsy, consider painting designs on the lamp shades or attaching decorative elements like faux butterflies or dragonflies. This hack creates custom pathway lighting that charges during the day and illuminates your garden at night.
86. FNISS Trash Can Planter
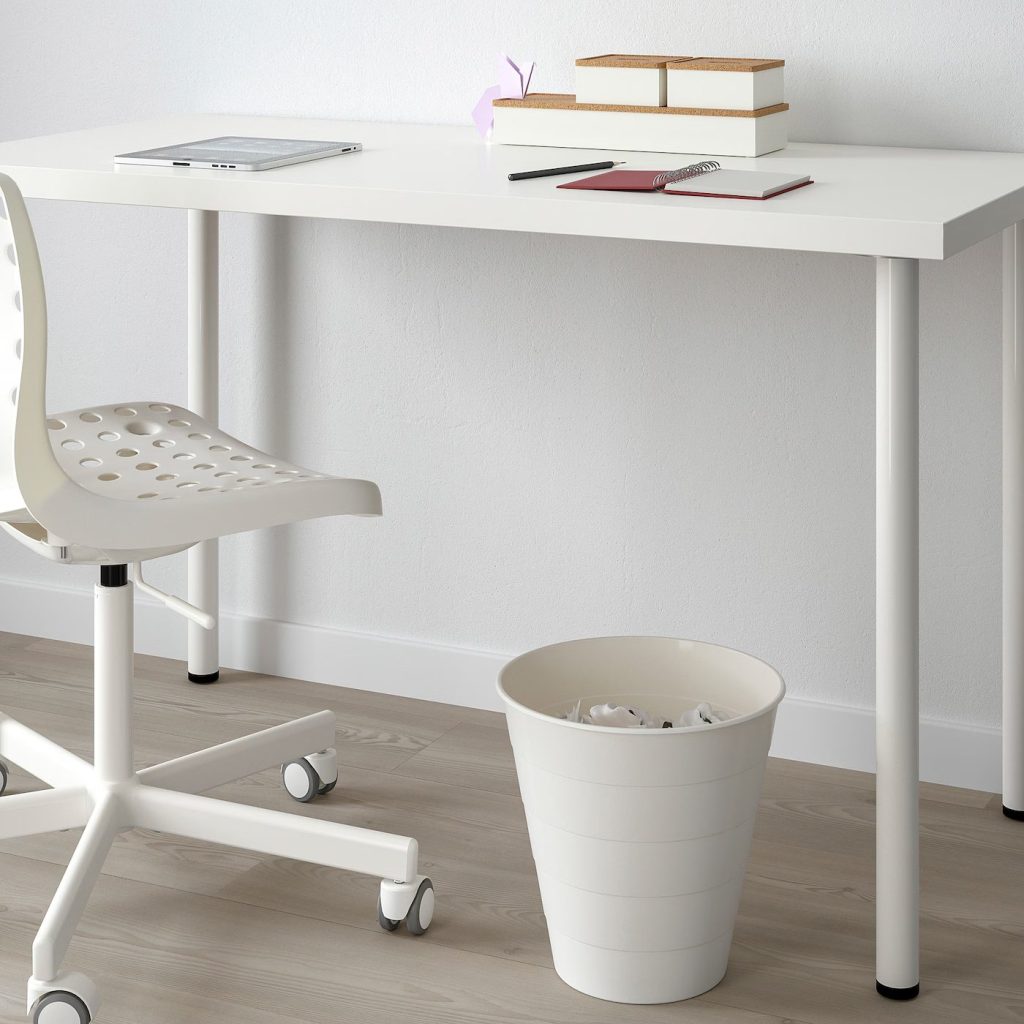
Repurpose the FNISS trash can into a modern outdoor planter. Start by drilling several drainage holes in the bottom of the can. Apply a coat of outdoor primer, then paint the exterior in a color that complements your outdoor space.
Create a false bottom inside the planter using pebbles or broken pottery pieces to improve drainage. Add high-quality potting soil and plants of your choice. Consider using trailing plants that will cascade over the sides for a dramatic effect.
Group several of these planters in varying heights for a striking display. This hack creates sleek, contemporary planters at a fraction of the cost of high-end outdoor pots.
87. MUSKÖ Storage Cabinet Outdoor Kitchen
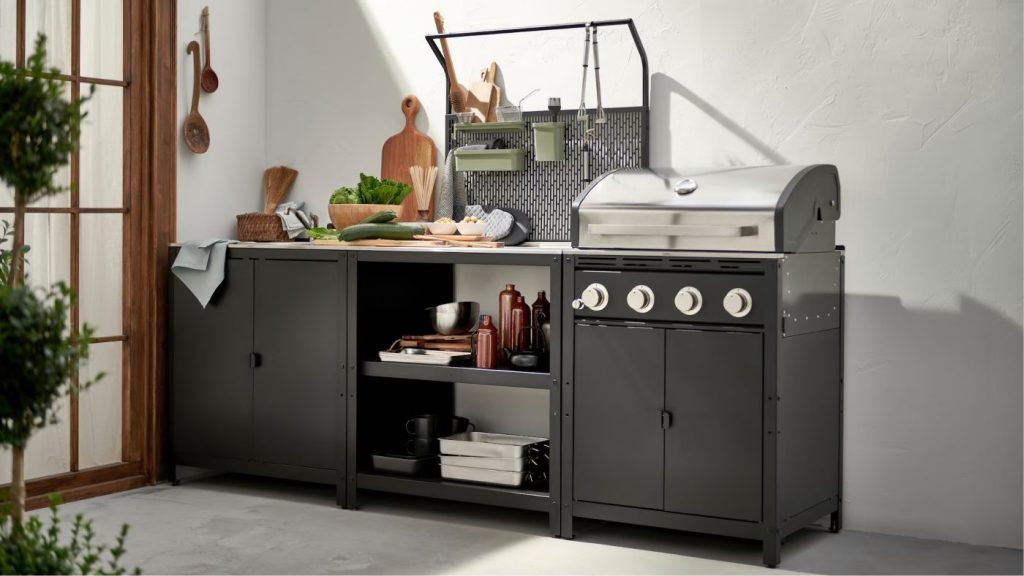
Transform the MUSKÖ storage cabinet into a compact outdoor kitchen unit. Start by treating the cabinet with outdoor sealant to protect it from the elements. Replace the top with a custom-cut piece of weather-resistant countertop material.
Install a small camping stove or electric hotplate on one side of the countertop. On the other side, create a prep area or add a small sink connected to a garden hose for water.
Use the interior of the cabinet to store outdoor dining essentials, cooking utensils, and dry goods. Add hooks to the sides for hanging grilling tools. This hack creates a functional outdoor cooking space perfect for patios or decks.
88. LACK Side Table Plant Stand
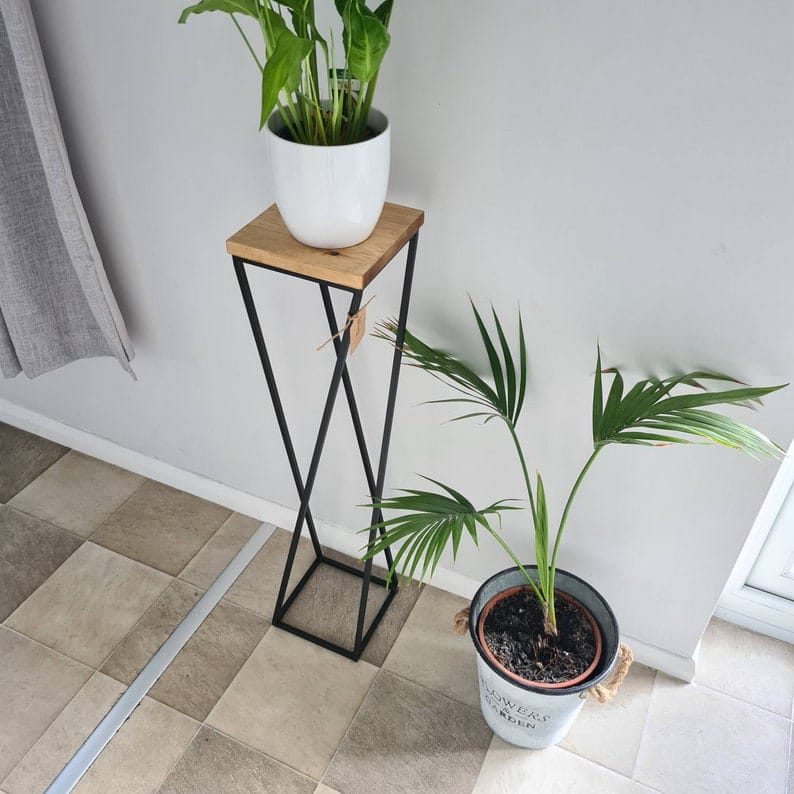
Convert a set of LACK side tables into a tiered plant stand for your patio or balcony. Start by reinforcing the tables with L-brackets for added stability. Paint or stain the tables in colors that complement your outdoor decor.
Arrange the tables in a stepped formation, securing them together with strong adhesive and screws. Add casters to the bottom table for easy mobility.
Use concrete or terra cotta pots in varying sizes on each level, mixing different types of plants for visual interest. This hack creates a space-saving solution for displaying multiple plants in a small outdoor area.
Creative Tip:Turn the LACK side table into a modular, wall-mounted cat playground by attaching multiple tables at different heights and angles.
89. RÅSKOG Utility Cart Bar Cart
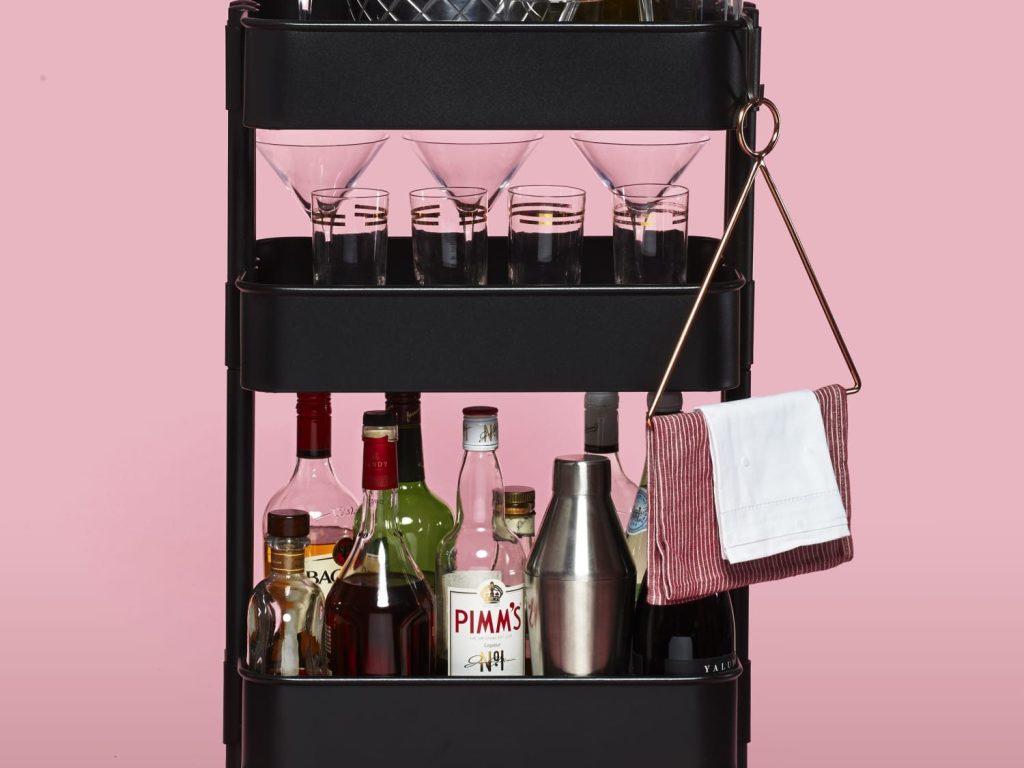
Transform the RÅSKOG utility cart into a weather-resistant outdoor bar cart. Start by spray painting the cart with rust-resistant paint in a color that matches your outdoor furniture.
Add a custom-cut piece of treated wood or outdoor-grade laminate to the top tier to create a stable surface for preparing drinks. Use the middle tier to hold bottles and mixers, and the bottom tier for storing glasses or ice buckets.
Install a towel bar on one end for hanging bar towels, and add hooks to the other end for hanging bottle openers and other bar tools. This hack creates a mobile beverage station perfect for outdoor entertaining.
90. HEJNE Shelving Unit Potting Bench

Convert the HEJNE shelving unit into a functional potting bench for your garden. Start by treating all wood surfaces with outdoor sealant for weather resistance. Add casters to the bottom for mobility.
Replace the top shelf with a custom-cut piece of treated plywood to create a large work surface. Install a row of hooks underneath this surface for hanging gardening tools.
Use the lower shelves to store pots, soil, and other gardening supplies. Add a small galvanized tub to one shelf to hold frequently used tools or to mix potting soil. This hack creates an organized workspace for all your gardening tasks.
Garage and Utility Room Hacks
91. IVAR Shelving System Modular Workbench
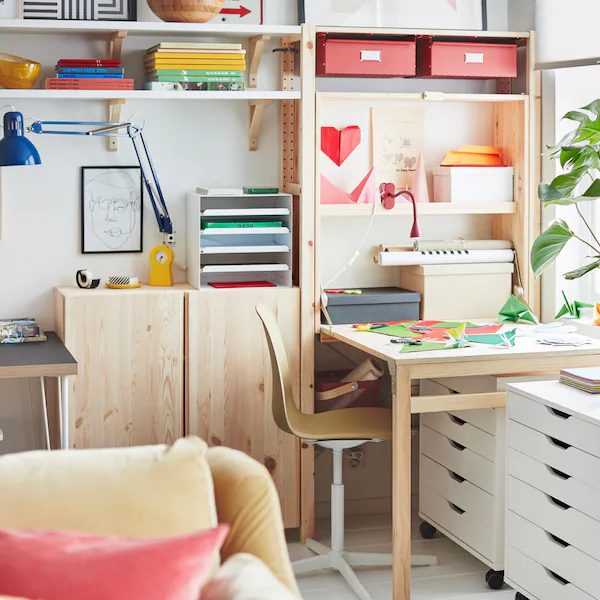
Transform the versatile IVAR shelving system into a customizable workbench for your garage. Start by assembling the shelving units in a configuration that suits your space and needs. Add a solid wood top to create a sturdy work surface.
Install pegboards on the back of the units for hanging tools. Use a combination of shelves and cabinets to store all your goods.
Conclusion
As we’ve explored these 91 IKEA hacks, it’s clear that the possibilities for personalization are nearly limitless. By thinking outside the box and applying a bit of creativity, you can transform everyday items into extraordinary pieces that truly make your house a home.
Remember, the beauty of these hacks lies not just in the end result, but in the process itself. Each project is an opportunity to express your creativity, learn new skills, and imbue your space with personal meaning. Whether you’ve tackled one hack or several, you’ve taken steps towards a more unique and sustainable living environment.
So go forth and experiment, mix and match ideas, and most importantly, have fun. Your perfect, personalized home is just a hack away!

