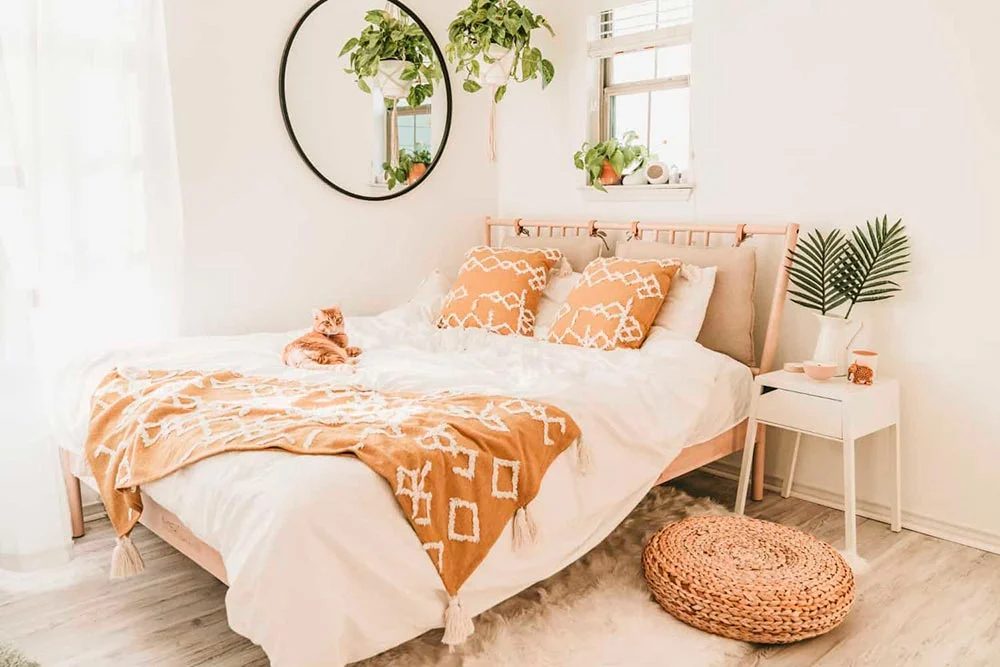
Are you ready to breathe new life into your bedroom without breaking the bank? Look no further! DIY projects are the perfect antidote to bland, cookie-cutter spaces.
They offer a unique opportunity to infuse your personality into every nook and cranny of your sleeping sanctuary. Whether you’re a seasoned craftsperson or a novice DIY enthusiast, this curated list of 25 bedroom makeover ideas has something for everyone.
From quick and easy decor tweaks to more ambitious furniture overhauls, we’ve got you covered. These projects range from the sublimely simple to the creatively complex, ensuring that you’ll find inspiration regardless of your skill level or time constraints.
So, roll up your sleeves and prepare to embark on a transformative journey that will metamorphose your bedroom into a cozy, stylish retreat that’s uniquely you.
DIY Ideas for Bedrooms
Get ready to unleash your inner designer and create a space that’s not just a room, but a reflection of your inimitable style and creativity.
1. Colorful Accent Wall
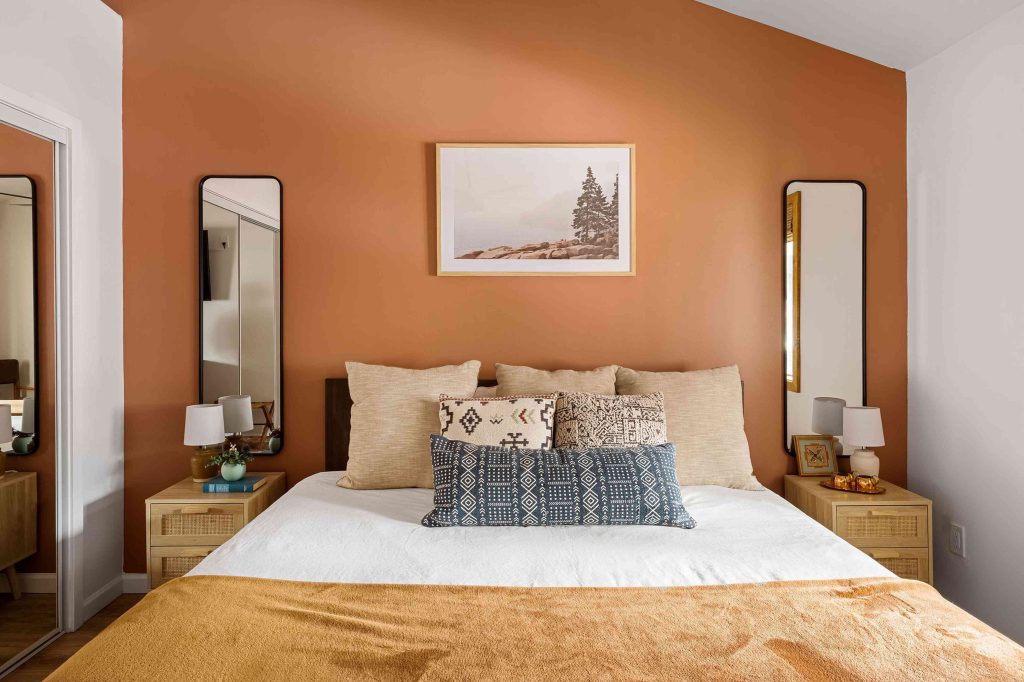
Transform your bedroom’s ambiance with a vibrant accent wall. Choose a color that complements your existing decor or go for a contrasting hue to create a striking focal point. Before you begin, make sure to properly prep the wall by cleaning it and applying painter’s tape to protect adjacent surfaces.
To achieve a professional-looking finish, start by applying a primer, especially if you’re painting over a darker color. Use a roller for larger areas and a brush for corners and edges. Apply two coats of your chosen color, allowing each coat to dry completely before adding the next. This simple yet effective DIY project can dramatically change the look and feel of your bedroom in just a weekend.
2. Floating Shelves
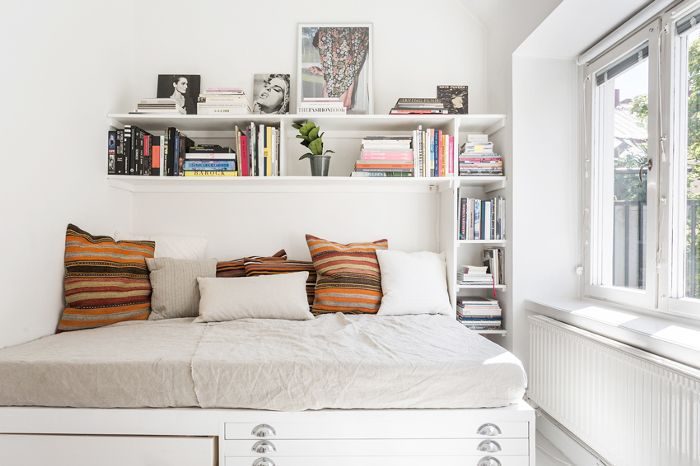
Floating shelves are not only functional but also add a modern touch to your bedroom decor. They provide extra storage space for books, plants, or decorative items without taking up valuable floor space. To create your own floating shelves, you’ll need wooden boards, brackets, a level, and a drill.
Start by measuring and marking where you want to place your shelves. Use a stud finder to locate the wall studs for secure mounting. Attach the brackets to the wall, ensuring they’re level. Then, place your wooden boards on top of the brackets and secure them in place. For a cohesive look, paint or stain the shelves to match your room’s color scheme. Arrange your favorite items on the shelves to create an eye-catching display that reflects your personal style.
3. Upcycled Headboard
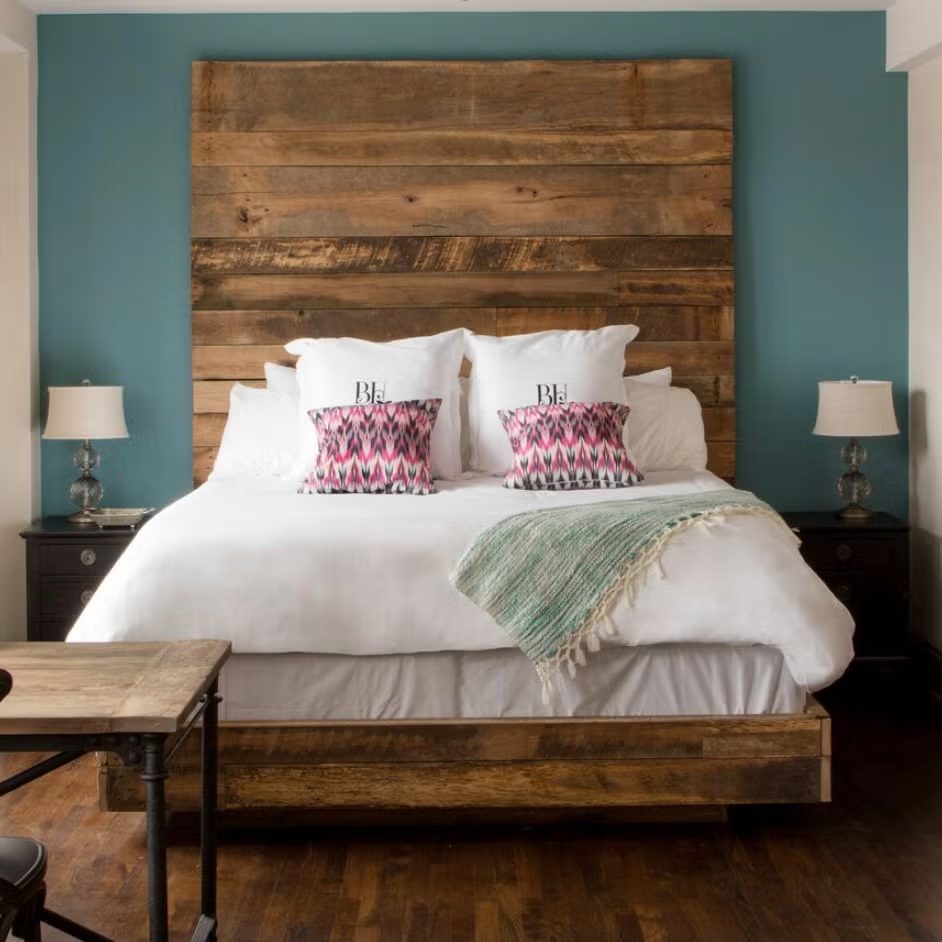
Give your bed a stunning focal point by creating a unique headboard from upcycled materials. Old doors, wooden pallets, or even a collection of vintage window frames can be transformed into a one-of-a-kind headboard. This project not only adds character to your room but also promotes sustainability by repurposing materials that might otherwise end up in a landfill.
For a pallet headboard, start by sanding the wood to remove any rough spots. Apply a wood stain or paint in your desired color. Once dry, secure the pallet to your bed frame or mount it directly on the wall behind your bed. For added comfort, consider attaching foam padding and covering it with fabric before mounting. This DIY headboard will instantly elevate your bedroom’s style and become a conversation piece for guests.
4. Macramé Wall Hanging
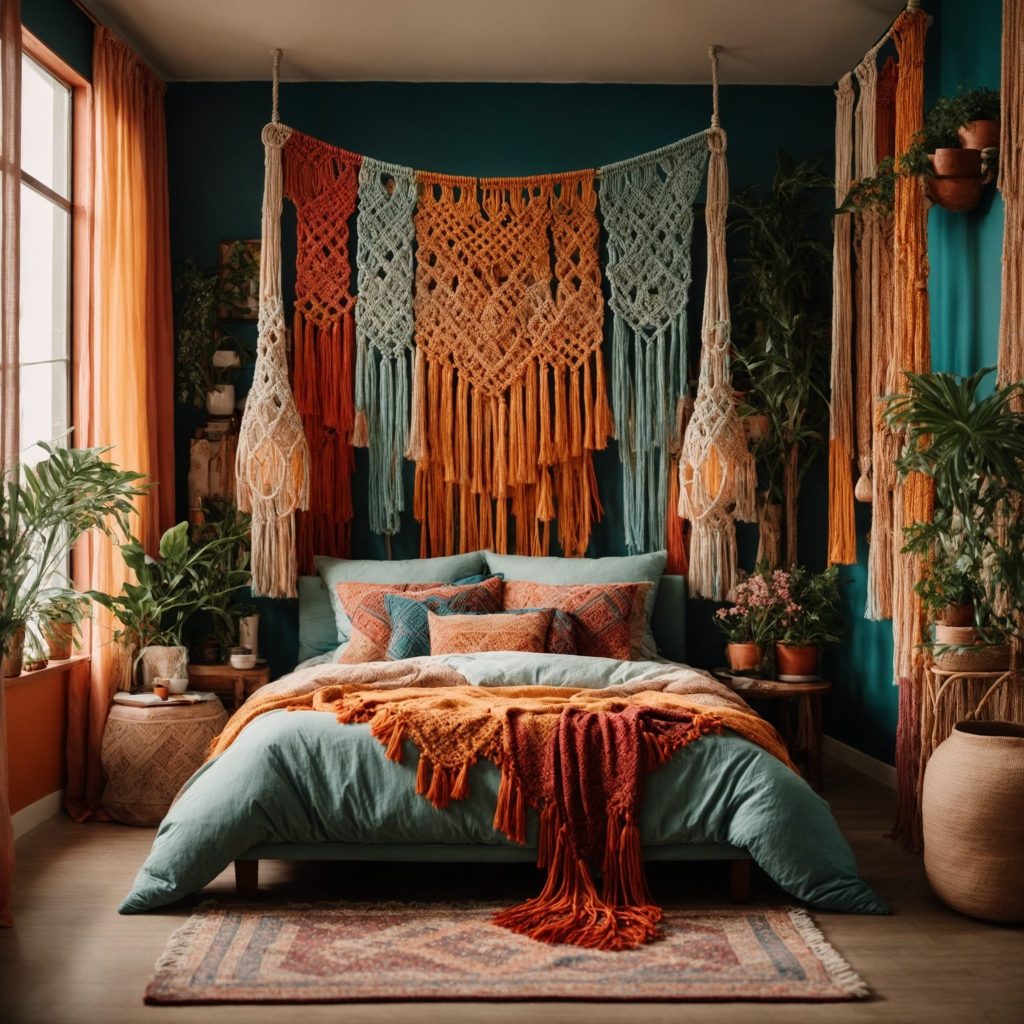
Bring a touch of bohemian charm to your bedroom with a handmade macramé wall hanging. This trendy textile art is surprisingly easy to create and adds texture and visual interest to your walls. You’ll need macramé cord, a wooden dowel, and scissors to get started.
Begin by cutting your cord into lengths and attaching them to the dowel using simple knots. Then, follow online tutorials to learn basic macramé knots like the square knot and spiral knot. As you become more comfortable with the technique, experiment with different patterns and shapes. You can incorporate beads or dyed cord for added visual appeal. Once complete, hang your macramé creation above your bed or in a corner to instantly infuse your space with boho-chic vibes.
5. DIY Bedside Table
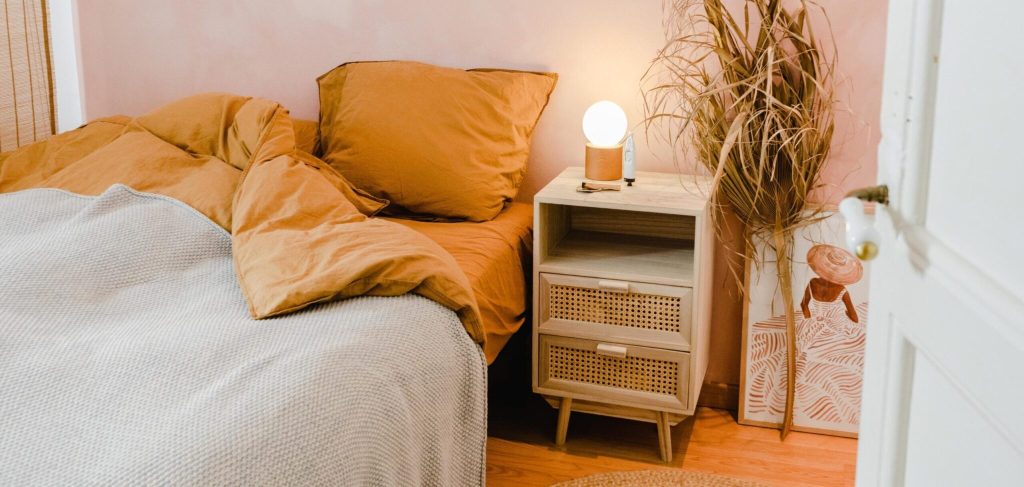
Create a unique bedside table that perfectly fits your needs and style. Whether you prefer a minimalist floating shelf or a more substantial piece of furniture, building your own nightstand allows for complete customization. For a simple yet stylish option, consider repurposing a wooden crate or stacking several crates for added storage.
To create a floating nightstand, secure a piece of wood to wall brackets for a sleek, space-saving solution. For a more traditional look, upcycle an old dresser or side table with a fresh coat of paint and new hardware. Add personal touches like a built-in wireless charging pad or a hidden compartment for valuables. Your custom bedside table will not only serve its practical purpose but also showcase your craftsmanship and creativity.
6. Fabric-Covered Cork Board
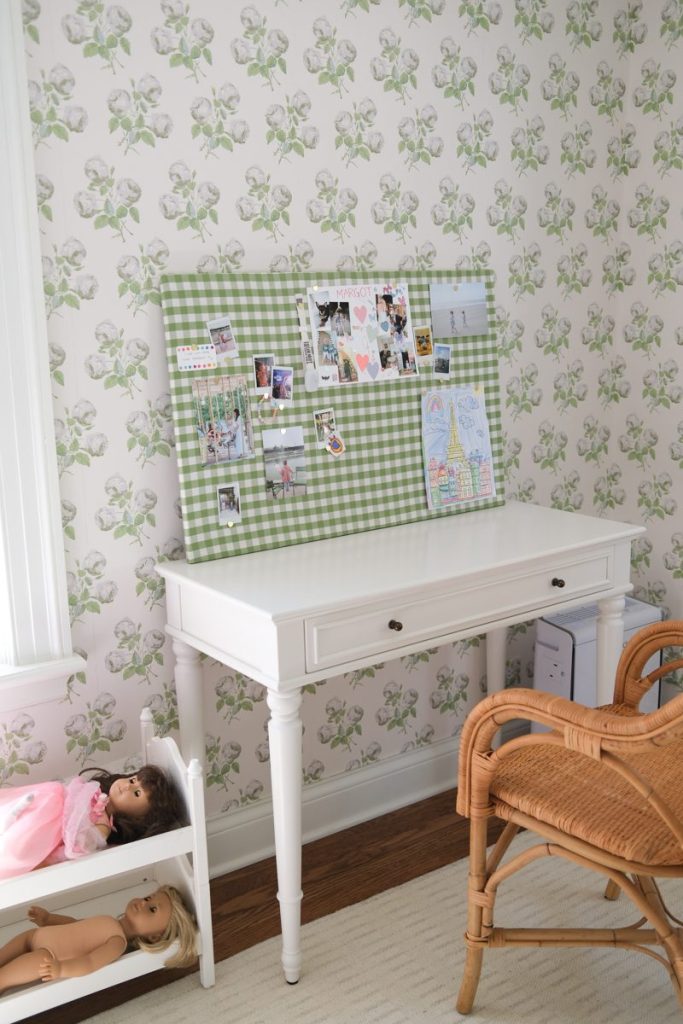
Keep your bedroom organized and visually appealing with a DIY fabric-covered cork board. This project combines functionality with style, allowing you to display photos, notes, and reminders in a way that complements your decor. You’ll need a cork board, fabric of your choice, scissors, and a staple gun to get started.
Begin by laying your fabric face-down on a flat surface. Place the cork board on top of the fabric, leaving enough excess to wrap around the edges. Carefully fold the fabric over the edges of the board, pulling it taut as you go, and secure it with staples. Pay special attention to the corners, folding them neatly for a professional finish. Once complete, hang your fabric-covered cork board on the wall and use decorative pushpins to create an eye-catching display of your favorite memories and important reminders.
7. Painted Dresser Makeover
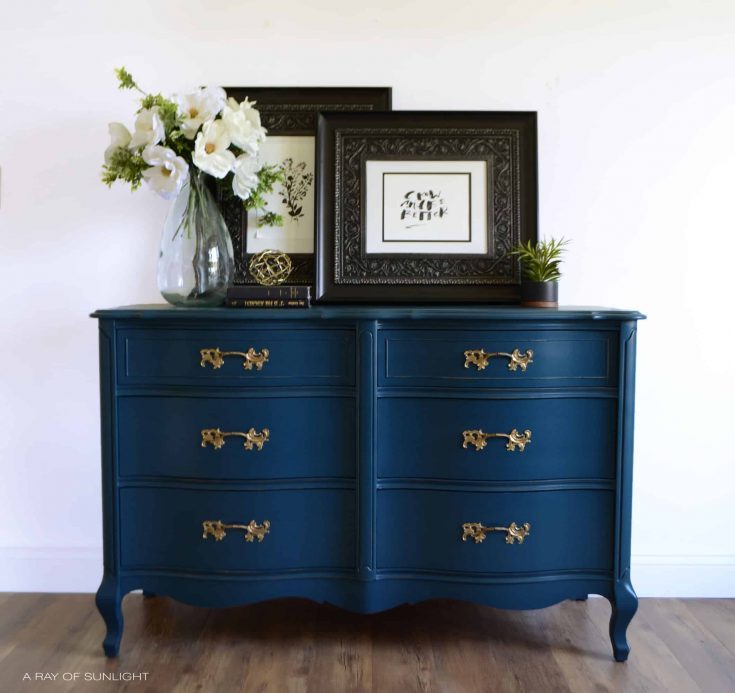
Give new life to an old dresser with a fresh coat of paint and updated hardware. This DIY project can completely transform a dated piece of furniture into a statement piece that matches your bedroom’s aesthetic. Start by thoroughly cleaning the dresser and removing all hardware. Sand the surface lightly to help the paint adhere better.
Choose a paint color that complements your room’s color scheme. Apply a primer if you’re making a dramatic color change, then follow with two coats of your chosen paint, allowing each coat to dry completely. For added interest, consider using different colors for the drawer fronts or creating a pattern with painter’s tape. Once the paint is dry, attach new knobs or handles to complete the transformation. Your revamped dresser will look like a custom piece at a fraction of the cost.
8. Canopy Bed Frame
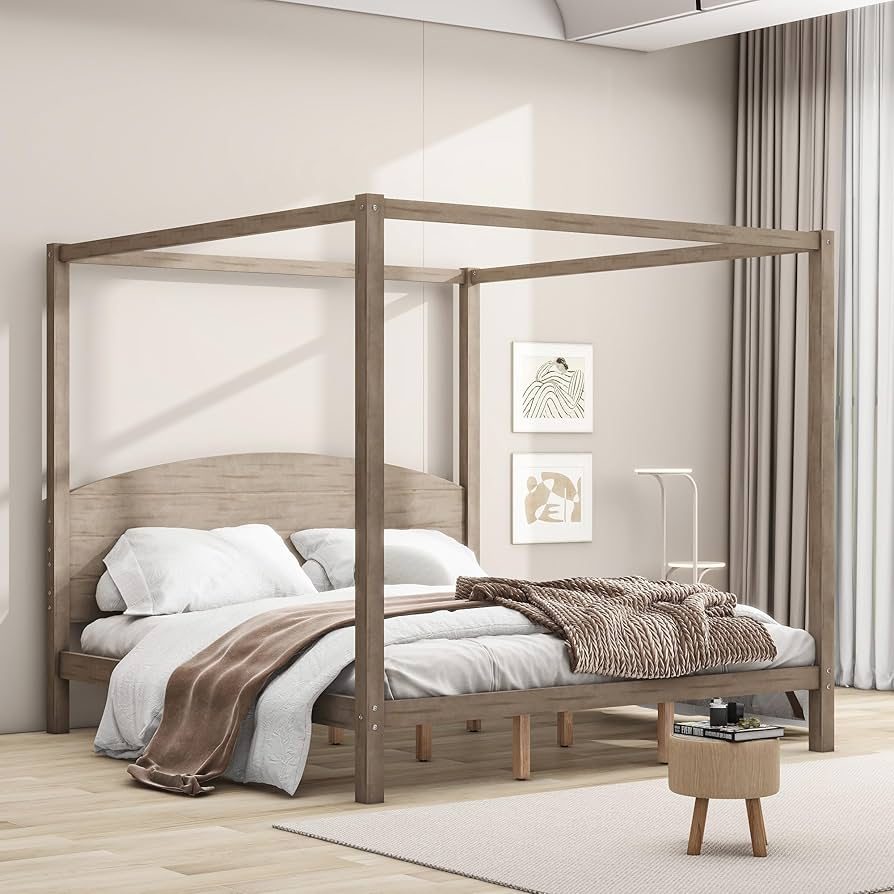
Create a luxurious, romantic atmosphere in your bedroom by adding a DIY canopy to your existing bed frame. This project can be as simple or elaborate as you like, from a minimalist design using sheer curtains to a more substantial structure with wooden posts.
For a simple canopy, install ceiling-mounted curtain rods above your bed in a rectangle shape. Hang sheer curtains or fabric of your choice from the rods, allowing them to drape gracefully around your bed. For a more permanent solution, consider attaching wooden posts to each corner of your bed frame, extending them to the ceiling. You can then drape fabric between the posts or attach a rod at the top for curtains. This DIY canopy will transform your bedroom into a cozy, intimate retreat.
9. String Light Wall Art
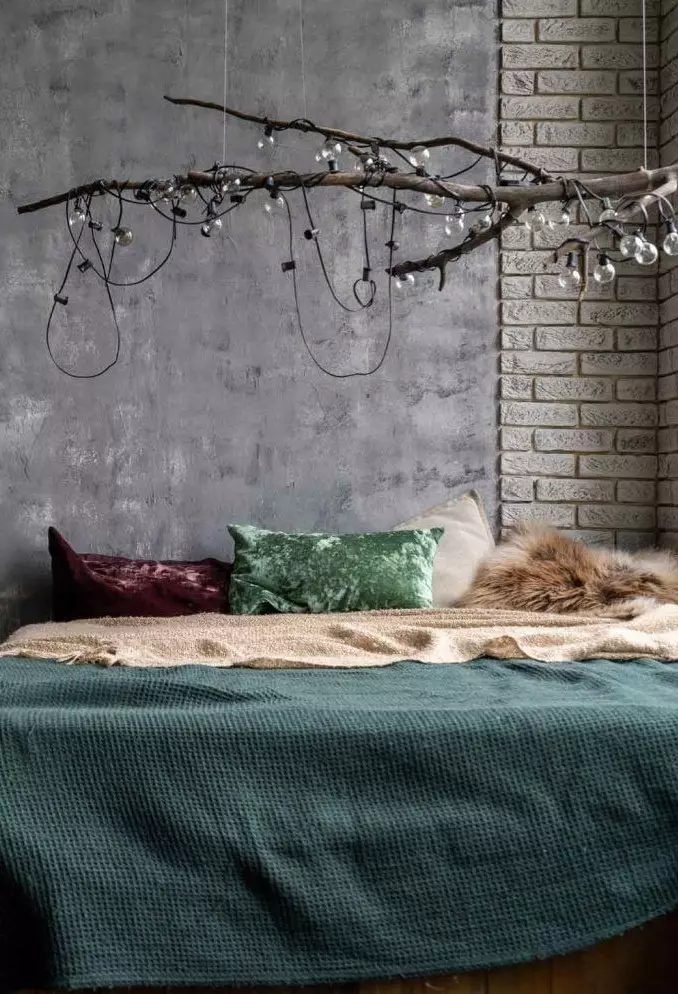
Create a magical ambiance in your bedroom with a DIY string light wall art installation. This project combines the soft glow of fairy lights with personalized designs or words for a truly unique decor piece. You’ll need a large canvas or wooden board, string lights, and nails or hooks to get started.
Begin by sketching your design on the canvas or board. This could be a word, a constellation, or any shape that resonates with you. Hammer small nails or place hooks along the outline of your design. Then, carefully wrap the string lights around the nails, following your pattern. Plug in your creation and watch as your bedroom is bathed in a warm, inviting glow. This DIY light art not only serves as a beautiful decor piece but also provides soft, ambient lighting for a cozy atmosphere.
10. Recycled Pallet Platform Bed
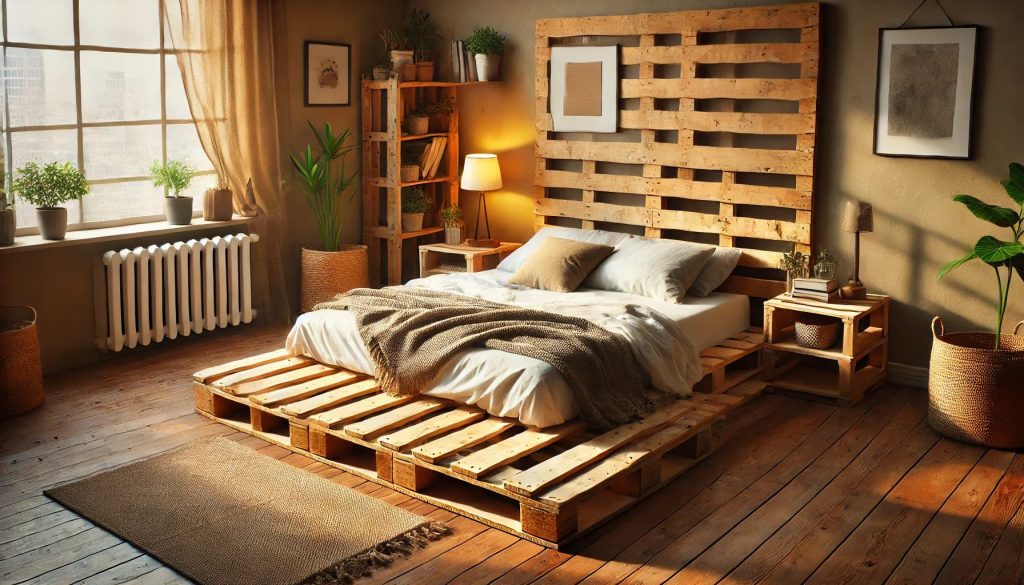
Build an eco-friendly and stylish platform bed using recycled wooden pallets. This project is perfect for those who love a rustic, industrial look and want to reduce their environmental impact. You’ll need several wooden pallets, sandpaper, wood stain or paint, and basic tools to get started.
Begin by thoroughly cleaning and sanding the pallets to remove any rough spots or splinters. Arrange the pallets in the desired configuration for your bed size, stacking them if necessary for added height. Secure the pallets together using screws or brackets. Once your base is stable, apply wood stain or paint to achieve your desired look. For added comfort, place a piece of plywood on top of the pallet base before adding your mattress. This DIY platform bed not only provides a unique sleeping space but also contributes to sustainable living practices.
11. Washi Tape Wall Design
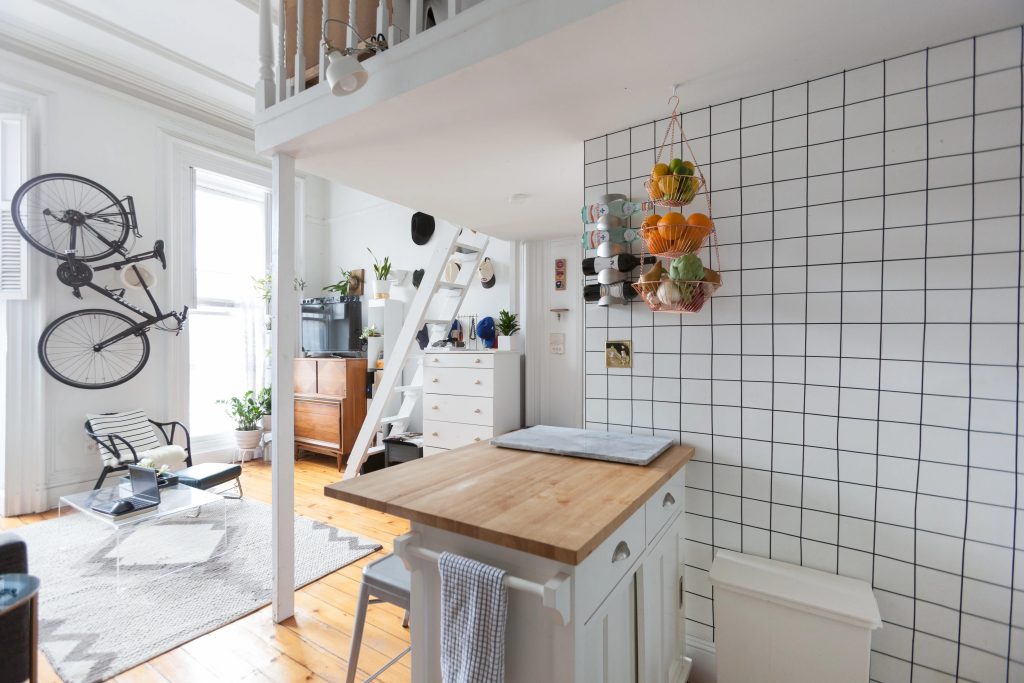
Create a stunning wall design without the commitment of paint using washi tape. This Japanese decorative tape comes in a variety of colors and patterns, allowing for endless creative possibilities. The best part? It’s easily removable, making it perfect for renters or those who like to change up their decor frequently.
Start by planning your design on paper. It could be geometric shapes, a mural-like scene, or abstract patterns. Clean your wall surface thoroughly before beginning. Carefully apply the washi tape according to your design, using a ruler for straight lines if needed. For more intricate designs, consider cutting the tape into smaller pieces. The result is a eye-catching wall feature that can be changed or removed whenever you’re ready for a new look, without damaging your walls.
12. Hanging Plant Display
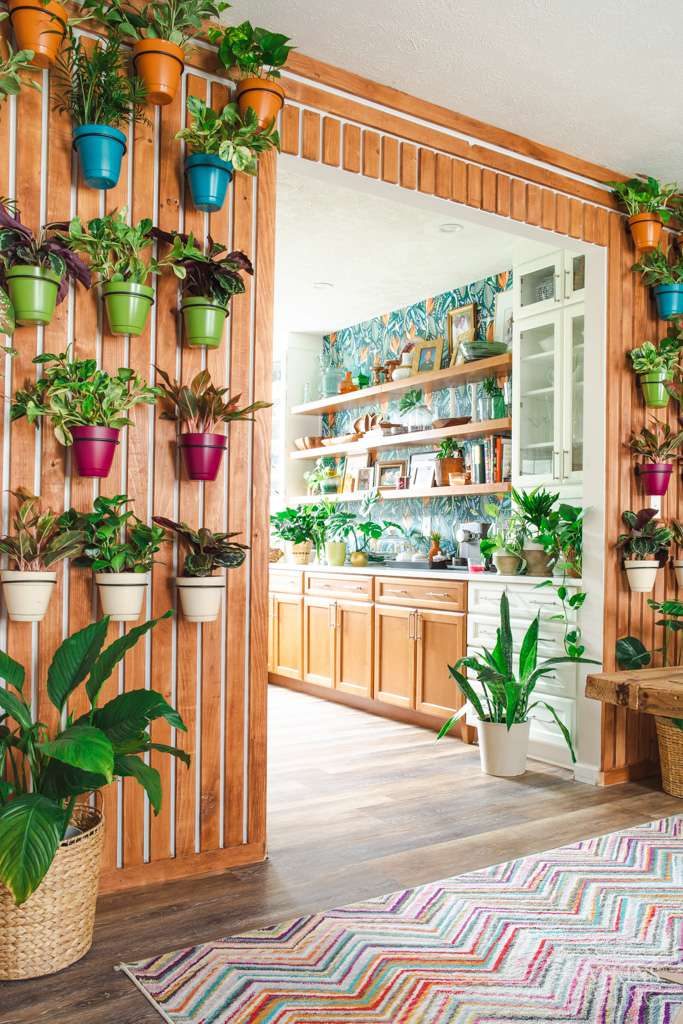
Bring a touch of nature into your bedroom with a DIY hanging plant display. This project not only adds visual interest to your walls but also improves air quality and creates a calming atmosphere. You’ll need sturdy rope or macramé hangers, various plants in lightweight pots, and hooks or a rod for hanging.
Choose plants that thrive in indoor conditions and complement your bedroom’s lighting. Arrange your plants at different heights for a dynamic look. Secure your hanging mechanism to the ceiling or a sturdy rod, ensuring it can support the weight of your plants. Place your potted plants in the hangers and adjust their positions until you achieve a balanced, aesthetically pleasing arrangement. This living wall art will transform your bedroom into a serene, nature-inspired retreat.
13. Repurposed Ladder Bookshelf
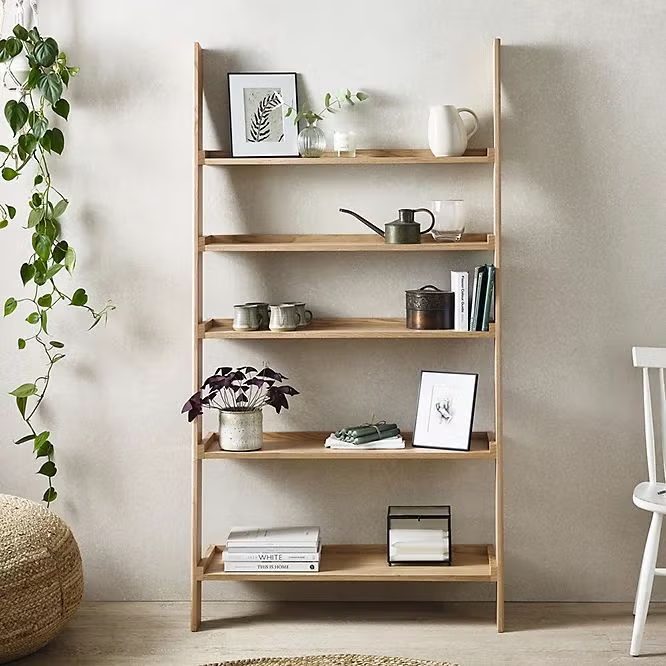
Turn an old wooden ladder into a charming and functional bookshelf. This DIY project adds rustic charm to your bedroom while providing a unique storage solution for books, plants, and decor items. Start by thoroughly cleaning and sanding an old wooden ladder. You can leave it in its natural state for a more rustic look or paint it to match your bedroom’s color scheme.
Lean the ladder against your wall at a slight angle, ensuring it’s stable. For added security, you can attach the top of the ladder to the wall with brackets. Use the ladder rungs as shelves, placing books, small potted plants, and decorative items on each level. For a cozier reading nook, consider adding a small armchair or floor cushions nearby. This repurposed ladder bookshelf not only serves a practical purpose but also adds character and visual interest to your bedroom.
14. Custom Pendant Light
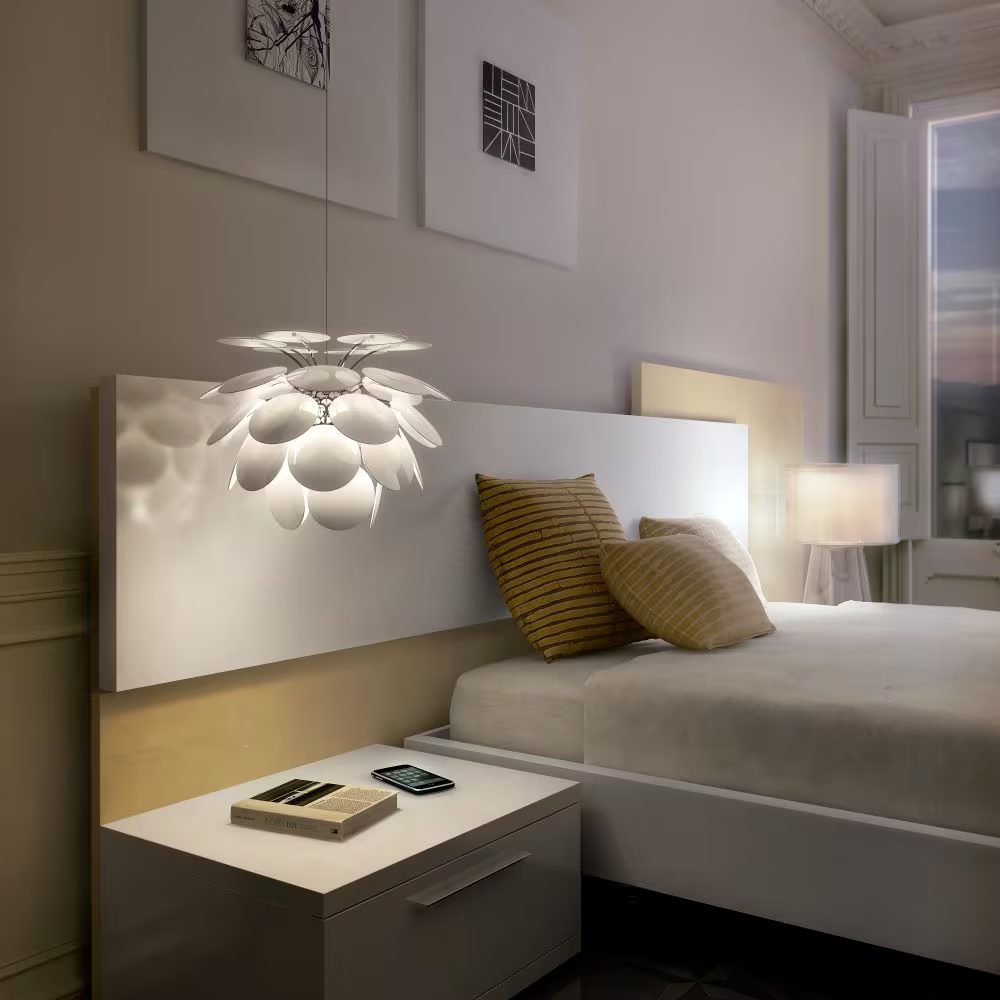
Create a unique focal point in your bedroom with a custom pendant light. This project allows you to design a light fixture that perfectly matches your style and complements your decor. You’ll need a pendant light kit, which includes the electrical components, and materials for the shade, such as woven baskets, paper lanterns, or even repurposed items like colanders or wire baskets.
Start by designing your lampshade. This could involve painting a paper lantern, weaving strips of fabric around a wire frame, or simply cleaning and preparing a found object. Carefully follow the instructions on your pendant light kit to assemble the electrical components. Attach your custom shade to the light fixture, ensuring it’s secure. Finally, hang your creation from the ceiling, making sure to follow proper electrical safety procedures. Your DIY pendant light will not only illuminate your space but also serve as a unique piece of functional art.
15. Fabric Wall Tapestry
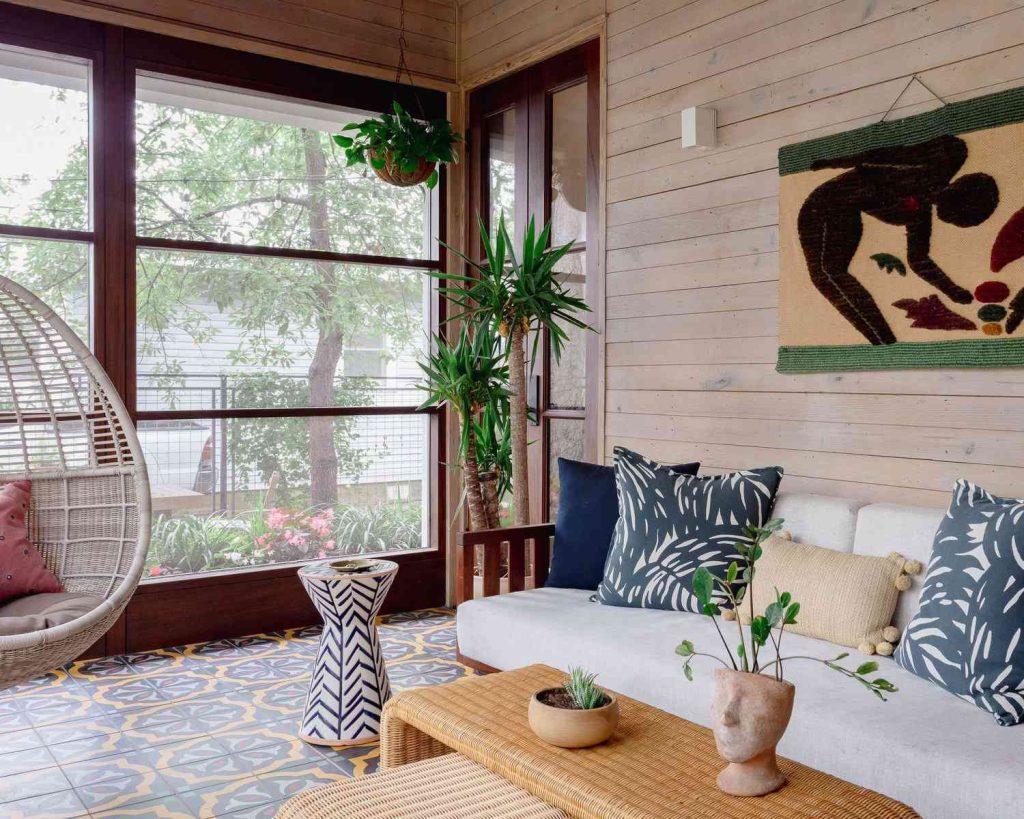
Add warmth and texture to your bedroom walls with a DIY fabric wall tapestry. This project allows you to create a large-scale piece of art that doubles as sound insulation and adds a cozy feel to your space. Choose a fabric that complements your bedroom’s color scheme and reflects your personal style.
To create your tapestry, you’ll need a large piece of fabric, a wooden dowel or rod for hanging, and basic sewing supplies. Hem the edges of your fabric for a clean finish. Create a pocket at the top of the fabric to slide the dowel through for hanging. For added interest, consider embellishing your tapestry with embroidery, appliqué, or fabric paint. Once complete, hang your tapestry on the wall using sturdy hooks or a curtain rod. This oversized textile art will instantly transform your bedroom into a warm, inviting space.
16. Reclaimed Wood Accent Wall
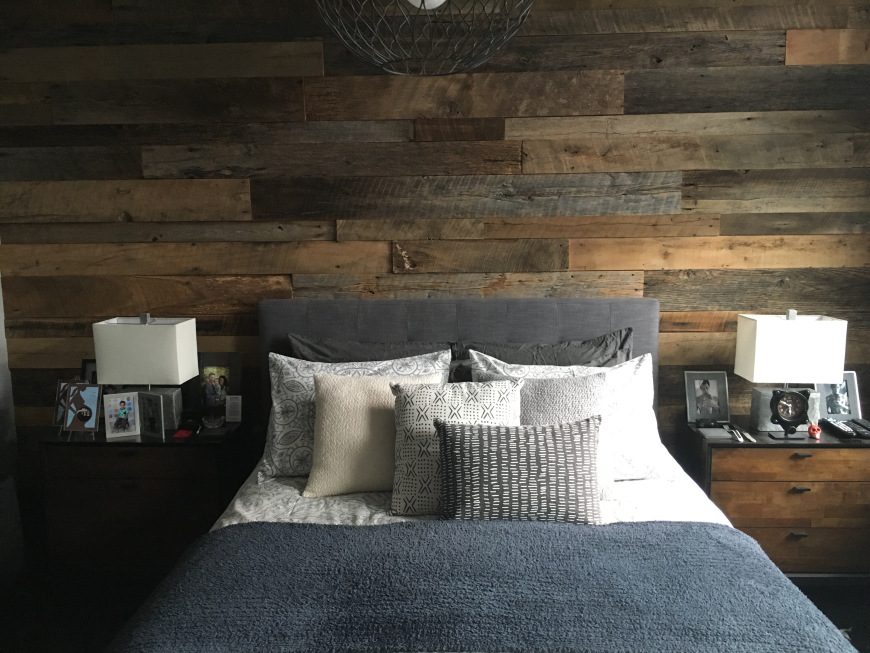
Transform your bedroom with a stunning reclaimed wood accent wall. This project adds texture, warmth, and a touch of rustic charm to your space. Start by sourcing reclaimed wood from local salvage yards, construction sites (with permission), or online marketplaces. Clean the wood thoroughly and sand it to remove any rough spots or splinters.
Before installation, plan your layout on the floor to ensure a balanced mix of colors and textures. Start at the bottom of your wall and work your way up, using a level to keep your rows straight. Secure each board to the wall using a nail gun or screws, making sure to hit the wall studs for stability. Consider leaving some gaps between boards for a more rustic look. Once complete, your reclaimed wood accent wall will serve as a striking focal point in your bedroom, adding character and a sense of history to your space.
Related Guide: 25 Easy Washi Tape Ideas for Wall Décor
17. DIY Upholstered Bench
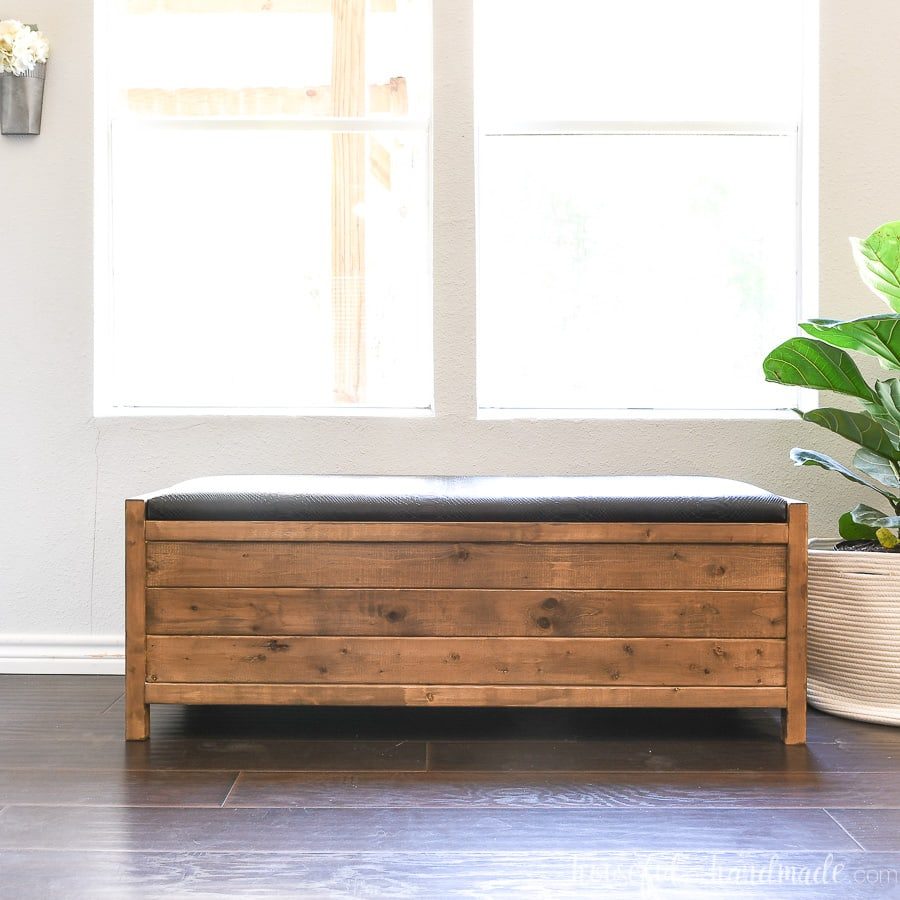
Create a comfortable and stylish seating area at the foot of your bed with a DIY upholstered bench. This project not only adds functionality to your bedroom but also provides an opportunity to incorporate additional colors and textures into your decor. You’ll need a wooden base (which can be built from scratch or repurposed from an existing piece of furniture), foam padding, fabric, and basic upholstery tools.
Start by building or preparing your bench base. Cut foam to size and attach it to the top of the bench using spray adhesive. Cover the foam with a layer of batting for a smoother finish. Next, cut your chosen fabric, allowing extra for wrapping around the edges. Stretch the fabric tightly over the foam and secure it to the underside of the bench using a staple gun.
Pay special attention to corners, folding them neatly for a professional look. Add legs to your bench if desired. Your custom upholstered bench will provide a perfect spot for putting on shoes or displaying decorative pillows and throws.
18. Mason Jar Sconce Lights
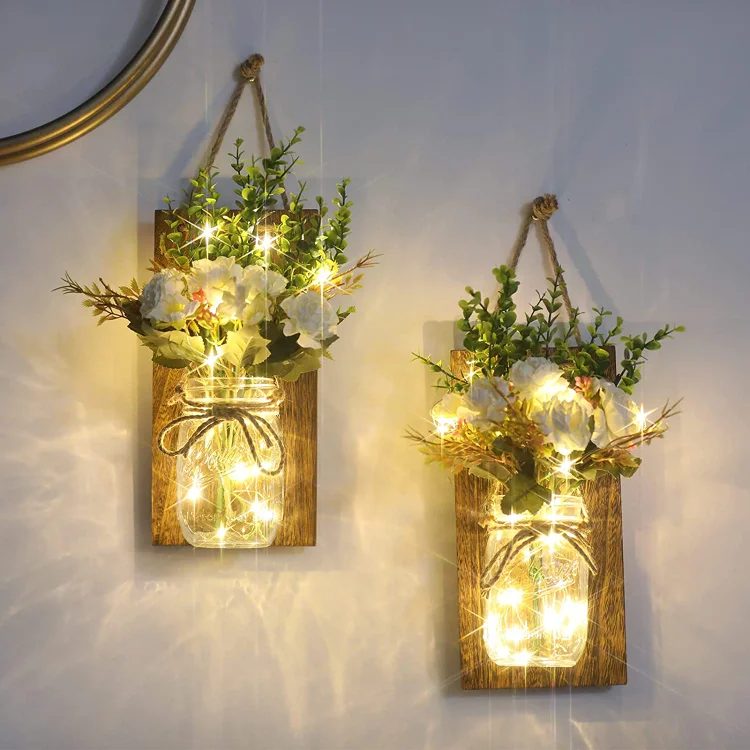
Bring a touch of farmhouse charm to your bedroom with DIY mason jar sconce lights. This project combines rustic elements with modern functionality for a unique lighting solution. You’ll need mason jars, wooden boards, pipe fittings for mounting, and basic electrical supplies including sconce light kits.
Start by staining or painting your wooden boards to match your decor. Attach pipe fittings to the boards to create a mount for your mason jars. Wire your sconce light kits according to the manufacturer’s instructions, ensuring all electrical connections are secure and safe. Place the light bulbs inside the mason jars and attach the jars to the pipe fittings. Mount your completed sconces on the wall, making sure they’re securely fastened. These charming mason jar lights will add a warm, cozy glow to your bedroom while showcasing your DIY skills.
19. Painted Floor Mandala
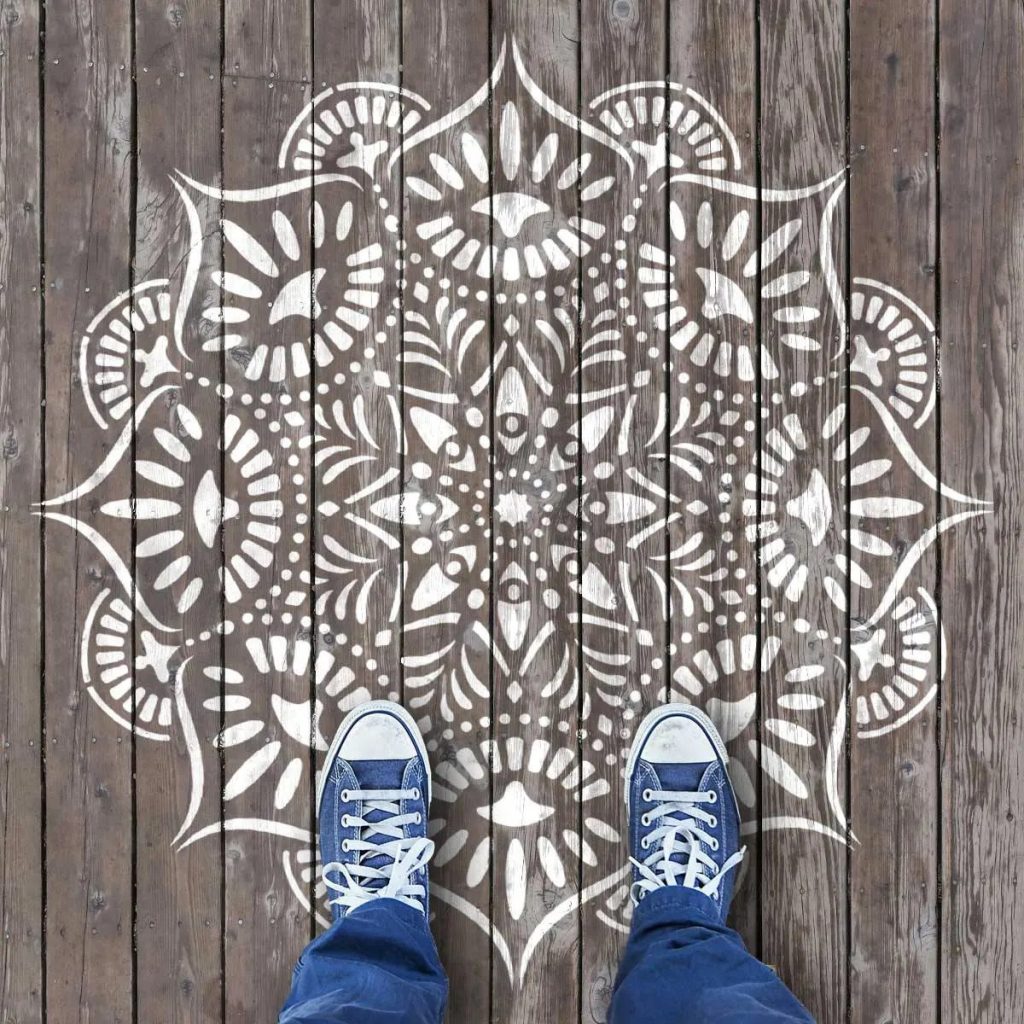
Transform your bedroom floor into a work of art with a painted mandala. This project is perfect for wooden or concrete floors and can add a bohemian touch to your space. You’ll need floor paint in your chosen colors, painter’s tape, and stencils or a compass for creating circular shapes.
Begin by thoroughly cleaning your floor and applying a base coat of paint if desired. Use a compass or large circular objects to trace the basic shape of your mandala. Then, use painter’s tape to section off areas for different colors. Paint each section, allowing it to dry completely before moving on to the next.
For more intricate designs, use stencils or freehand your patterns. Once your mandala is complete, apply a clear sealant to protect your artwork. This painted floor mandala will serve as a stunning focal point in your bedroom, adding color and personality to your space from the ground up.
20. Fabric-Covered Closet Doors
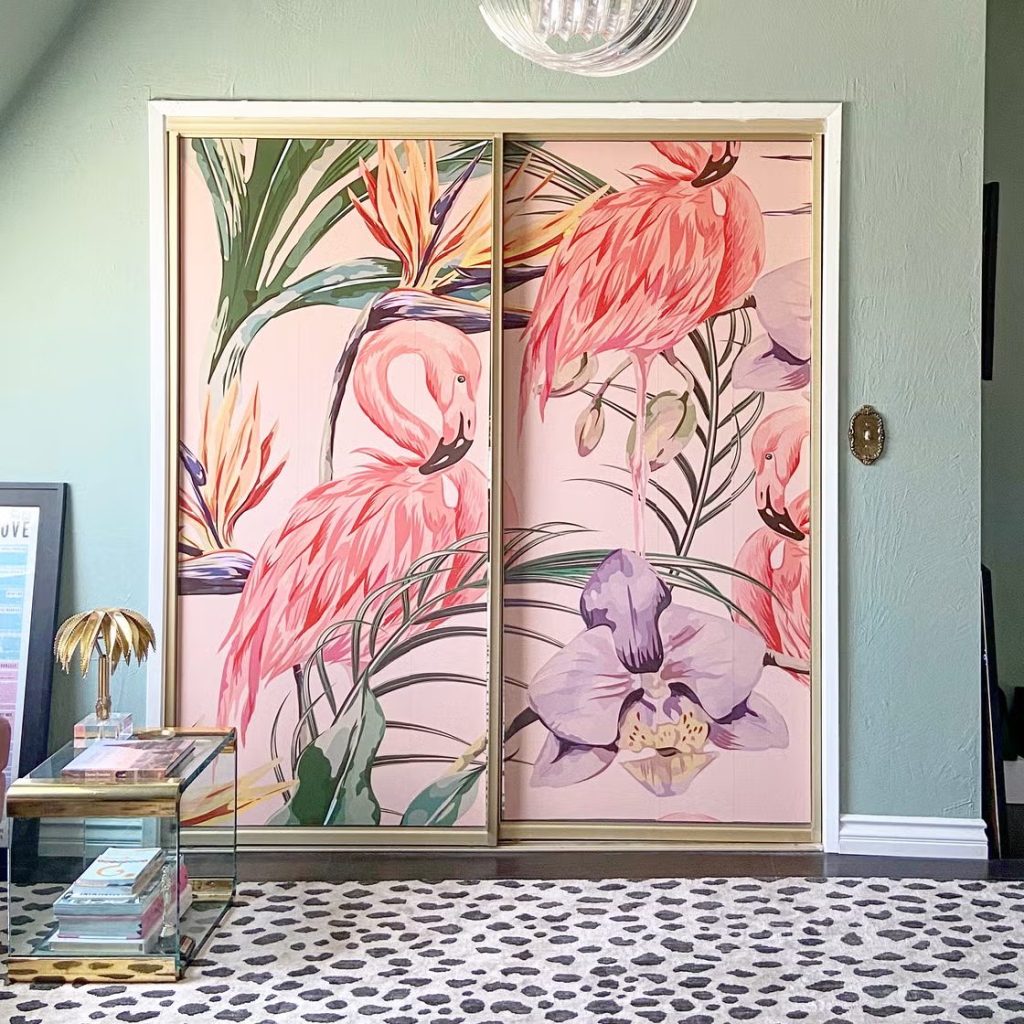
Give your bedroom closet doors a soft, stylish update with a fabric covering. This project is perfect for renters or those looking for a temporary change, as it’s easily reversible. Choose a fabric that complements your bedroom decor and adds visual interest to your space.
Start by measuring your closet doors and cutting your fabric to size, allowing extra for wrapping around the edges. Clean the doors thoroughly and apply a layer of spray adhesive. Carefully position your fabric on the door, smoothing out any wrinkles or bubbles as you go. Wrap the excess fabric around the edges of the door and secure it with a staple gun or strong tape.
For a more polished look, consider adding decorative trim around the edges of the door to hide the fabric edges. This fabric-covered closet door makeover not only adds a soft touch to your bedroom but also allows you to easily change up your decor by swapping out the fabric when you’re ready for a new look.
21. Wooden Slat Accent Wall
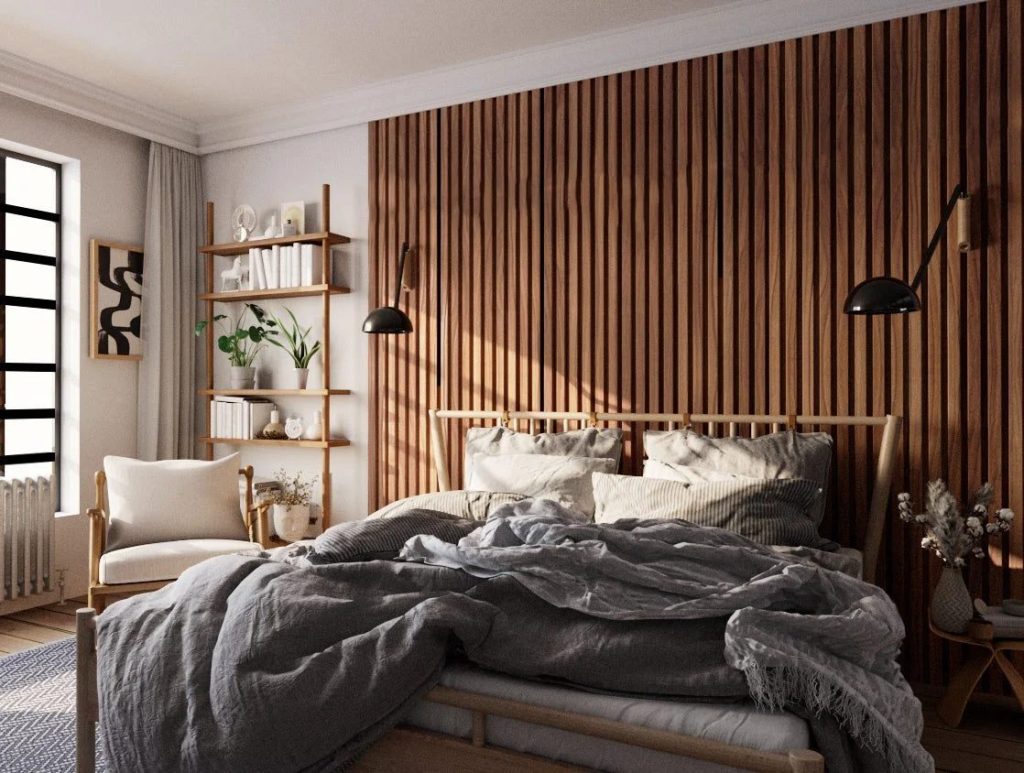
Create a sleek, modern accent wall using wooden slats. This project adds depth and texture to your bedroom while maintaining a clean, contemporary aesthetic. You’ll need thin wooden boards, a saw, wood stain or paint, and mounting materials such as construction adhesive and a nail gun.
Begin by planning your design. You can create a uniform pattern or play with different widths and spacing for a more dynamic look. Cut your wooden boards to size and sand them smooth. Apply wood stain or paint to achieve your desired finish.
Starting at one end of your wall, attach the slats using construction adhesive and secure them with a nail gun. Be sure to use a level frequently to ensure straight lines. This wooden slat accent wall will add architectural interest to your bedroom and create a stunning backdrop for your bed or other furniture.
22. Rope-Wrapped Mirror Frame
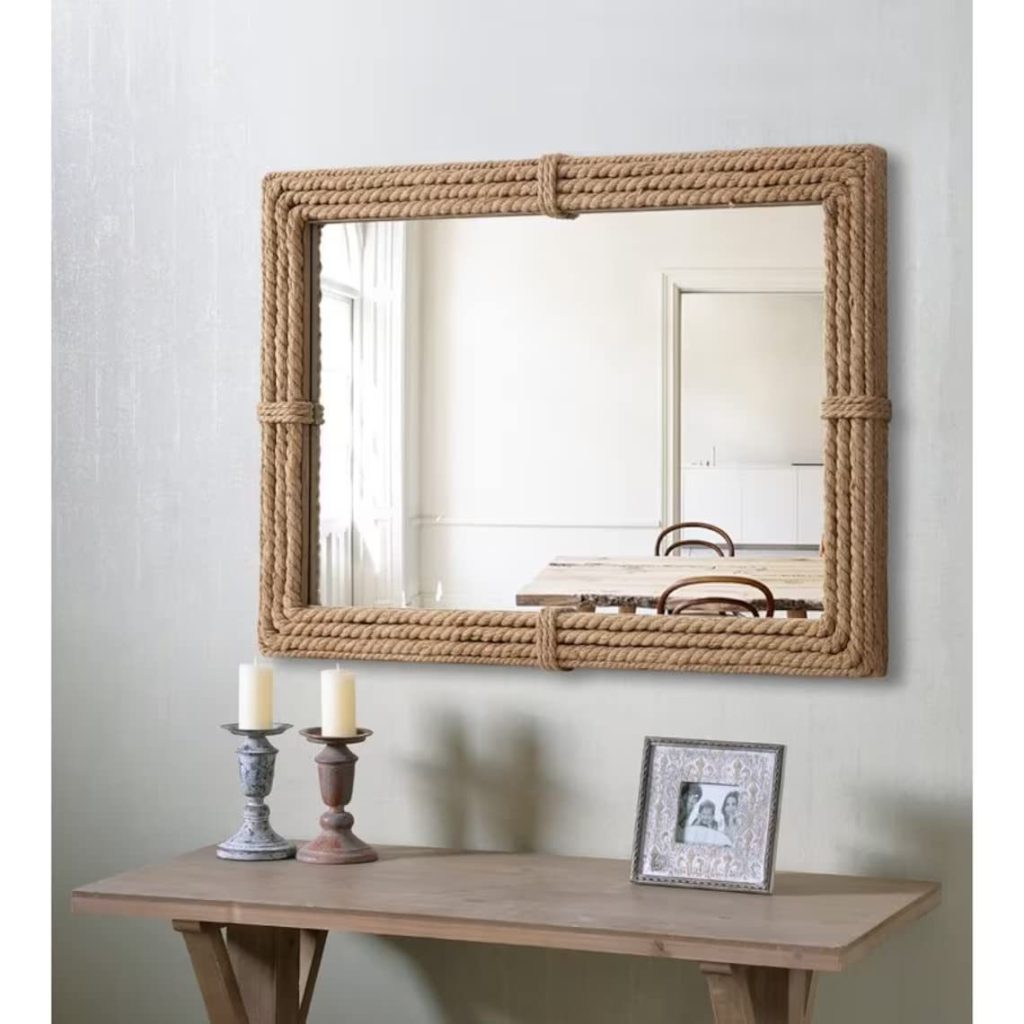
Give a plain mirror a coastal makeover by wrapping its frame with rope. This DIY project adds texture and a nautical touch to your bedroom decor. You’ll need a mirror with a wide, flat frame, thick rope, and a hot glue gun.
Start by cleaning your mirror frame thoroughly. Beginning at one corner, apply a line of hot glue and press the end of the rope into it. Continue wrapping the rope tightly around the frame, applying glue every few inches to secure it.
When you reach a corner, carefully bend the rope to maintain a neat edge. Once you’ve covered the entire frame, cut the rope and glue down the end securely. Your rope-wrapped mirror will add a beachy, relaxed vibe to your bedroom and can be customized with different types of rope or even painted for a more colorful look.
23. Vintage Suitcase Nightstand
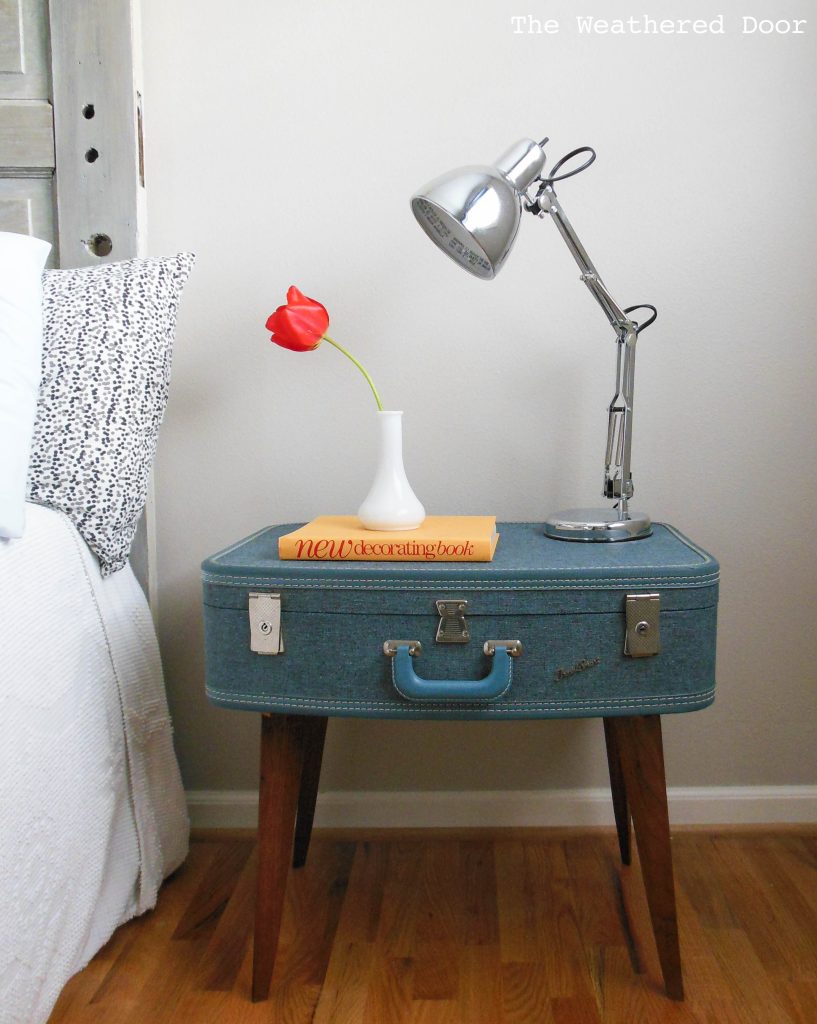
Repurpose a vintage suitcase into a unique and functional nightstand. This project not only provides bedside storage but also adds a whimsical, travel-inspired touch to your bedroom. Look for a sturdy vintage suitcase at thrift stores or flea markets.
Clean the suitcase thoroughly, inside and out. If desired, line the interior with attractive fabric for a finished look. To create legs for your nightstand, you can use hairpin legs, wooden furniture legs, or even stack two suitcases for added height and storage.
Secure the legs to the bottom of the suitcase using screws or strong adhesive. For a final touch, you might add a glass top to create a smooth surface for placing items. This vintage suitcase nightstand serves as both a practical piece of furniture and a conversation starter.
24. Woven Wall Hanging
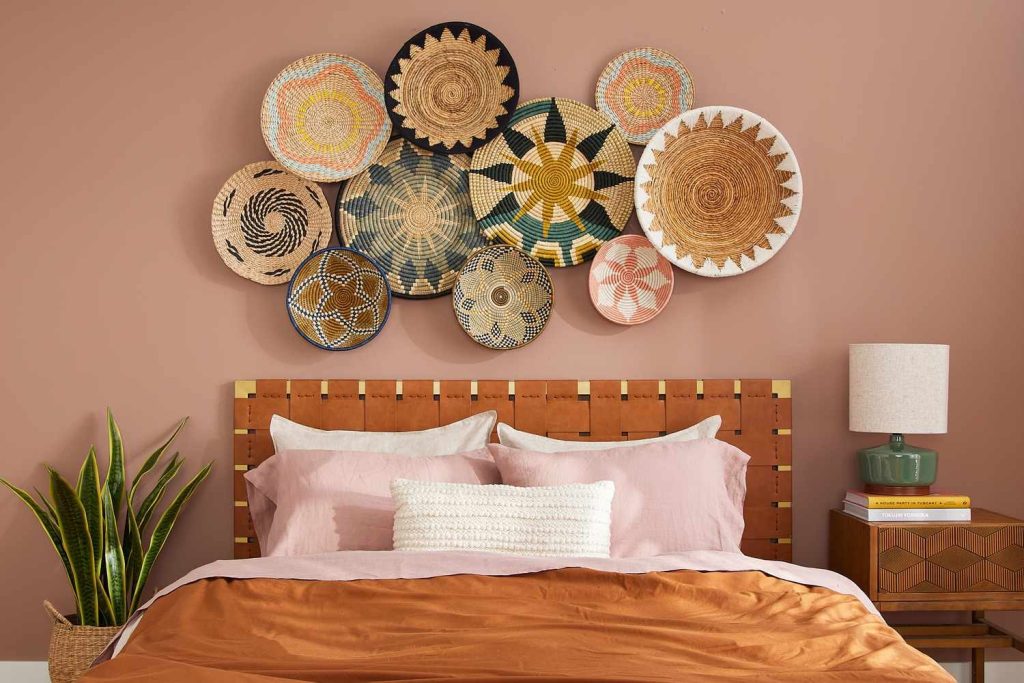
Create a beautiful, textured wall hanging using basic weaving techniques. This DIY project allows you to incorporate your favorite colors and textures into a unique piece of art for your bedroom. You’ll need a wooden dowel, yarn in various colors and textures, and a large-eye needle.
Start by cutting several long strands of yarn and tying them to your dowel to create the warp (vertical strings). Then, using your needle, weave different colors and textures of yarn horizontally through the warp strings.
Experiment with different weaving patterns and incorporate elements like tassels or beads for added interest. Once your weaving is complete, trim any loose ends and hang your creation on the wall. This woven wall hanging adds a soft, bohemian touch to your bedroom and showcases your crafting skills.
25. Faux Brick Wall Panels
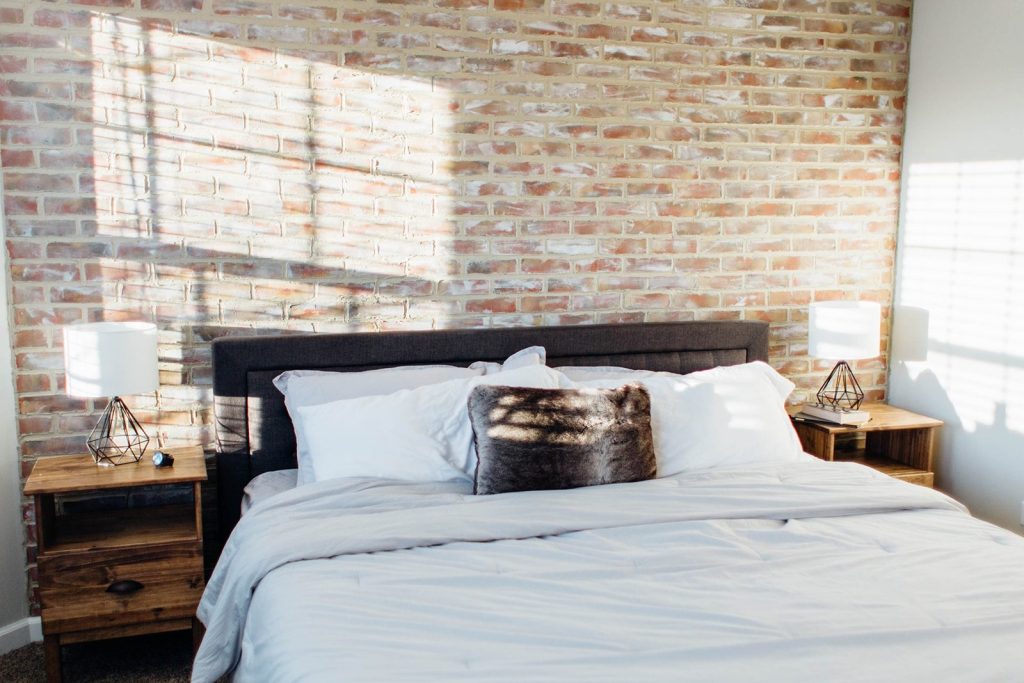
Transform a plain wall in your bedroom into a trendy exposed brick feature using faux brick panels. This project gives you the look of a converted loft or industrial space without the mess and expense of real brickwork. You’ll need faux brick panels (available at most home improvement stores), construction adhesive, a saw for cutting, and paint if you want to customize the color.
Measure your wall and cut the panels to fit, allowing for outlets and switches. Apply construction adhesive to the back of each panel and press firmly against the wall, using a level to ensure straight installation.
Once all panels are in place, you can paint them to achieve your desired brick color or leave them as is for a more natural look. Finish by caulking any seams between panels for a seamless appearance. This faux brick wall adds texture and urban sophistication to your bedroom, creating a stunning backdrop for your decor.
Conclusion
Transforming your bedroom doesn’t have to be an expensive or daunting task. With these 25 DIY ideas, you can create a personalized, stylish space that reflects your unique taste and personality.
From simple decor updates like washi tape designs and fabric-covered cork boards to more ambitious projects like building your own platform bed or creating a wooden slat accent wall, there’s a project for every skill level and style preference.
Remember, the key to successful DIY is patience and creativity. Don’t be afraid to put your own spin on these ideas and make them truly your own. With a little effort and imagination, you can turn your bedroom into a cozy, inspiring retreat that you’ll love spending time in. Happy crafting!

