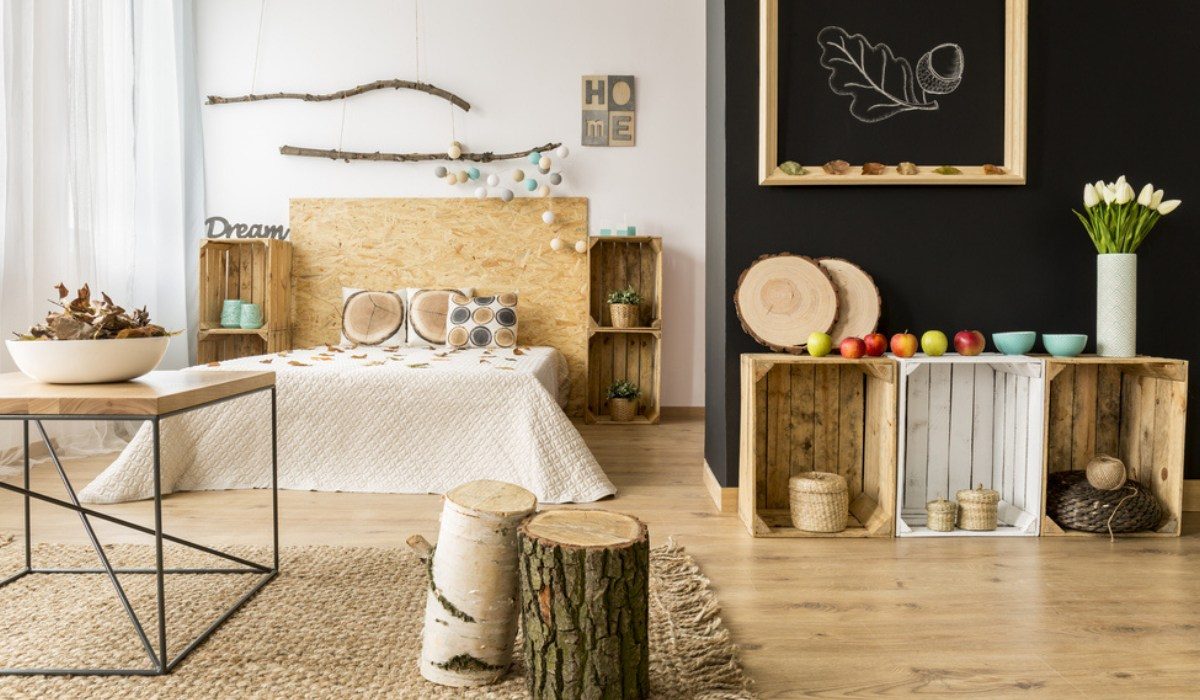
Home is where the heart is, and there’s no better way to make your living space truly yours than by adorning it with personal touches. DIY home decor projects offer a unique opportunity to express your creativity, save money, and develop new skills.
Whether you’re a first-time homeowner, a renter looking to add some personality to your space, or simply someone who loves crafting, this comprehensive guide to 90 DIY home decor projects for beginners will inspire and empower you to transform your living environment.
Embarking on DIY projects can seem daunting at first, but fear not! Each project in this article has been carefully selected with beginners in mind. You’ll find a wide range of difficulty levels, from quick and easy tasks that can be completed in an afternoon to more involved projects that might take a weekend or two.
The best part? Most of these projects require minimal tools and materials, many of which you might already have lying around your home.
As you dive into these projects, remember that DIY is all about the journey. Don’t be afraid to make mistakes – they’re part of the learning process and often lead to happy accidents that make your creations truly unique. Embrace imperfections and let your personality shine through in every piece you create.
This guide is organized into several categories to help you find projects that suit your needs and interests. From wall art and furniture makeovers to storage solutions and seasonal decor, there’s something for every room and every taste. We’ll start with simpler projects and gradually move to more complex ones, allowing you to build your skills and confidence along the way.
DIY Home Decor Projects for Beginners
So, roll up your sleeves, gather your supplies, and get ready to embark on a creative adventure that will transform your living space into a personalized haven. Let’s dive into our first set of DIY home decor projects for beginners!
Wall Art and Decor
1. Abstract Canvas Painting
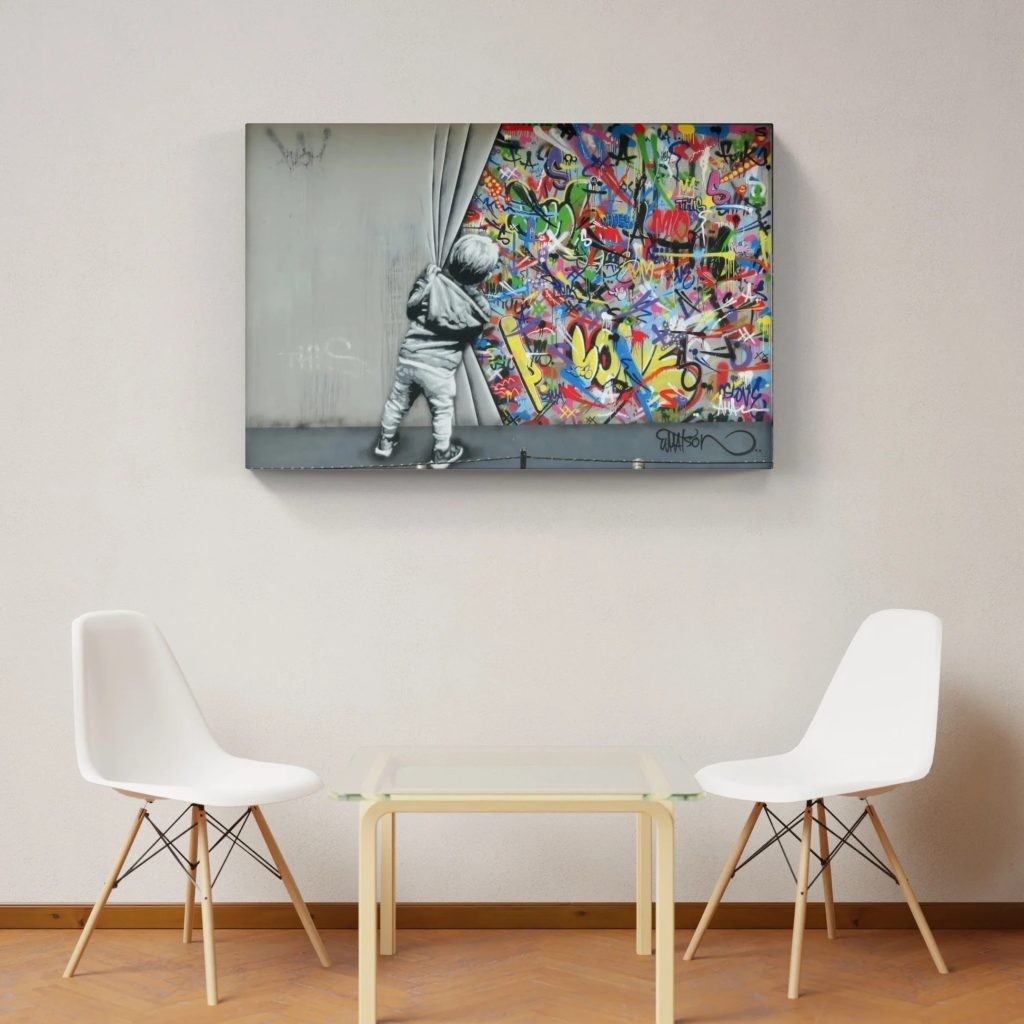
Transform a blank canvas into a stunning piece of abstract art using acrylic paints. This project is perfect for beginners because there’s no need for precise brushwork or realistic depictions. Simply choose a color palette that complements your room and let your creativity flow.
Start by applying a base coat to your canvas, then use various techniques like splattering, dripping, or blending to create an eye-catching abstract design. Don’t be afraid to experiment with different tools like sponges, palette knives, or even your fingers to achieve unique textures and patterns.
2. Framed Fabric Wall Art
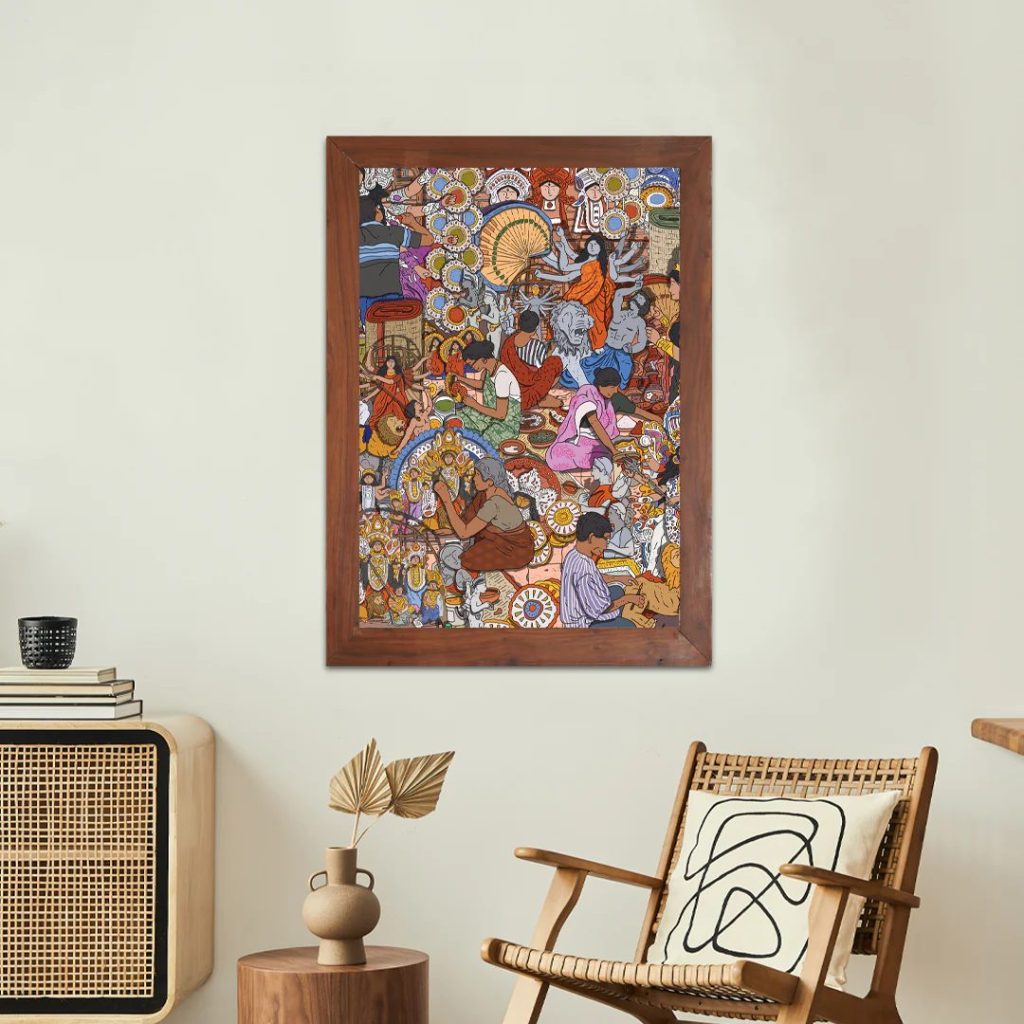
Create elegant wall art by framing your favorite fabric swatches. This project is incredibly simple yet yields impressive results. Choose fabrics with patterns or textures that appeal to you and complement your room’s color scheme.
Stretch the fabric over a piece of cardboard cut to fit your frame, securing it with tape or a staple gun. Then, simply place the fabric-covered cardboard into the frame. This project allows you to easily switch out fabrics to update your decor seasonally or as your tastes change.
3. DIY Woven Wall Hanging
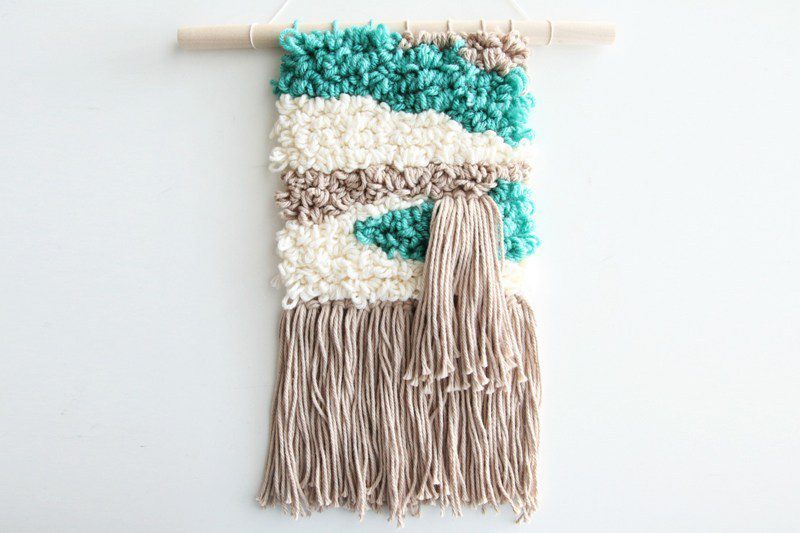
Embrace the boho-chic trend with a handmade woven wall hanging. You’ll need a wooden dowel, yarn in various colors and textures, and a large-eye needle. Start by cutting your yarn into long strands and draping them over the dowel.
Then, use basic weaving techniques to create patterns and textures. Incorporate different colors and even small objects like beads or feathers for added interest. This project is not only relaxing but also highly customizable to suit your personal style.
4. Photo Collage Wall
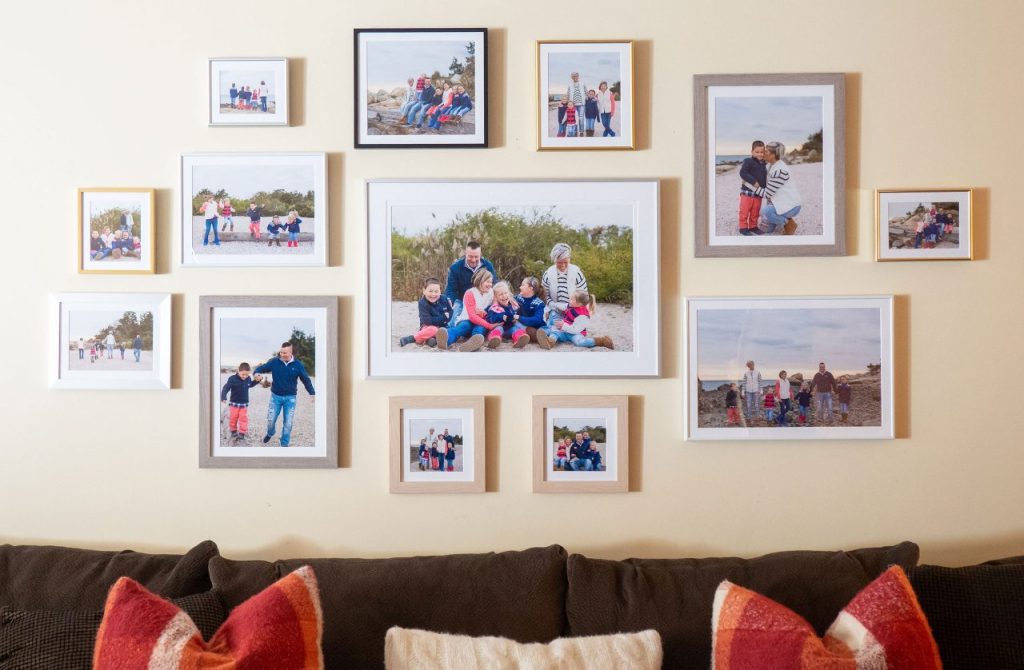
Turn your favorite memories into a striking wall display. Print out a selection of photos in various sizes and arrange them on a large piece of kraft paper or cardboard to create a pleasing composition.
Once you’re happy with the layout, transfer the photos onto your wall using removable adhesive strips or washi tape. This project allows you to easily update your display over time and is perfect for renters who can’t make permanent changes to their walls.
5. Geometric Wall Art with Washi Tape
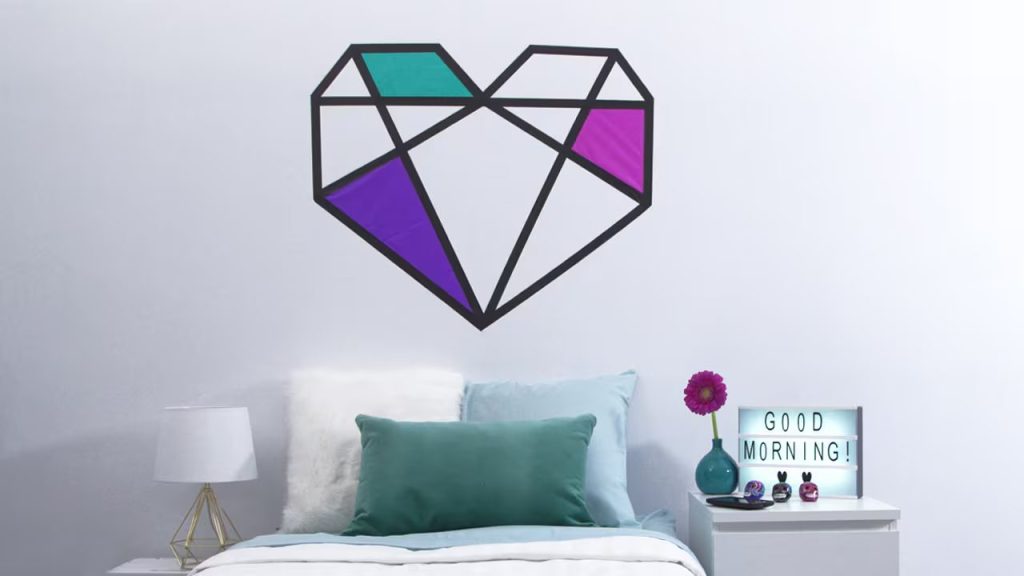
Create eye-catching geometric patterns on your walls using colorful washi tape. This temporary decor solution is perfect for those who like to change up their space frequently. Plan out your design on paper first, then use a level and pencil to lightly mark guidelines on your wall.
Carefully apply the washi tape along these lines to create your geometric pattern. The possibilities are endless – from simple stripes and triangles to more complex designs like honeycombs or starbursts.
Upcycled and Repurposed Decor
6. Mason Jar Organizers
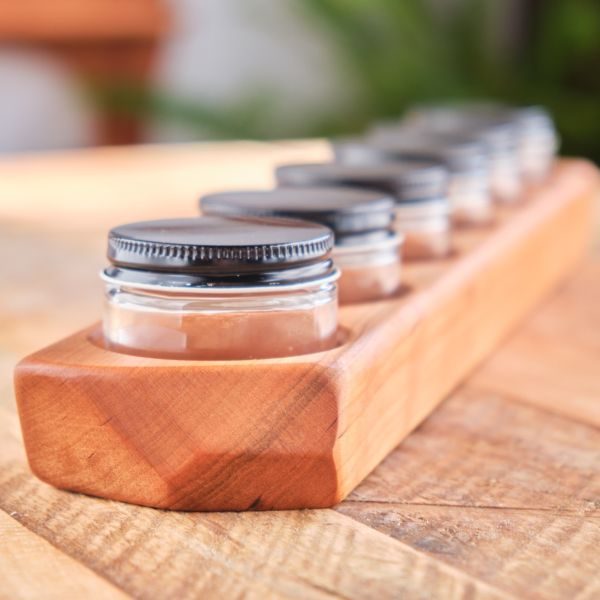
Give new life to old mason jars by turning them into stylish organizers for your bathroom, office, or craft room. Clean the jars thoroughly and remove any labels. You can paint the jars with chalk paint for a rustic look or leave them clear for a more modern aesthetic.
Attach the jar lids to a wooden board using strong adhesive or screws, then screw the jars onto the lids. Mount the board on your wall for instant, customizable storage that doubles as decor.
7. Vintage Suitcase Side Table
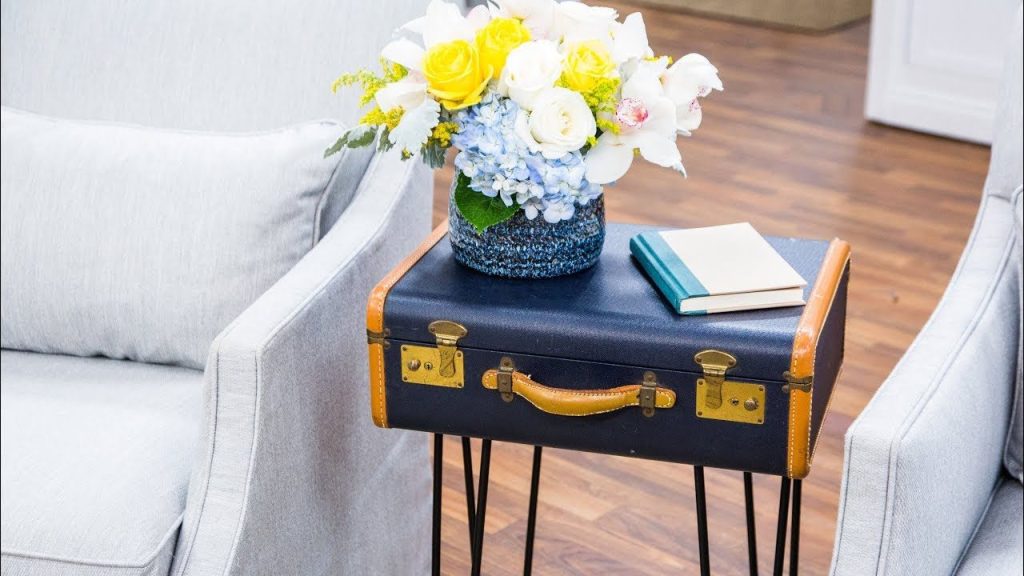
Transform an old suitcase into a unique side table with character. Find sturdy wooden or metal legs (you can often find these at hardware stores or online) and attach them to the bottom of a vintage suitcase using strong brackets and screws.
Make sure the suitcase is secure and level before use. This project not only creates a one-of-a-kind piece of furniture but also provides hidden storage inside the suitcase.
8. Book Page Wreath
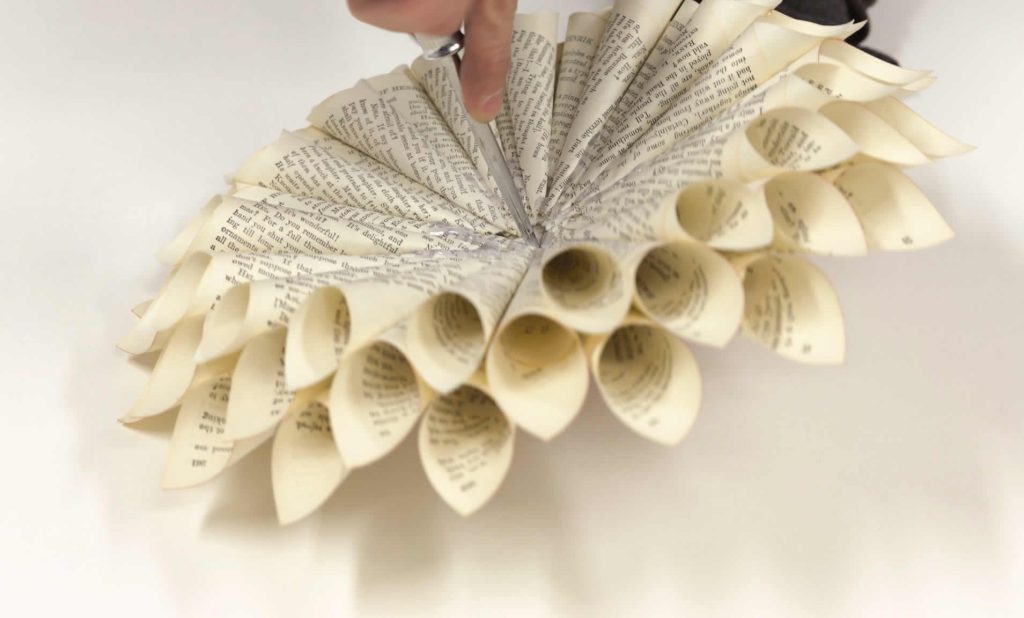
Create a literary-inspired wreath using pages from an old book. (Pro tip: Use a book that’s beyond repair to avoid damaging one that could still be read.) Roll individual pages into cones and secure them with glue.
Attach these cones to a circular wreath form, starting from the outer edge and working your way in. Layer the cones to create a full, textured look. This wreath makes a beautiful addition to any book lover’s home and can be customized with different paper types or even sheet music.
9. Tin Can Planters
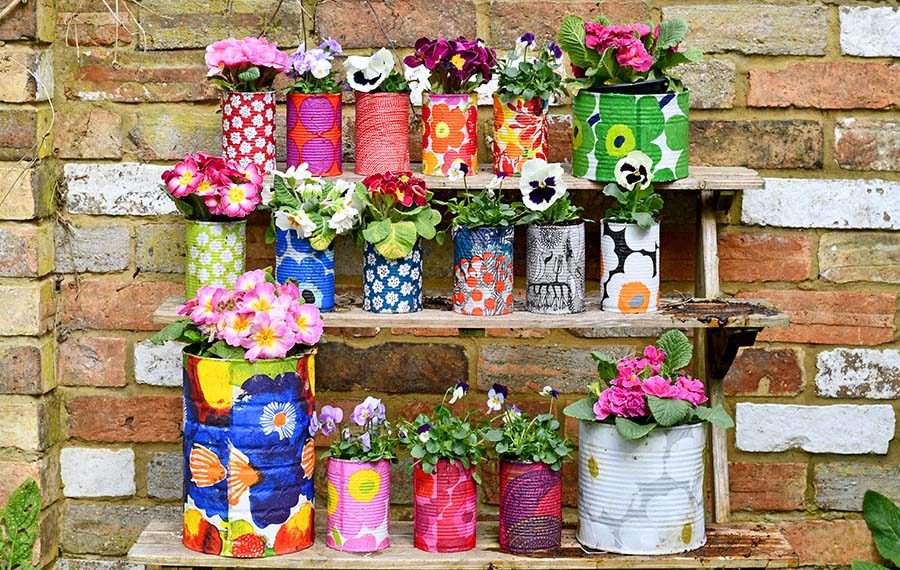
Breathe new life into empty tin cans by turning them into charming planters. Clean the cans thoroughly and remove any labels. Use a hammer and nail to punch drainage holes in the bottom.
Paint the cans in colors that complement your decor, or wrap them in twine or fabric for added texture. Fill with soil and your favorite small plants or herbs. These planters are perfect for windowsills or can be hung using macramé plant hangers for a bohemian touch.
10. Wine Cork Bulletin Board
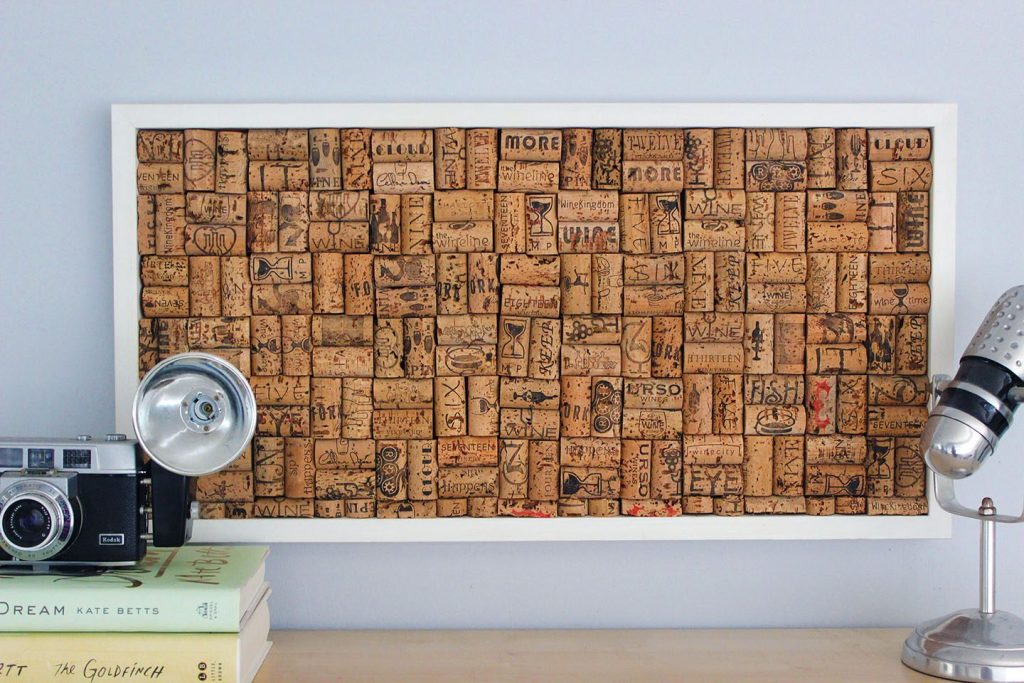
Put those saved wine corks to good use by creating a functional and decorative bulletin board. Start with a picture frame or a shallow shadowbox. Arrange the corks in a single layer inside the frame, gluing them in place. You may need to cut some corks to fit around the edges.
Once the glue is dry, your cork board is ready to use. This project not only recycles materials but also creates a conversation piece that’s perfect for displaying photos, notes, or small mementos.
Textiles and Soft Furnishings
11. No-Sew Pillow Covers
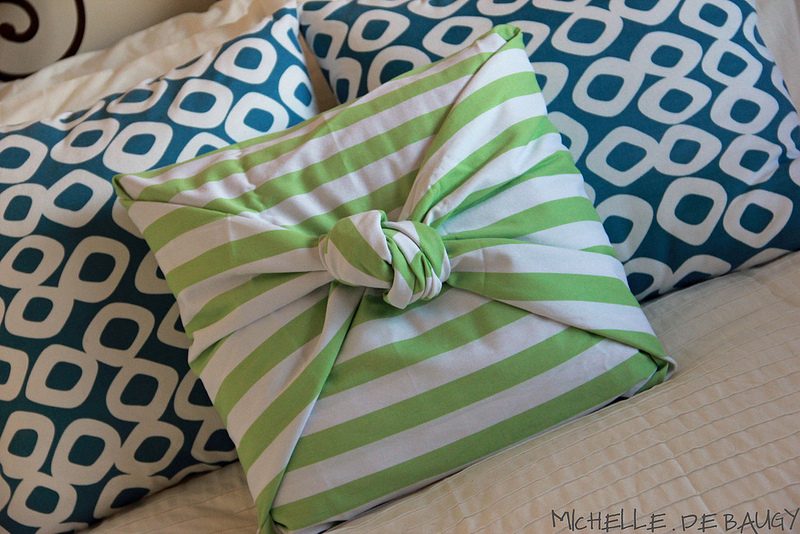
Update your throw pillows without touching a sewing machine. Choose a fabric that complements your decor and measure it to fit your pillow insert, adding an extra inch on all sides for seams. Fold the edges over and secure them with fabric glue or iron-on hemming tape. Leave one side open, insert your pillow, then close the final edge. This project allows you to easily change your pillow covers seasonally or whenever you want to refresh your space.
12. Dip-Dyed Curtains
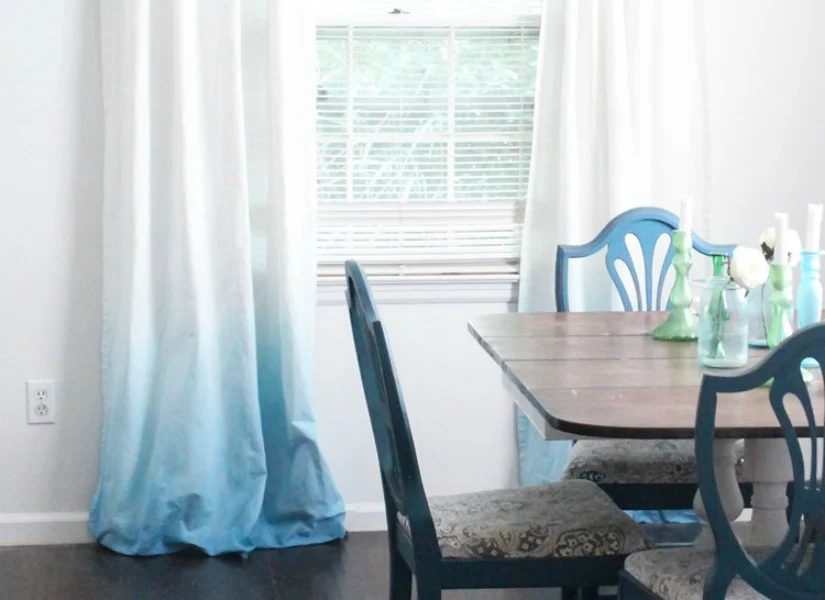
Give plain curtains a colorful upgrade with this simple dip-dye technique. Choose a fabric dye in a color that complements your room. Prepare the dye according to package instructions in a large bucket or tub.
Dip the bottom portion of your curtains into the dye, leaving them submerged for longer at the very bottom and gradually less time as you move up. This creates an ombre effect. Rinse until the water runs clear, then hang to dry. The result is a custom look that adds a pop of color to your windows.
13. Macramé Plant Hanger
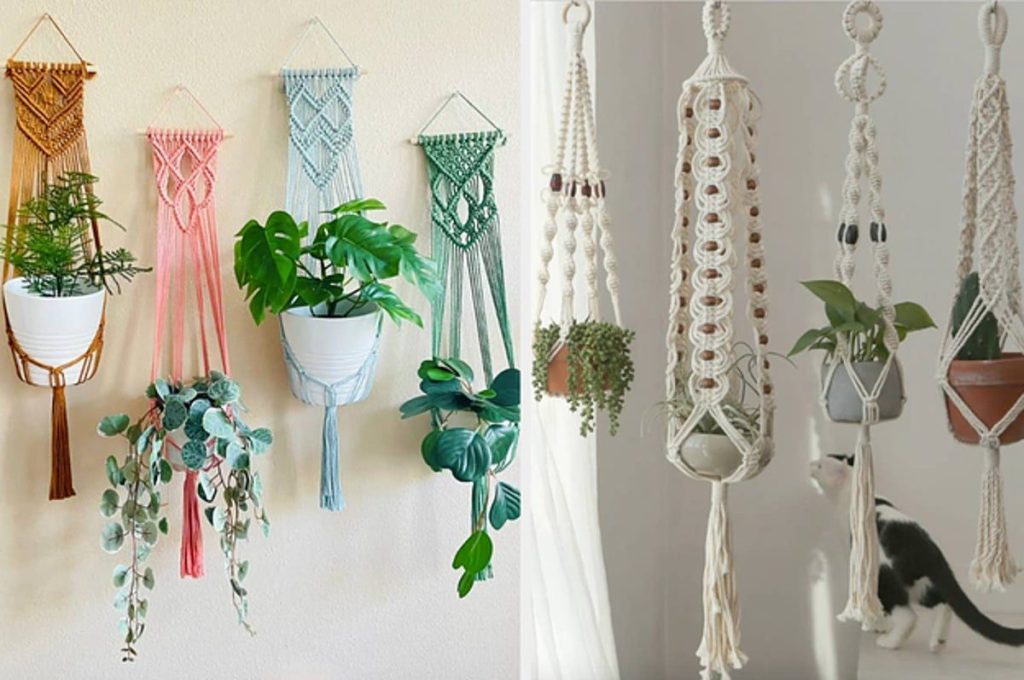
Embrace the resurgence of macramé with this beginner-friendly plant hanger project. You’ll need macramé cord and a wooden or metal ring. Start by cutting several long pieces of cord and folding them in half over the ring.
Use basic macramé knots (square knots and half-hitch knots are great for beginners) to create a netted pattern that will hold your plant pot. Finish with a gather knot at the bottom. This project not only adds a boho touch to your decor but also helps you make use of vertical space for your plants.
14. Pom-Pom Throw Blanket
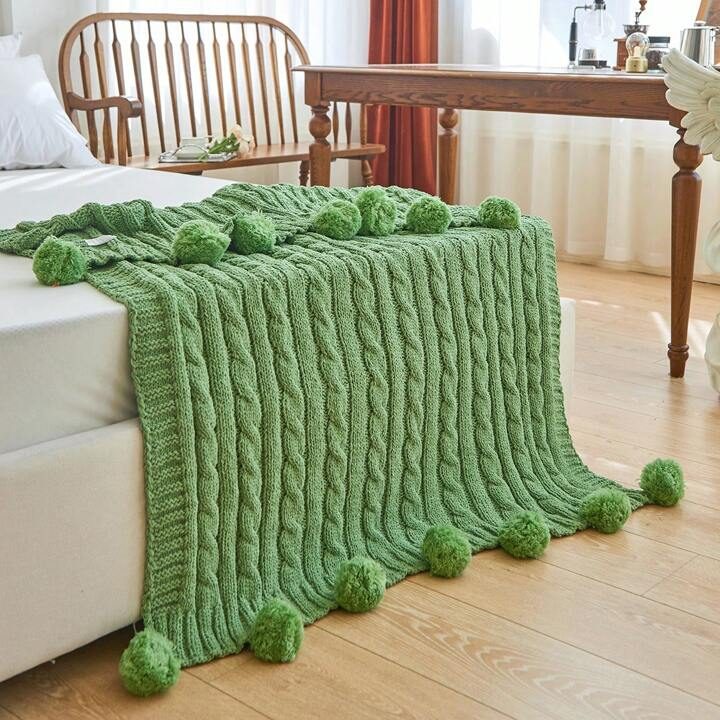
Add a playful touch to a plain throw blanket by adorning it with colorful pom-poms. You can make pom-poms using yarn and a pom-pom maker, or purchase pre-made ones. Choose colors that complement or contrast with your blanket.
Arrange the pom-poms on the blanket in a pattern of your choice – along the edges, in the corners, or scattered throughout. Secure each pom-pom with strong fabric glue or by sewing them on. This simple addition transforms a basic blanket into a custom piece that adds texture and whimsy to your space.
15. Fabric-Covered Lampshade
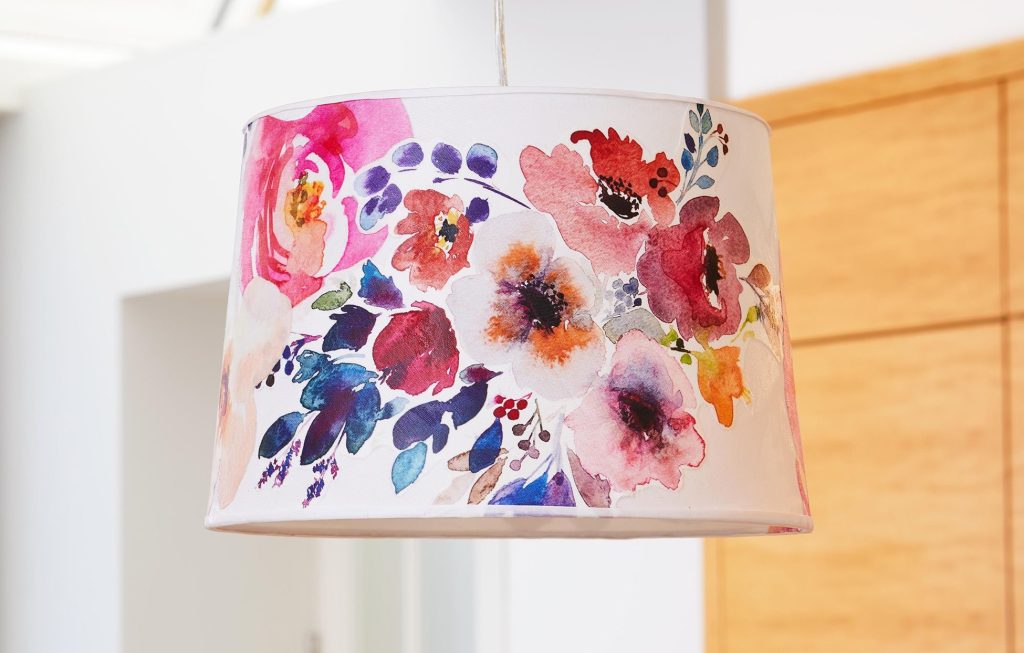
Revitalize an old lampshade with your favorite fabric. Measure the circumference and height of your lampshade, then cut your fabric to size, adding an extra inch on all sides. Apply fabric glue to the lampshade, carefully smoothing the fabric over it to avoid wrinkles.
Fold the excess fabric over the edges and glue in place. For a neat finish, use ribbon or trim to cover the top and bottom edges. This project allows you to perfectly match your lampshade to your decor or create a statement piece with bold patterns or colors.
Storage and Organization
16. Rope Basket
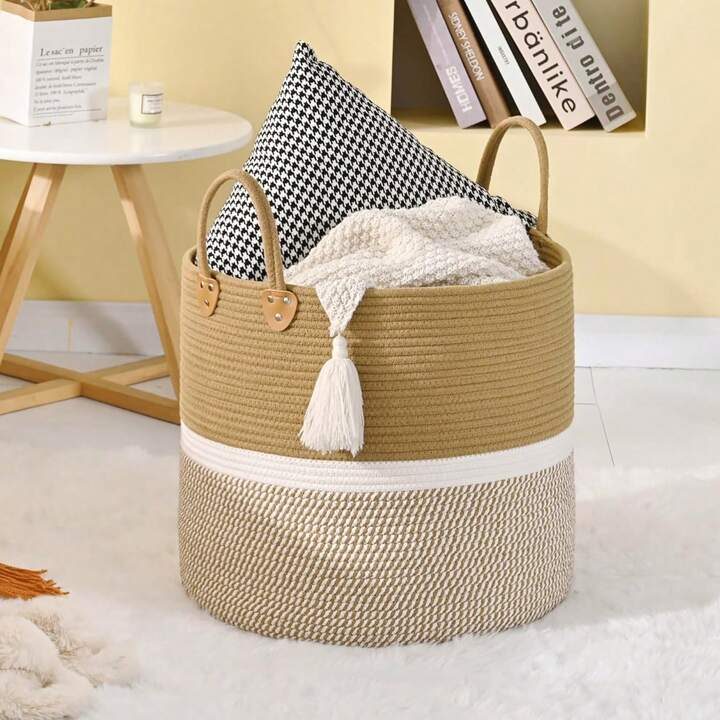
Create a stylish and functional storage solution with a DIY rope basket. You’ll need thick cotton rope, a sewing machine with a zigzag stitch, and thread that matches your rope. Start by coiling the rope into a spiral and sewing it together, gradually building up the sides as you go. This project not only provides practical storage but also adds a rustic, handmade touch to any room.
17. Floating Shelves
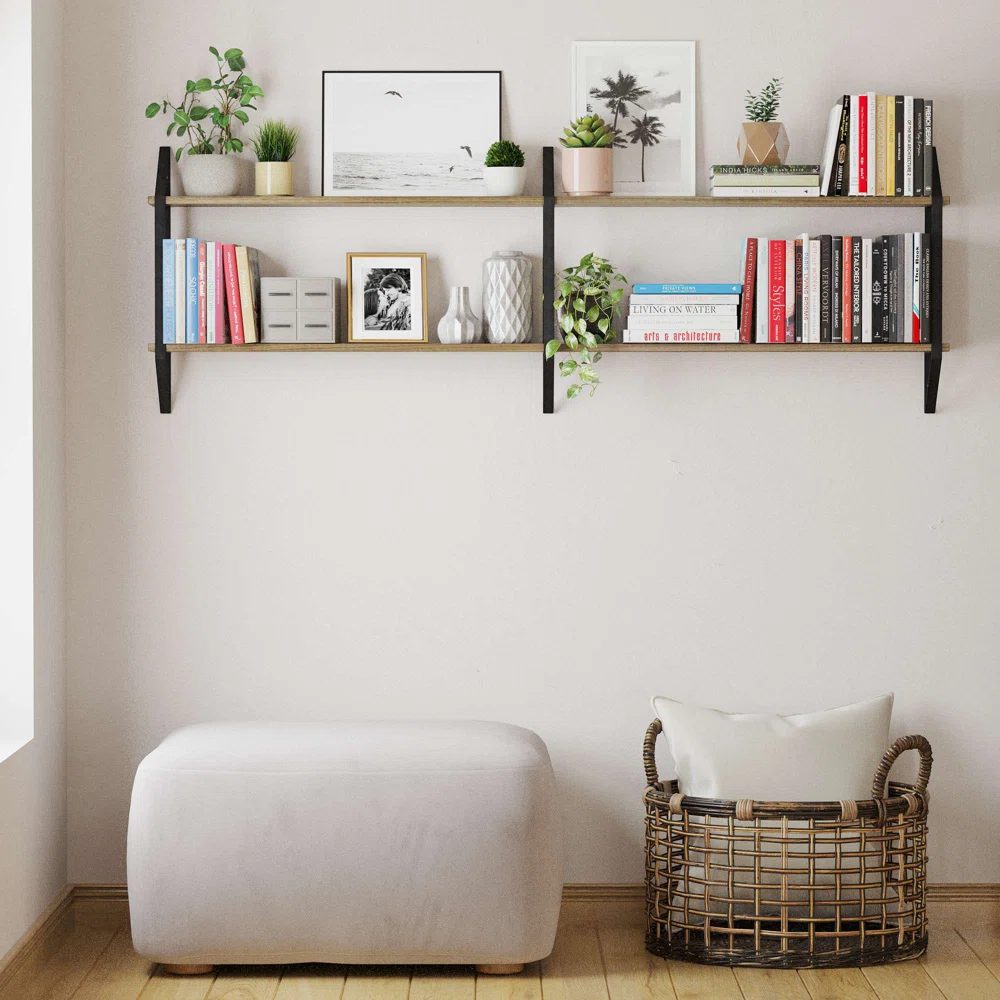
Install simple floating shelves to add both storage and visual interest to your walls. Purchase unfinished wood planks and brackets from a hardware store. Sand the wood smooth, then stain or paint it to match your decor. Securely attach the brackets to your wall (make sure to use wall anchors if you’re not drilling into studs), then place the shelves on top. These versatile shelves can display books, plants, or decorative objects.
18. Pegboard Organizer
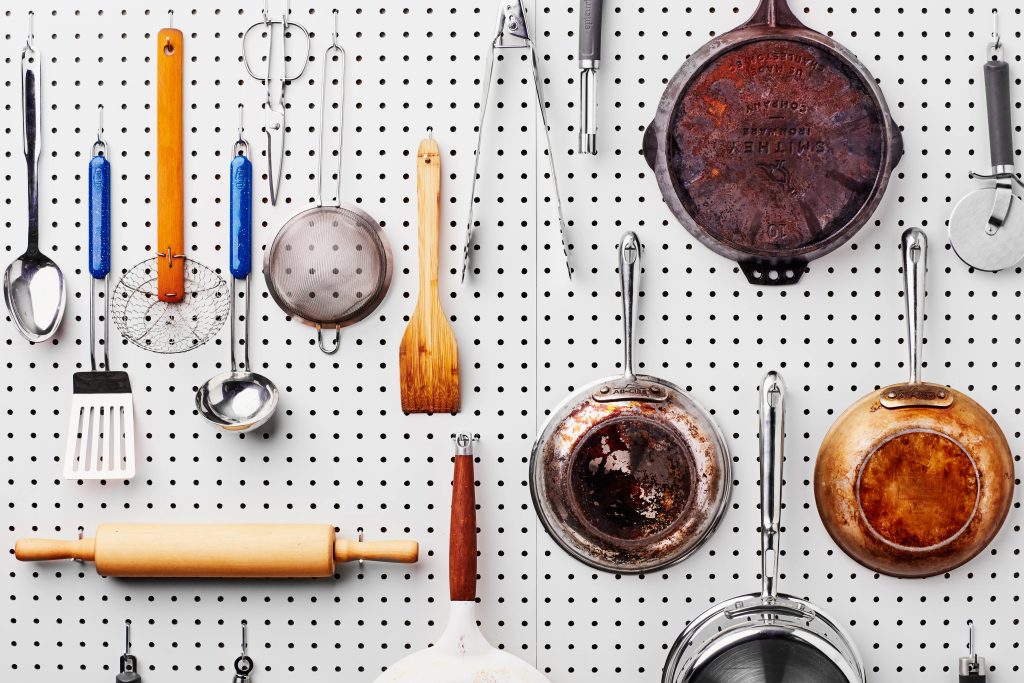
Transform a plain pegboard into a customizable organization system for your office, craft room, or garage. Paint the pegboard in a color that complements your space. Once dry, hang it securely on your wall. Use various pegboard accessories like hooks, baskets, and shelves to create a storage system tailored to your needs. This project is not only practical but also allows for easy rearrangement as your storage needs change.
19. Upcycled Drawer Organizers
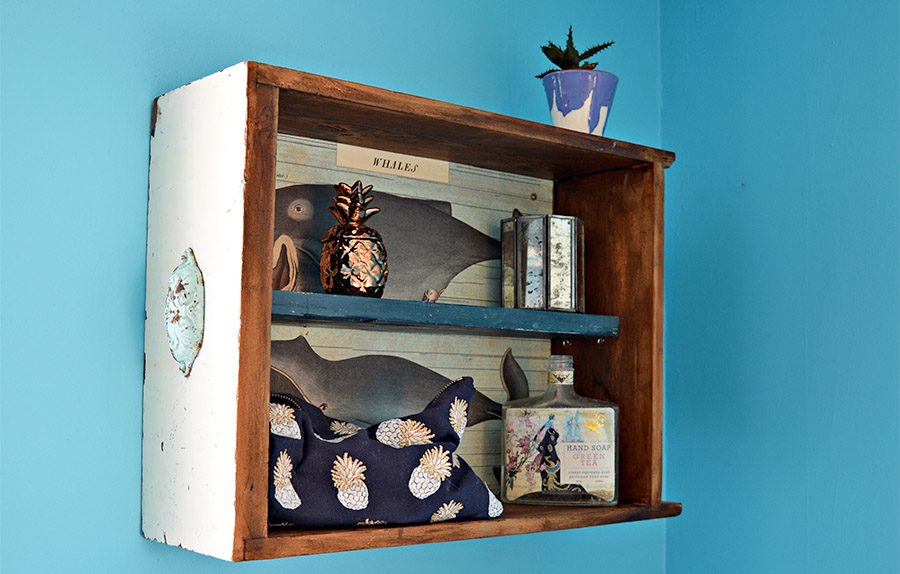
Give new life to old drawers by turning them into wall-mounted organizers. Remove any hardware, sand the drawer smooth, and paint it in your desired color. Attach keyhole hangers to the back for easy mounting. These repurposed drawers make unique shelving units for entryways, bathrooms, or bedrooms, perfect for storing small items or displaying decor.
20. Ladder Bookshelf
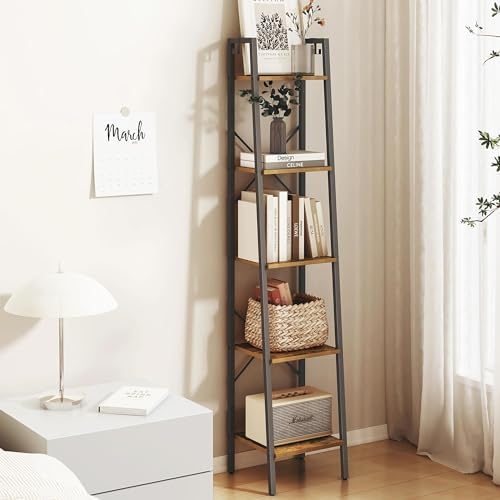
Create a rustic bookshelf using an old wooden ladder. Clean and sand the ladder, then apply a coat of wood stain or paint to match your decor. Lean the ladder against a wall and use the rungs as shelves for books, plants, or decorative objects. This project offers a charming, vintage-inspired storage solution that’s sure to be a conversation starter.
Furniture Makeovers
21. Chalk Paint Dresser Refresh

Give an old dresser new life with chalk paint. This type of paint requires minimal prep work and adheres well to most surfaces. Clean your dresser thoroughly, then apply 2-3 coats of chalk paint in your chosen color, allowing each coat to dry completely. For a distressed look, sand the edges lightly after painting. Finish with a clear wax to protect the paint. This project can dramatically change the look of a piece of furniture with relatively little effort.
22. Reupholstered Dining Chairs
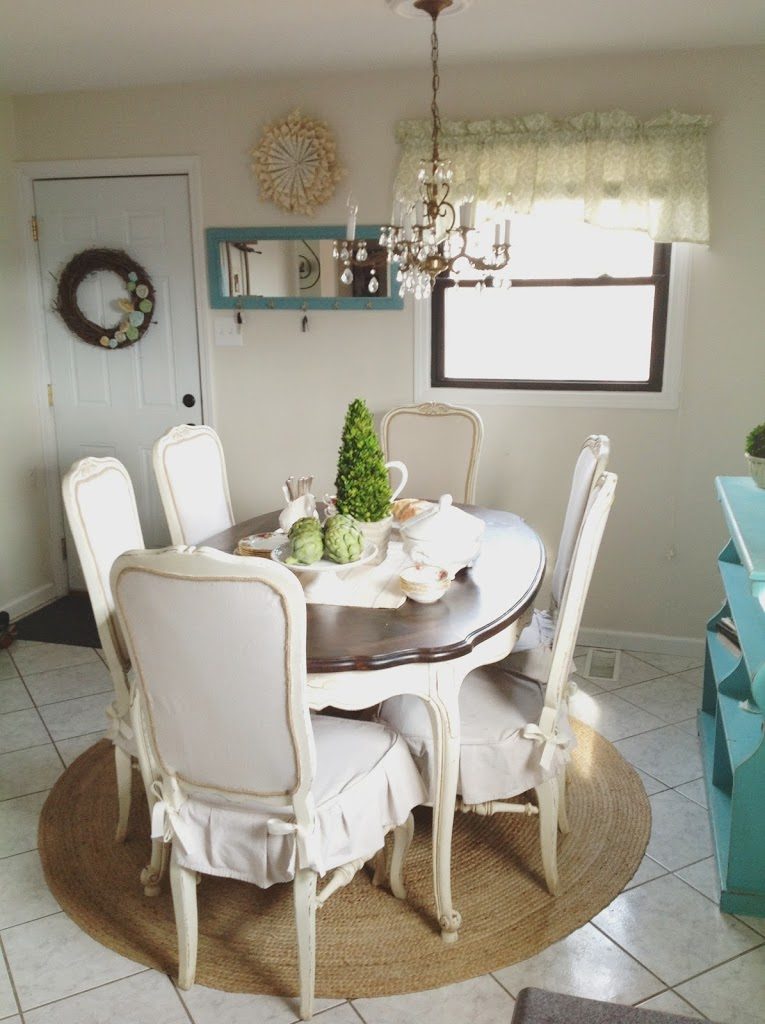
Update your dining set by reupholstering the chair seats. Remove the seat cushions from the chairs and strip off the old fabric. Cut new fabric slightly larger than the seat, then use a staple gun to secure it tightly around the cushion, folding the corners neatly. Reattach the seats to the chairs. This project allows you to completely change the look of your dining area and is a great way to practice basic upholstery skills.
23. Painted Tile Table Top

Transform a plain table with a painted tile top. Clean the tabletop thoroughly, then arrange ceramic tiles in a pattern of your choice. Use tile adhesive to secure them in place. Once dry, grout between the tiles. After the grout has set, use stencils and acrylic paint designed for ceramics to create patterns on the tiles. Seal the entire surface with a clear, waterproof sealant. This project turns a basic table into a unique, artistic piece.
24. Decoupage Nightstand

Give a wooden nightstand a fresh look with decoupage. Choose decorative paper or fabric in patterns you love. Cut the paper to fit the surfaces of your nightstand, then apply it using decoupage glue (both under and over the paper). For a smooth finish, use a brayer or credit card to remove any air bubbles. Once dry, apply several coats of clear sealer for durability. This technique allows you to completely customize a piece of furniture to match your style.
25. Leather-Wrapped Handles
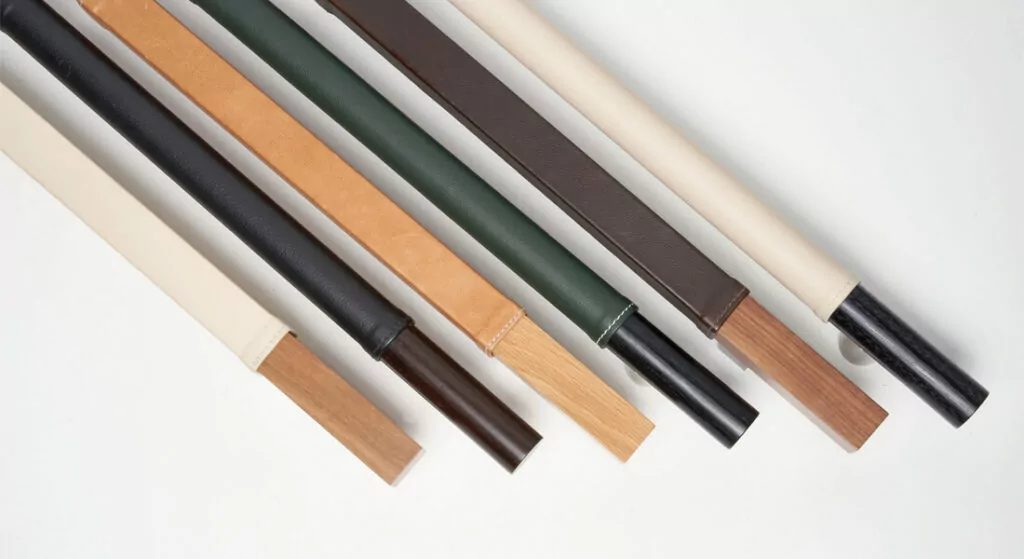
Upgrade plain furniture handles with a leather wrap. Cut strips of leather slightly longer than your handles. Apply a strong adhesive to the back of the leather and carefully wrap it around the handle, overlapping slightly. Secure the end with a small tack or more adhesive.
Note: This simple project adds a touch of sophistication to dressers, cabinets, or drawers and can be completed in just a few minutes per handle.
Lighting Projects
26. Mason Jar Chandelier
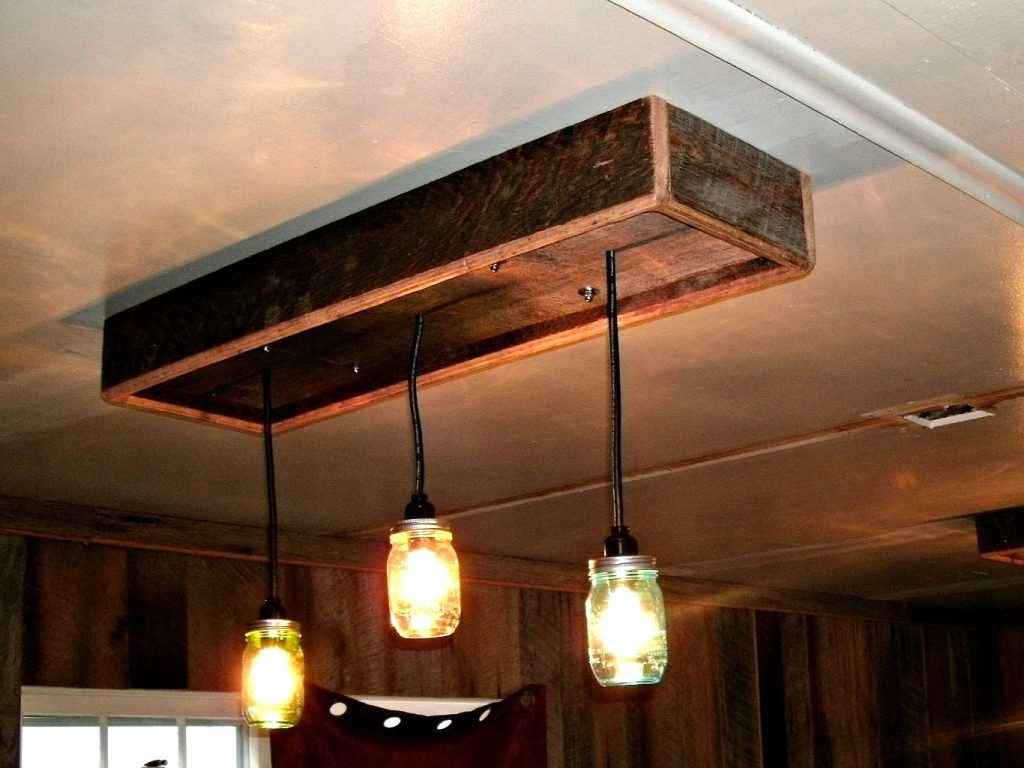
Create a charming, rustic chandelier using mason jars. You’ll need a wooden board, mason jars, lighting kits, and chain or rope for hanging. Drill holes in the jar lids for the light fixtures, then attach the jars to the board. Wire the lighting kits according to the instructions (or consult an electrician if you’re unsure). Hang your chandelier securely from the ceiling. This project creates a unique focal point and warm, ambient lighting.
27. Copper Pipe Floor Lamp
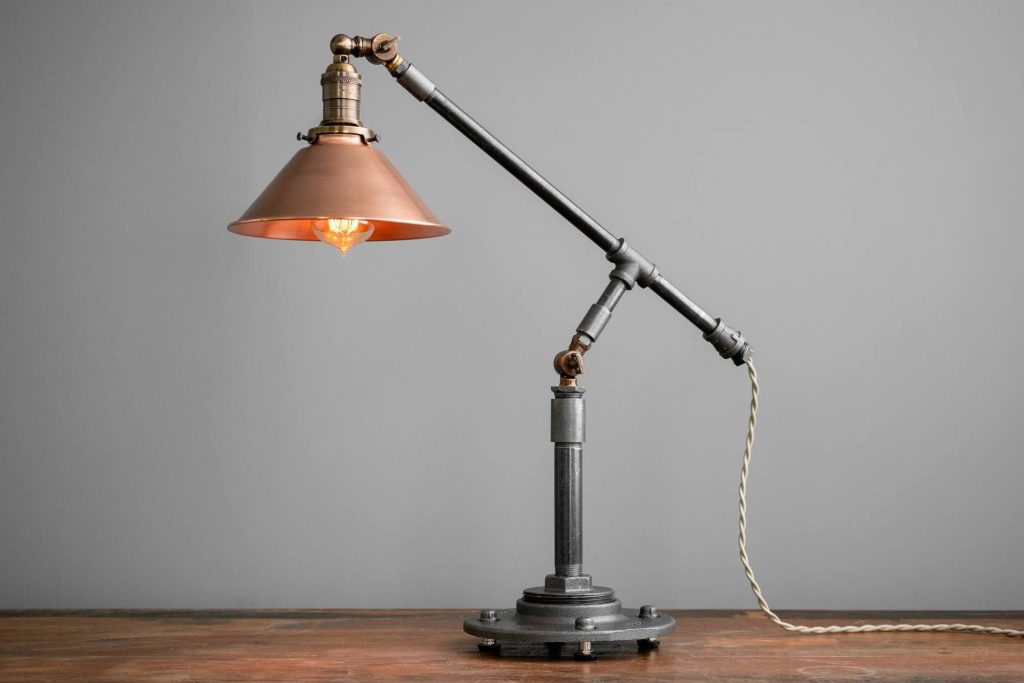
Construct a modern floor lamp using copper pipes and fittings. Cut copper pipes to your desired lengths and assemble them using elbow joints and T-joints to create the lamp’s structure. Add a base for stability and run an electrical cord through the pipes. Attach a socket at the top and add a shade of your choice. This industrial-chic lamp adds a designer touch to your space at a fraction of the cost of store-bought versions.
28. Wine Bottle Table Lamp
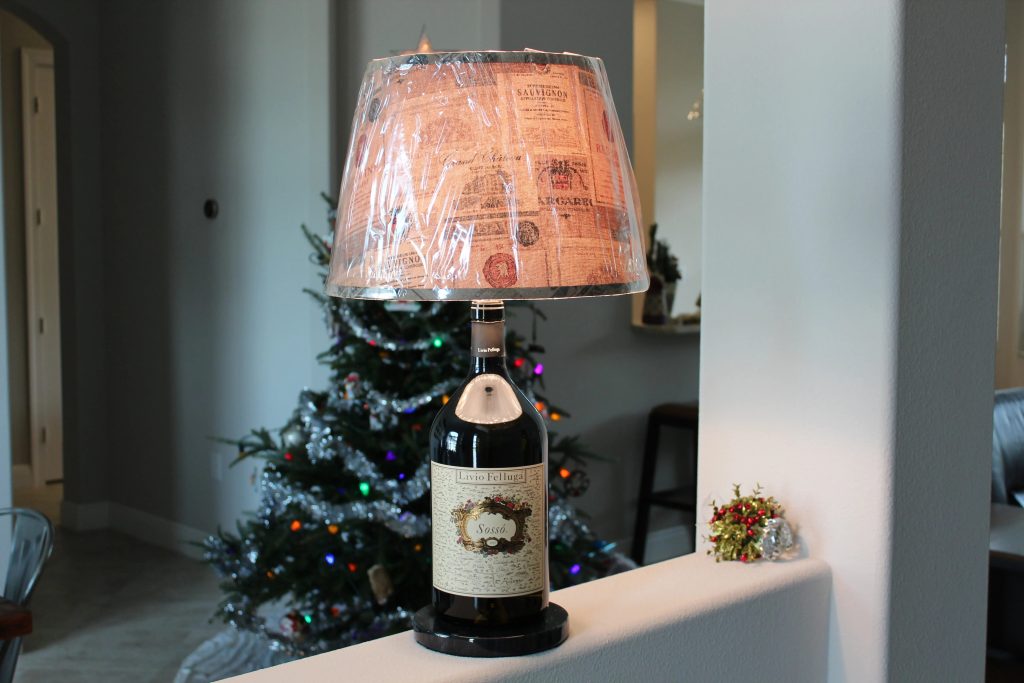
Repurpose an empty wine bottle into an elegant table lamp. Clean the bottle thoroughly and dry completely. Use a bottle lamp kit (available at most hardware stores) to turn your bottle into a lamp base. Choose a lampshade that complements the bottle’s shape and color. This eco-friendly project creates a unique lighting fixture and is a great way to preserve a bottle from a special occasion.
29. Paper Lantern Makeover
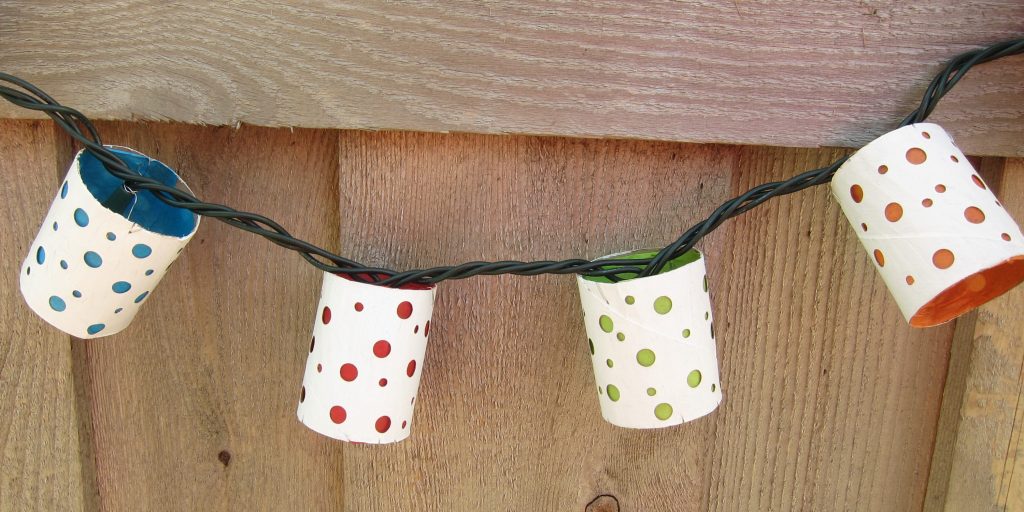
Transform plain paper lanterns into custom light fixtures. Use tissue paper, paint, or fabric to cover the lanterns in colors or patterns that match your decor. For a more elaborate design, try decoupaging the lanterns with cut-out shapes or photos. Hang your customized lanterns individually or in clusters for a dramatic lighting effect.
30. Twig Lampshade
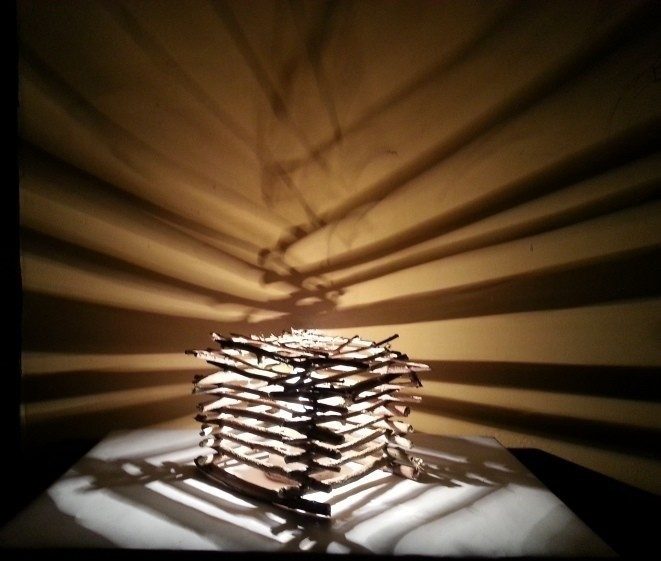
Create a nature-inspired lampshade using twigs from your backyard. Start with a plain, cylindrical lampshade frame. Collect straight twigs of similar thickness and cut them to the height of your shade. Hot glue the twigs vertically around the frame, placing them close together for full coverage. This project brings an organic, woodland touch to your lighting and is particularly striking when illuminated.
Seasonal and Holiday Decor
31. Pinecone Wreath
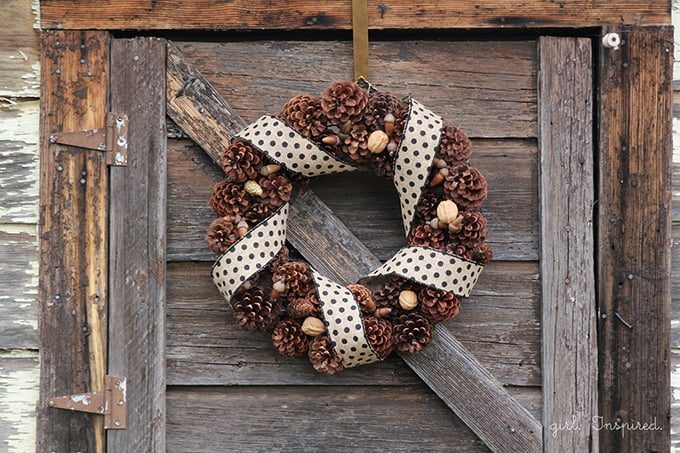
Craft a natural wreath perfect for fall or winter using pinecones. Start with a foam or straw wreath form. Collect pinecones of various sizes and attach them to the form using hot glue or floral wire. Fill in any gaps with smaller pinecones, acorns, or faux berries. Finish with a ribbon for hanging. This wreath brings a touch of the outdoors inside and can be customized with paint or glitter for a more festive look.
32. Fabric Scrap Garland
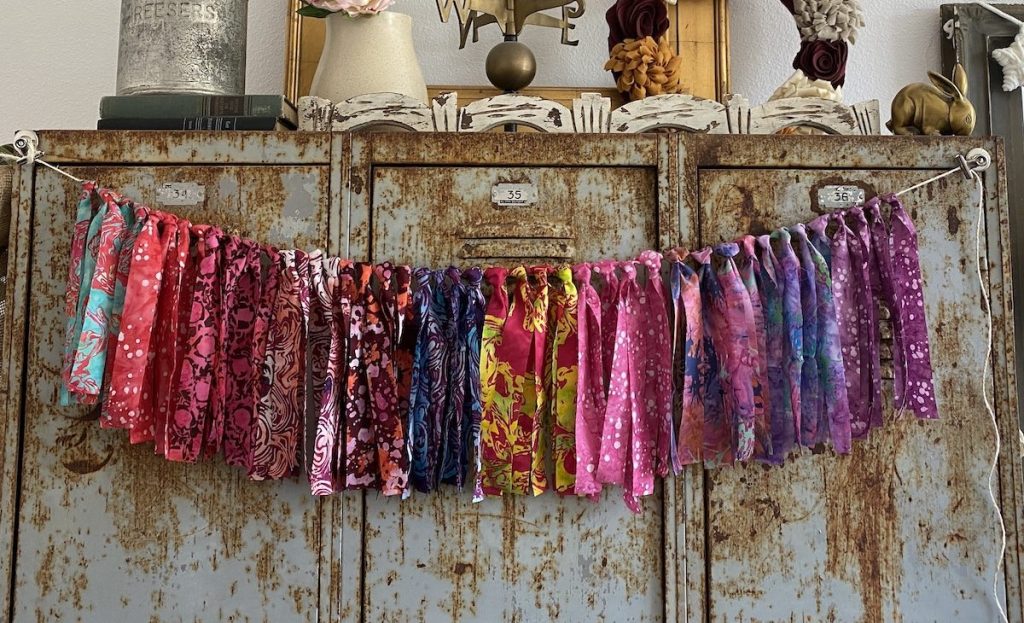
Create a cheerful garland using scraps of fabric. Cut fabric into small rectangles or use a template to cut them into shapes like leaves or stars. Thread the fabric pieces onto twine or fishing line, tying knots between each to keep them in place. This versatile decoration can be made in any color scheme to suit different seasons or holidays.
Related Guide: 25 Ideas for Using Rope Lights to Create Ambient Lighting
33. Painted Glass Ornaments
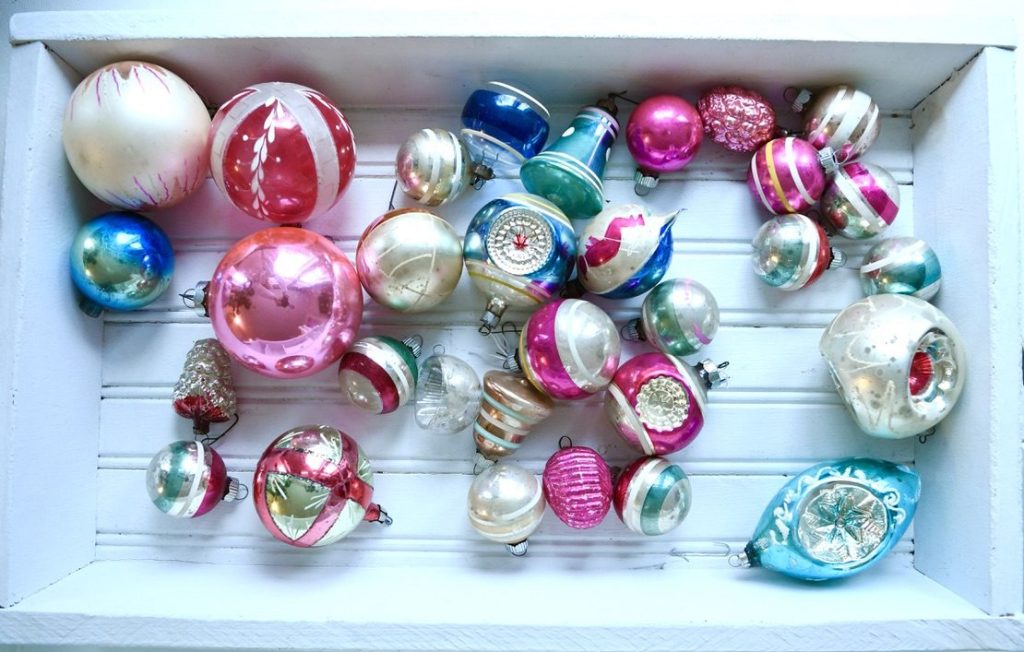
Personalize clear glass ornaments for unique holiday decorations. Remove the metal tops from the ornaments and pour in acrylic paint, swirling it around to coat the inside. Drain excess paint and let dry completely before replacing the tops. Add glitter, sequins, or small beads inside for extra sparkle. These custom ornaments make beautiful gifts or additions to your own tree.
34. Pumpkin Succulent Planter
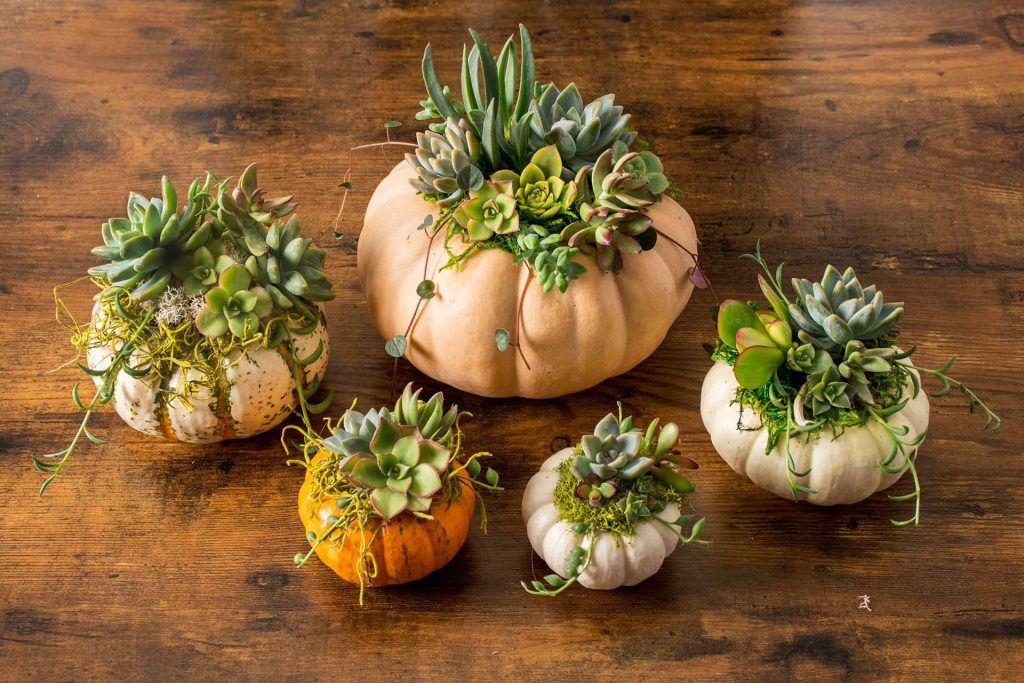
For a twist on traditional fall decor, turn a faux pumpkin into a succulent planter. Cut off the top of the pumpkin and hollow out the inside. Fill with potting soil and arrange small succulents inside. This long-lasting autumn decoration combines the seasonal charm of pumpkins with the year-round appeal of succulents.
35. DIY Advent Calendar
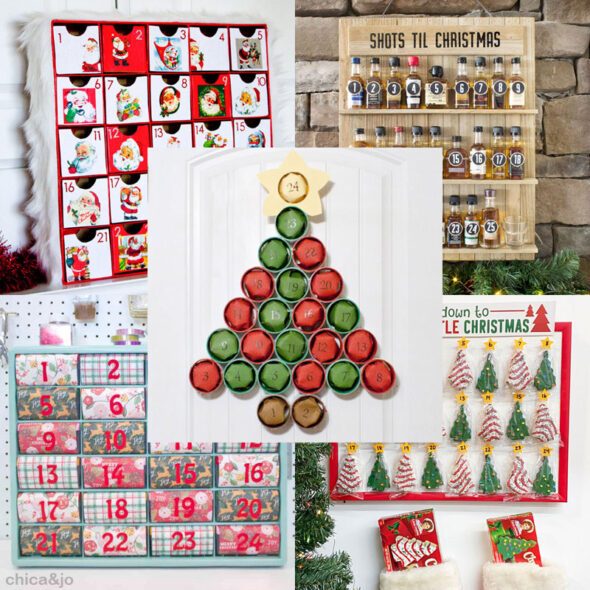
Create a reusable advent calendar using small fabric pouches, clothespins, and a long ribbon or string. Number the pouches from 1 to 24 and attach them to the ribbon with clothespins. Hang the ribbon in a zigzag or straight line on a wall or across a mantel. Fill the pouches with small treats or activity ideas for a personalized countdown to Christmas.
Kitchen and Dining Decor
36. Painted Kitchen Canisters
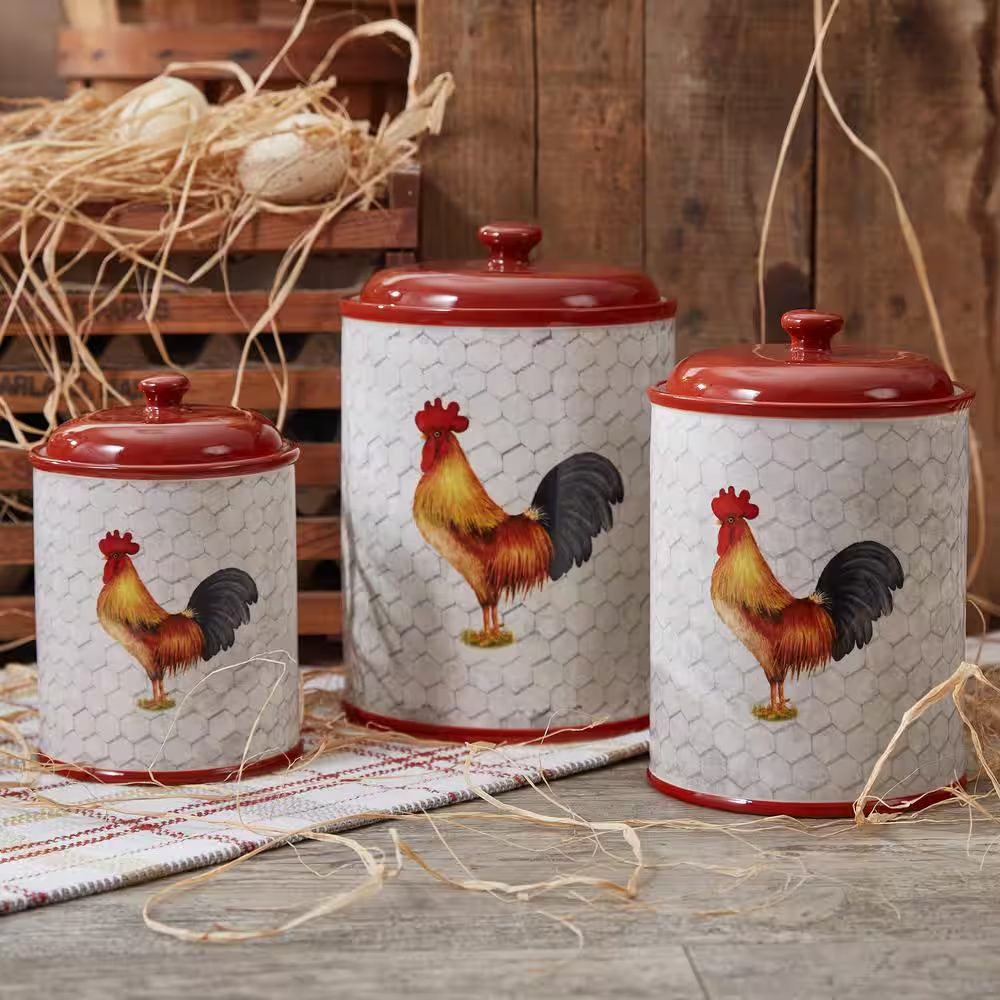
Upgrade plain glass or ceramic kitchen canisters with paint. Clean the canisters thoroughly and apply painter’s tape to create geometric patterns or to mask off areas you want to keep unpainted. Use glass or ceramic paint in colors that complement your kitchen decor. Once dry, carefully remove the tape to reveal your design. These custom canisters add a pop of color to your countertops while keeping dry goods organized.
37. DIY Cake Stand

Create a beautiful cake stand for displaying baked goods or using as a centerpiece. Choose a decorative plate and a candlestick or vase for the base. Make sure both pieces are clean and dry, then use a strong epoxy to attach the base to the center of the plate’s underside. Allow to dry completely before use. This project allows you to mix and match pieces to create a cake stand that perfectly suits your style.
38. Herb Garden Wall
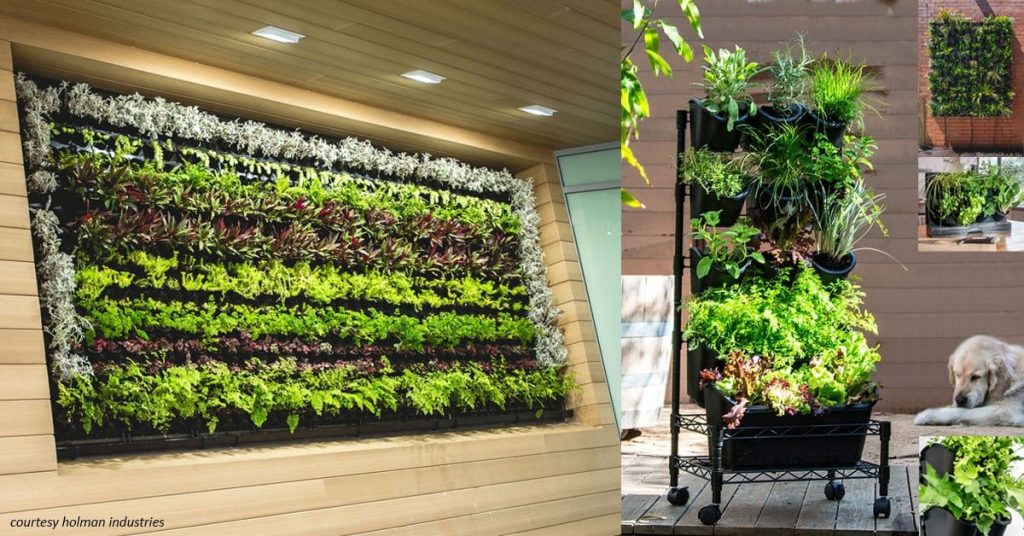
Bring life to your kitchen with a wall-mounted herb garden. Use small pots or mason jars to hold your herbs, attaching them to a wooden board or directly to the wall using strong brackets. Label each herb with small chalkboard tags or paint pen on the containers. This project not only adds greenery to your kitchen but also provides fresh herbs for cooking.
39. Wooden Serving Tray
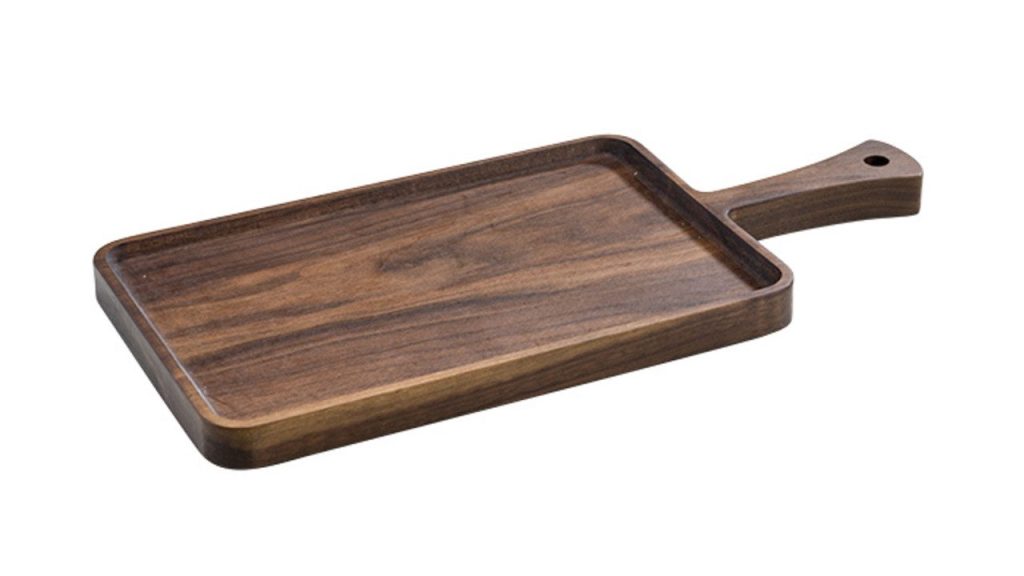
Construct a rustic serving tray using reclaimed wood. Cut two longer pieces for the sides and two shorter pieces for the ends. Assemble them into a rectangle using wood glue and nails. Attach a base made of thin plywood or more reclaimed wood. Add handles to the sides using rope or purchased metal handles. Sand the tray smooth and finish with food-safe wood oil. This handmade tray is perfect for serving or as a decorative piece on a coffee table.
40. Painted Dish Towels
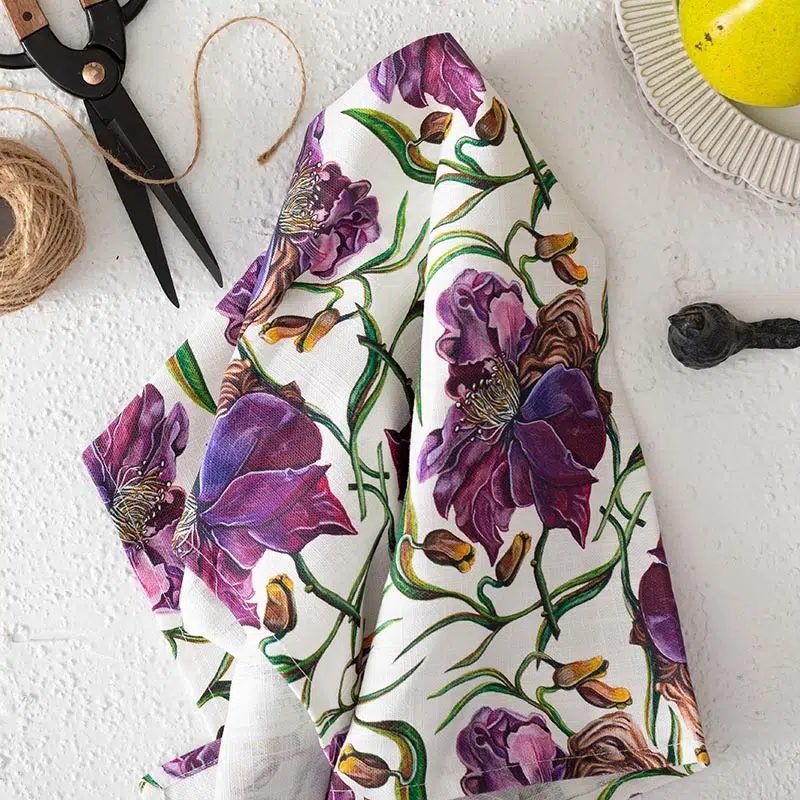
Personalize plain dish towels with fabric paint. Use stencils or freehand your own designs – simple geometric shapes or kitchen-themed motifs work well. Make sure to place a piece of cardboard inside the towel to prevent the paint from bleeding through. Once the paint is dry, heat-set it according to the paint manufacturer’s instructions. These custom towels add a personal touch to your kitchen and make great gifts.
Bathroom Decor
41. Rustic Towel Ladder
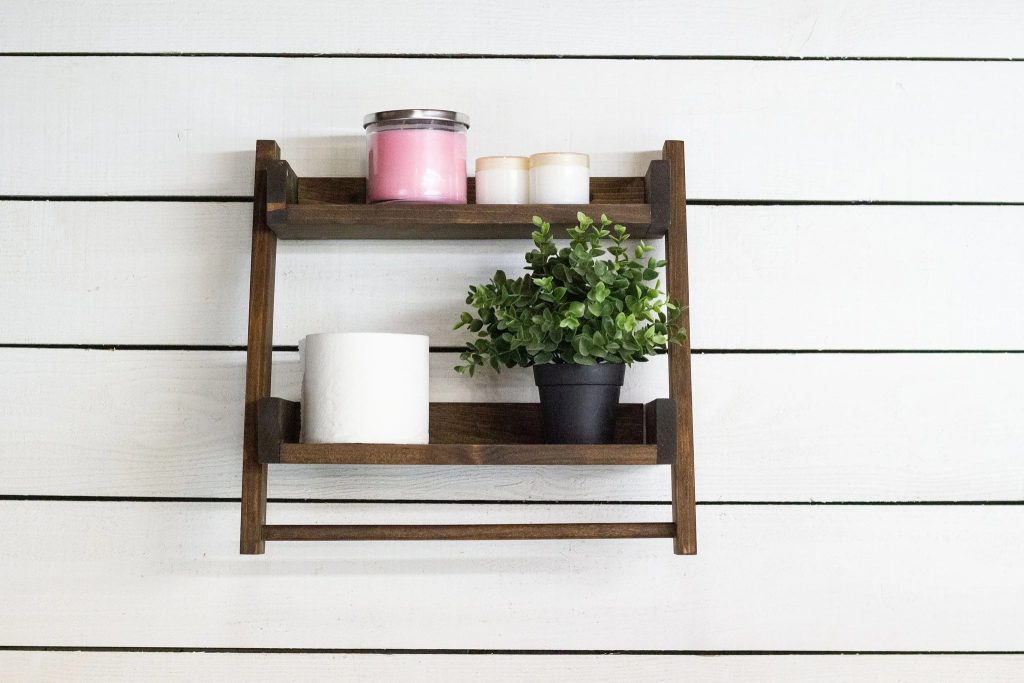
Create a space-saving towel storage solution with a rustic ladder. Use reclaimed wood or new lumber cut to size for the sides and rungs. Sand all pieces smooth and stain or paint as desired. Assemble the ladder using wood glue and screws, ensuring it’s sturdy enough to hold towels. Lean it against your bathroom wall for a functional and decorative touch.
42. Seashell Bathroom Accessories
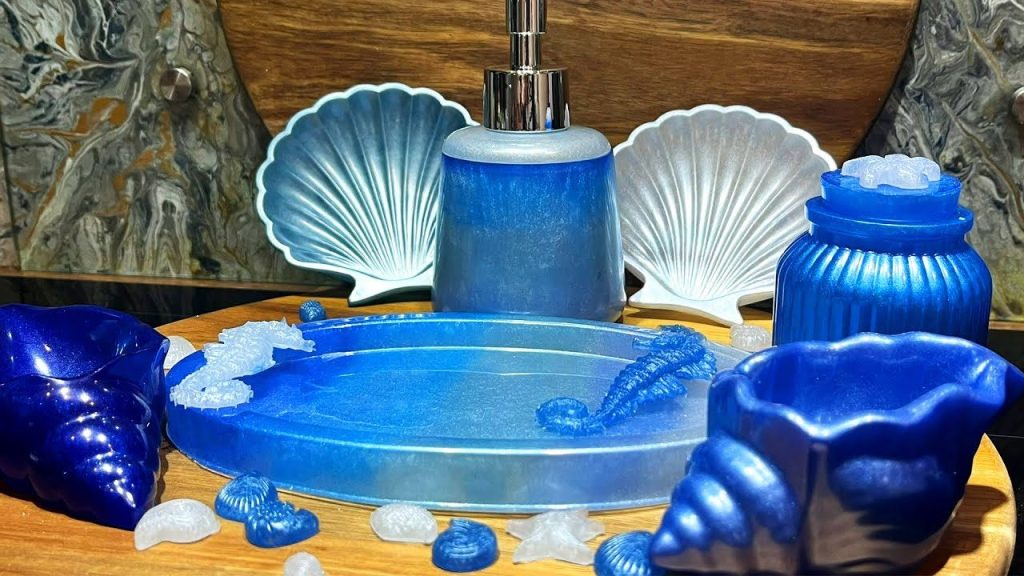
Bring a beach vibe to your bathroom with seashell-adorned accessories. Collect various seashells and clean them thoroughly. Use a strong adhesive to attach them to plain bathroom accessories like soap dispensers, toothbrush holders, or small decorative frames. Finish with a clear, waterproof sealant to protect the shells. This project creates a cohesive, coastal theme for your bathroom decor.
43. Eucalyptus Shower Bundle

Create a spa-like experience in your shower with a eucalyptus bundle. Gather fresh eucalyptus branches and tie them together with twine. Hang the bundle from your showerhead, making sure it’s not directly in the water stream. The steam from your shower will release the aromatic oils from the eucalyptus, providing a refreshing and invigorating scent. Replace the bundle every few weeks for continued freshness.
44. Painted Vanity Mirror Frame
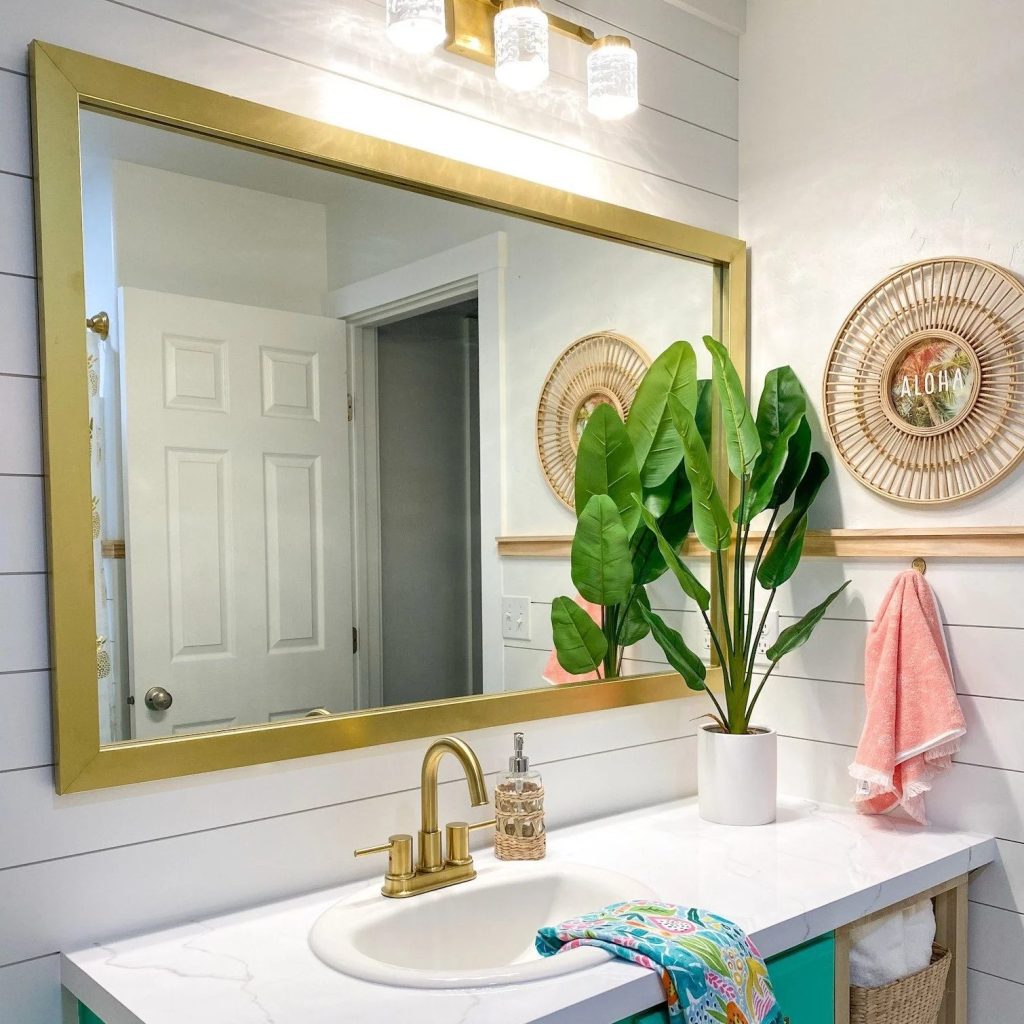
Give your bathroom mirror a custom look by painting the frame. If your mirror doesn’t have a frame, create one using molding from a hardware store. Clean the frame thoroughly and apply painter’s tape around the edges of the mirror to protect it. Use a primer if needed, then apply your chosen paint color. For added interest, try a metallic finish or a distressed look. This simple update can dramatically change the look of your entire bathroom.
45. Mason Jar Bathroom Organizer
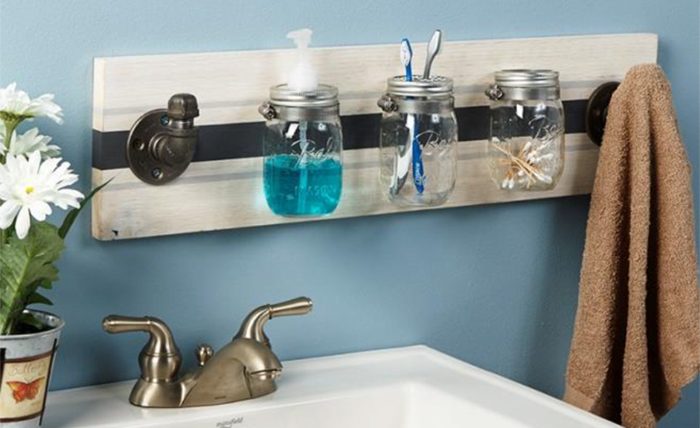
Craft a charming organizer for bathroom essentials using mason jars. Paint the jars in colors that complement your bathroom decor. Once dry, attach the jar lids to a wooden board using strong adhesive or screws. Mount the board on your bathroom wall, then screw the jars onto their lids. Use these jars to store cotton balls, q-tips, toothbrushes, or other small bathroom items. This project combines rustic charm with practical storage.
Outdoor and Patio Decor
46. Painted Terra Cotta Pots
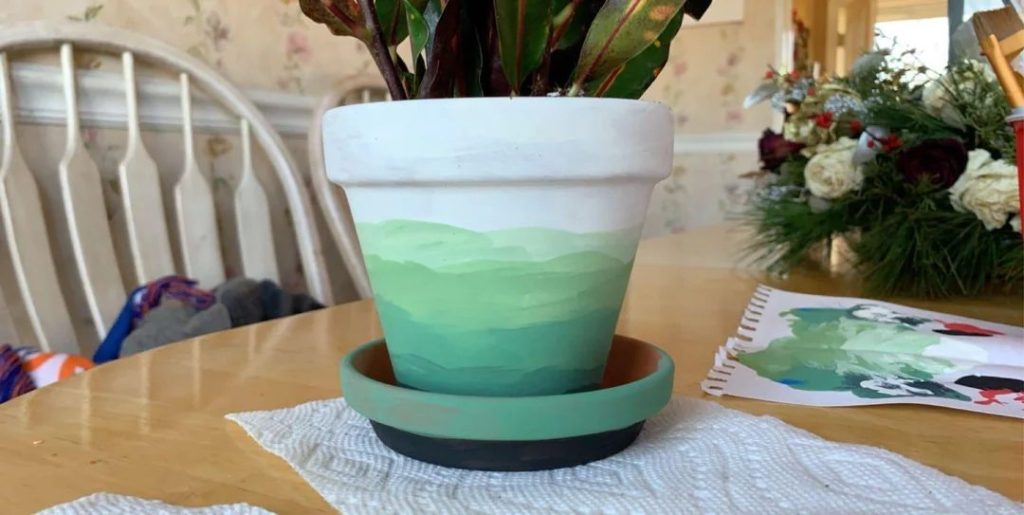
Brighten up your outdoor space with colorfully painted terra cotta pots. Clean the pots thoroughly and allow them to dry completely. Apply a base coat of exterior acrylic paint, then add patterns, designs, or even landscapes using additional colors. Seal the pots with a clear, waterproof sealant to protect your artwork from the elements. These personalized pots add a pop of color to patios, balconies, or garden areas.
47. DIY Outdoor Pillows
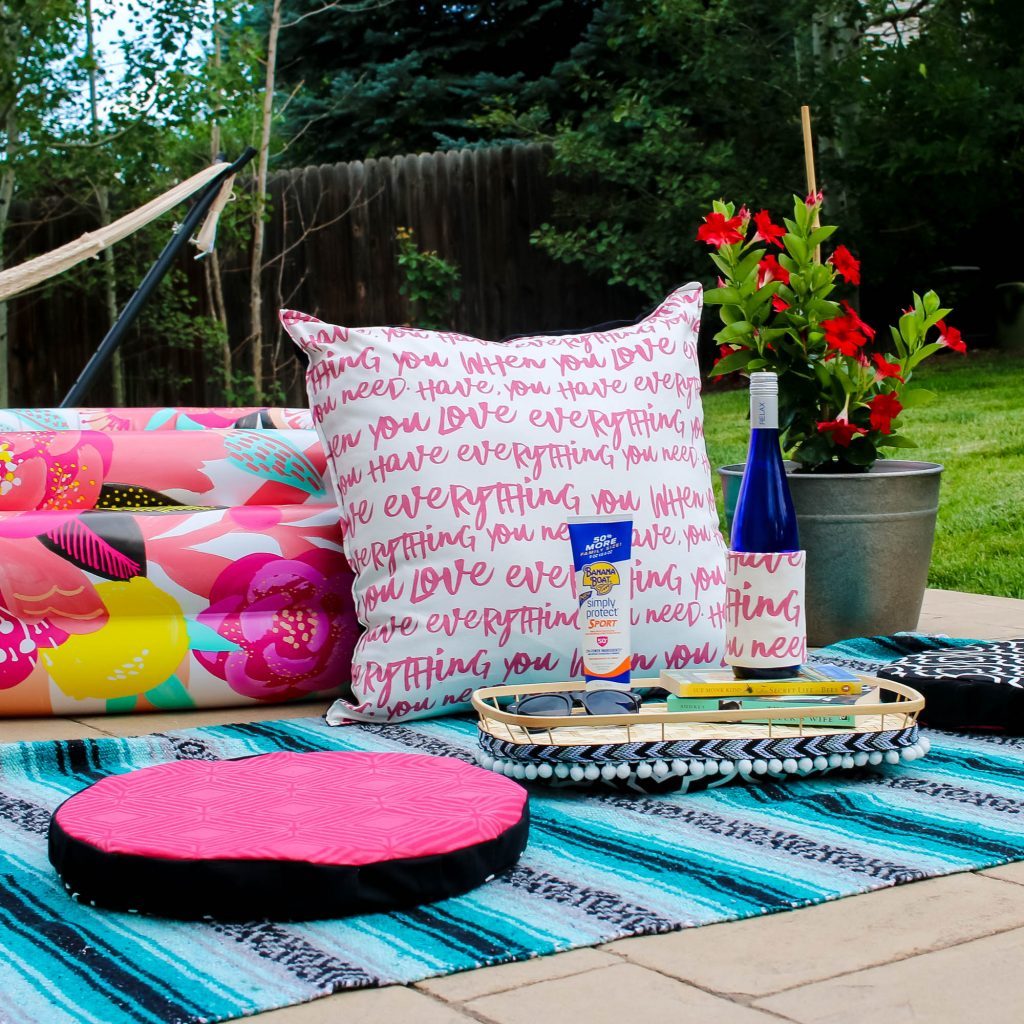
Create weather-resistant pillows for your outdoor furniture using waterproof fabric. Cut two pieces of fabric to your desired pillow size, adding an extra inch on all sides for seams. Sew three sides together, turn the cover right side out, stuff with polyester fiberfill, and hand-sew the final side closed. These custom pillows can withstand the outdoors while adding comfort and style to your patio seating.
48. Mosaic Stepping Stones

Design unique stepping stones for your garden path. Purchase concrete stepping stone molds and ready-mix concrete from a hardware store. Pour the concrete into the mold, then press colorful glass tiles, pebbles, or broken china into the wet concrete in a pattern of your choice. Allow to dry completely before removing from the mold. These personalized stepping stones add character to your garden and can even commemorate special dates or include handprints.
49. Hanging Plant Shelf
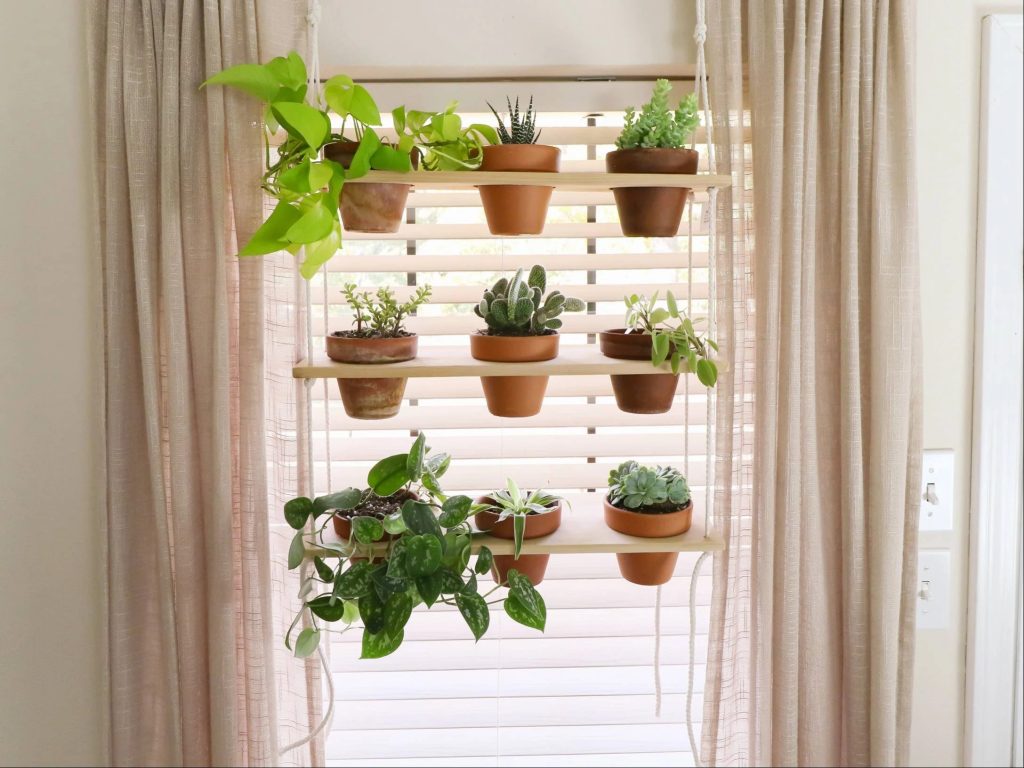
Construct a simple hanging shelf for outdoor plants. Cut a wooden board to your desired length and sand it smooth. Drill holes near each corner and thread sturdy rope through these holes. Knot the rope securely under the shelf, leaving enough length at the top to hang from a hook or bracket. Finish the wood with exterior sealant to protect it from the weather. This project creates vertical garden space perfect for small balconies or patios.
50. Upcycled Wind Chimes
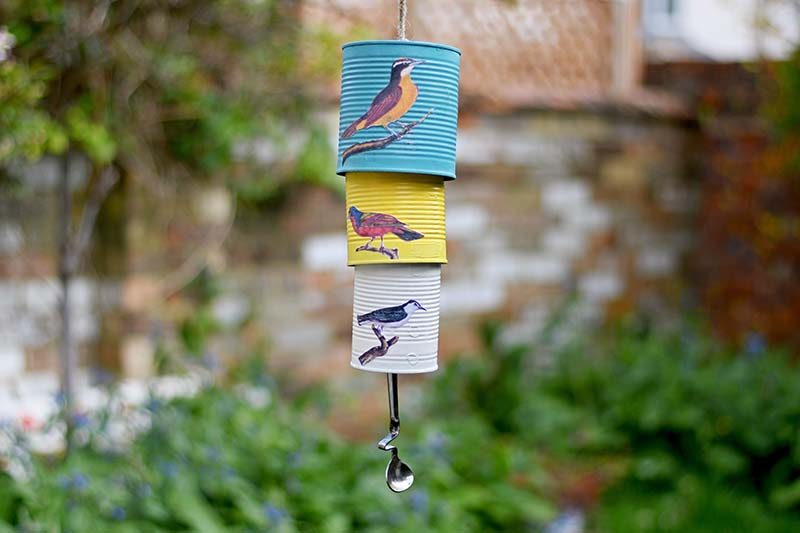
Create melodious wind chimes using repurposed materials. Collect items that will make pleasant sounds when they clang together, such as old keys, small metal tubes, or even silverware. Drill small holes in each piece and thread them onto fishing line or thin wire at varying lengths.
Attach these to a central piece, like a small wooden disk or metal ring. Hang your creation outside and enjoy the gentle sounds on breezy days.
Home Office and Workspace Decor
51. Cork Board World Map
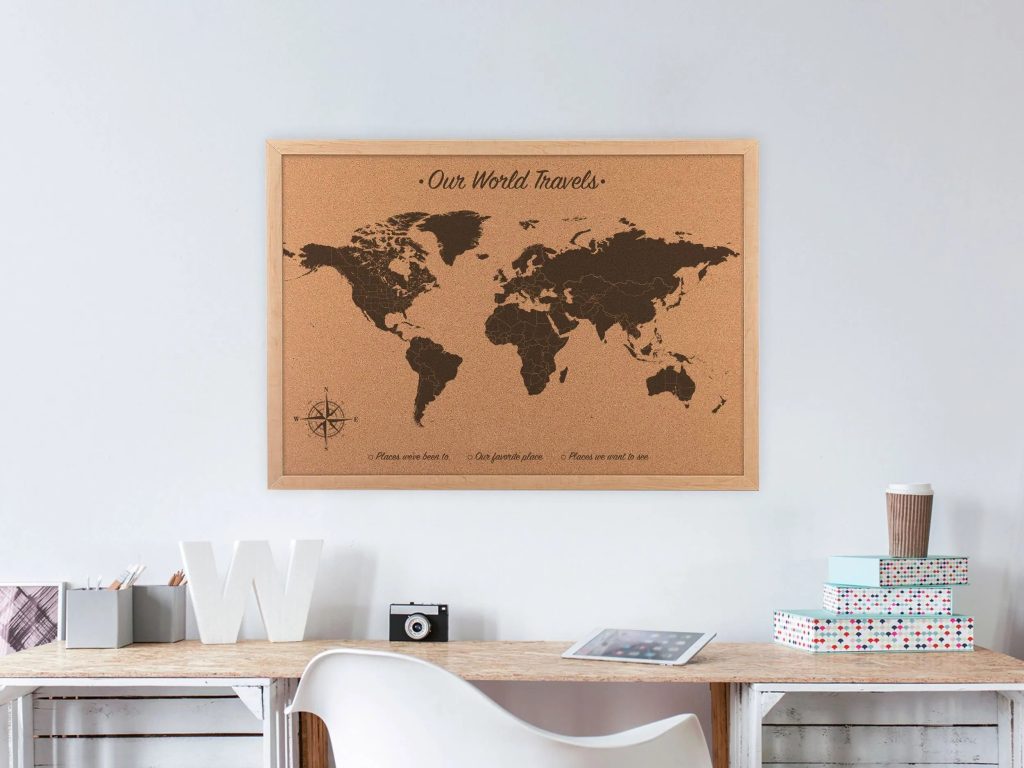
Design a functional and decorative world map for your office wall. Purchase a large cork board and a world map poster. Carefully cut out the continents from the poster and arrange them on the cork board, leaving space between for “oceans.” Paint the exposed cork blue to represent water. Once dry, glue the continent cut-outs in place. This project creates an eye-catching piece of wall art that doubles as a pin board for travel plans or global business connections.
52. DIY Desk Organizer
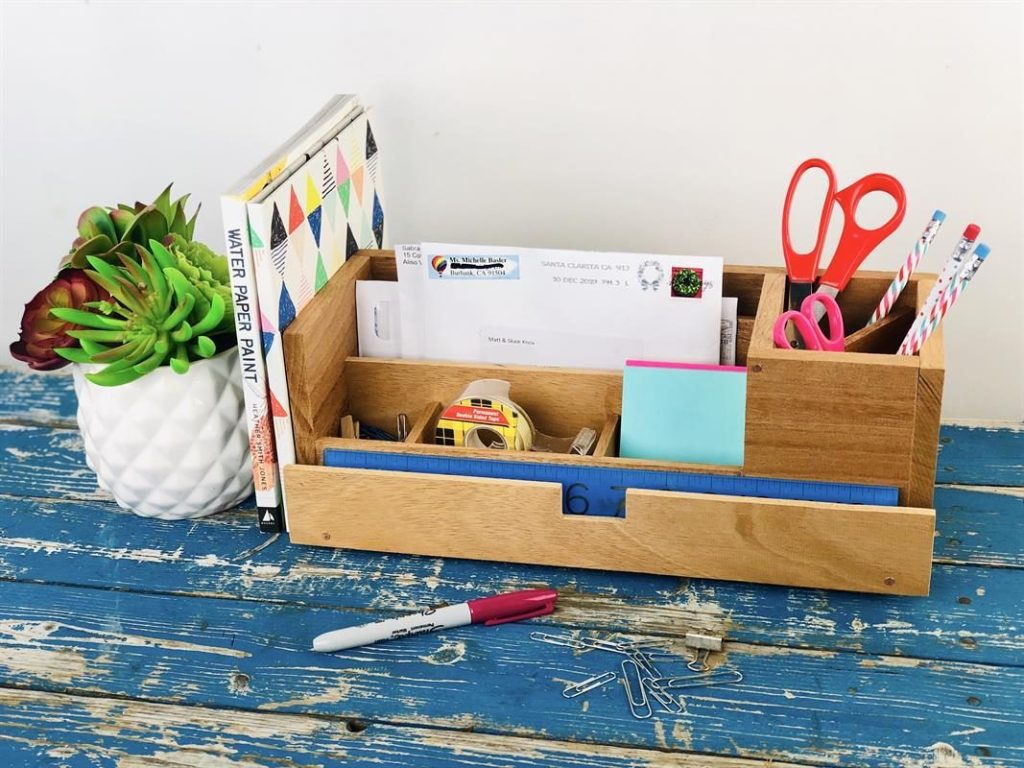
Craft a custom desk organizer using small wooden crates or boxes. Sand the wood smooth and paint or stain in colors that complement your office decor. Arrange the boxes in a configuration that suits your needs – some upright for files or books, others laying flat for pens and small items. Glue the boxes together for stability. This modular organizer keeps your workspace tidy while adding a personal touch.
53. Painted File Cabinet

Transform a dull metal file cabinet into a stylish storage piece. Clean the cabinet thoroughly and sand lightly to help paint adhere. Apply a metal primer, then paint with your chosen color of metal-specific paint. For added interest, use painter’s tape to create geometric patterns or ombre effects. Replace the standard handles with decorative knobs for a finishing touch. This project turns a utilitarian item into a focal point of your office decor.
54. Fabric-Covered Bulletin Board

Create a custom bulletin board to match your office decor. Start with a plain cork board or foam core board. Cut a piece of fabric slightly larger than the board. Wrap the fabric around the board, pulling it taut, and secure it to the back with staples or strong adhesive. For a polished look, cover the edges with ribbon, attaching it with fabric glue. This project allows you to coordinate your bulletin board perfectly with your office color scheme.
55. DIY Bookends
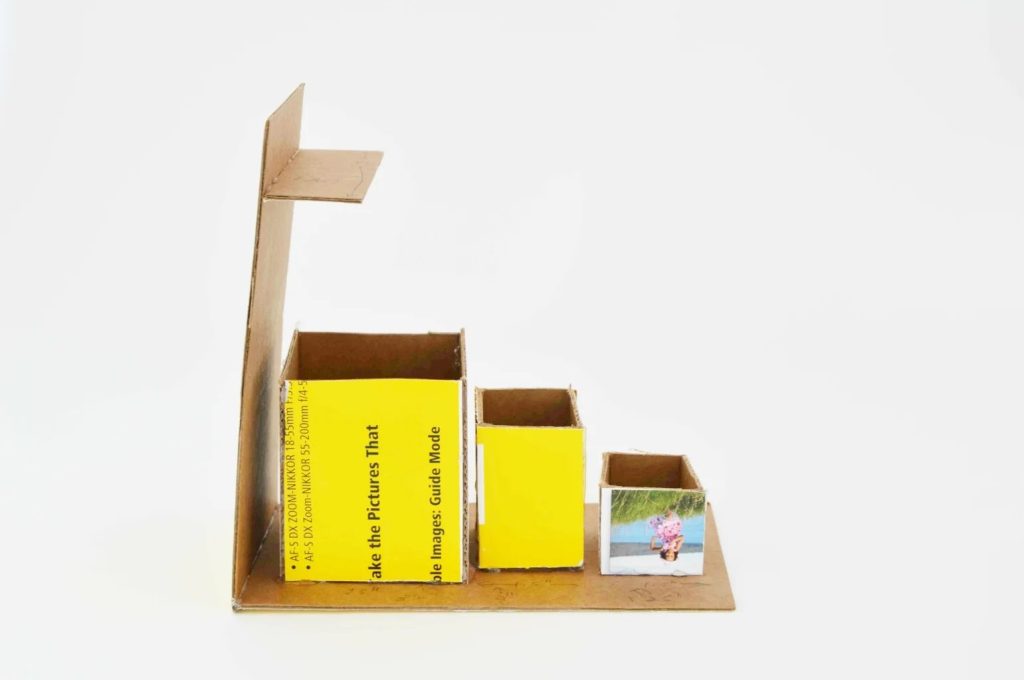
Craft unique bookends to keep your office books organized. For a modern look, use small wooden blocks or bricks. Paint them in colors that complement your decor, or cover them with decorative paper using decoupage techniques. For added stability, glue felt to the bottom. Alternatively, for a natural look, use geodes or large, flat rocks. These custom bookends combine functionality with personal style.
Bedroom Decor
56. Macramé Wall Hanging
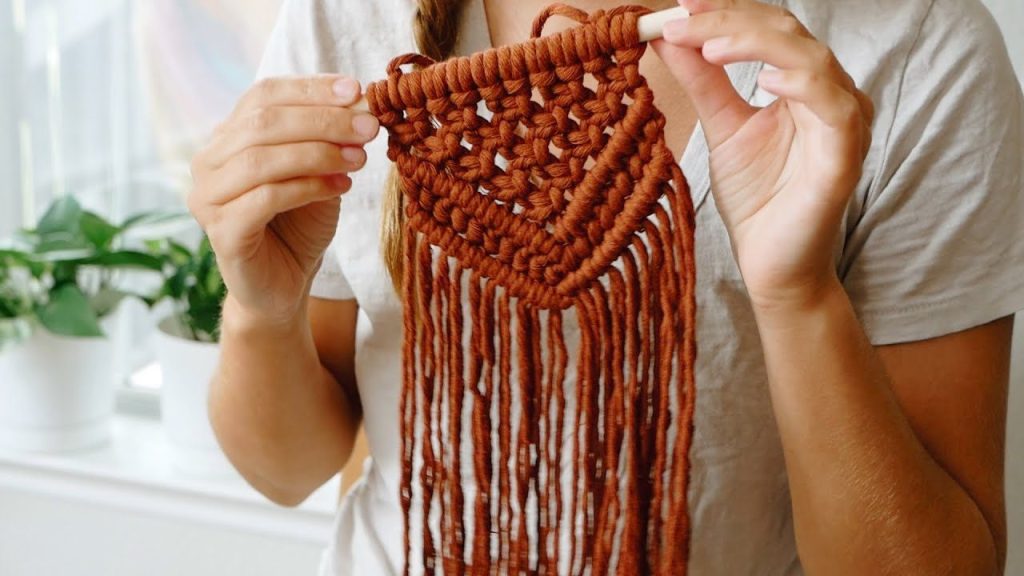
Create a boho-chic focal point for your bedroom with a macramé wall hanging. Using macramé cord and a wooden dowel, practice basic macramé knots to create an intricate pattern. Incorporate wooden beads or dip portions of the piece in fabric dye for added visual interest. This textural wall art adds warmth and artisanal charm to your bedroom decor.
57. DIY Headboard
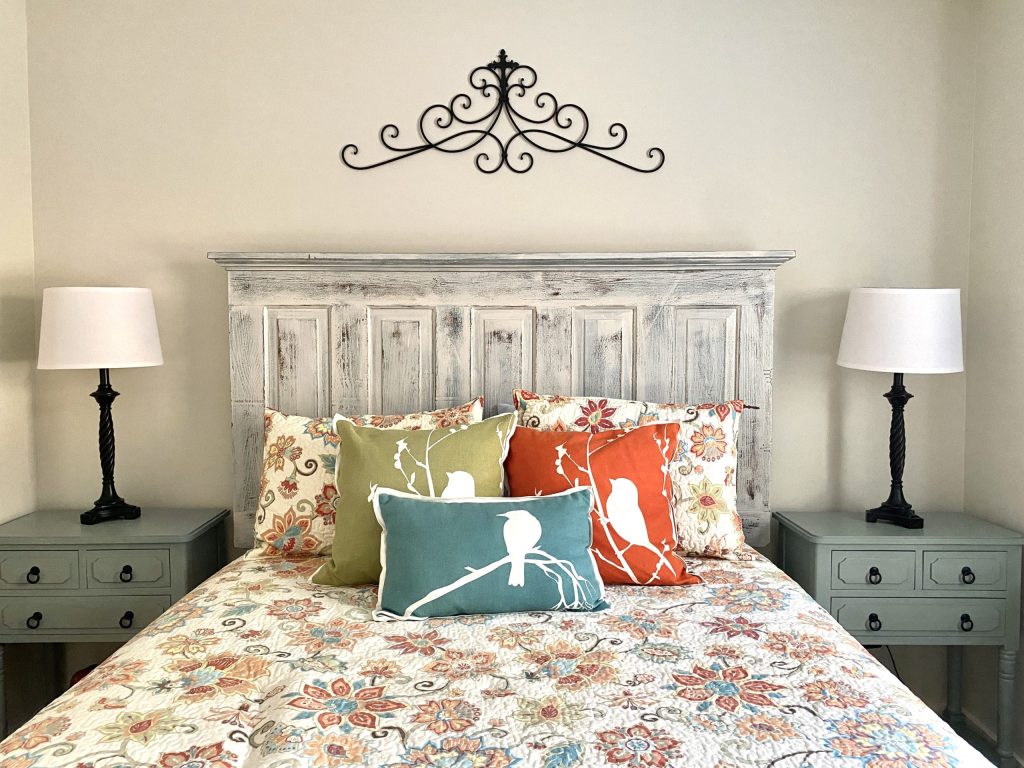
Design a custom headboard to suit your style. For a simple approach, use a large piece of plywood cut to size. Cover it with foam and batting, then wrap it in a fabric of your choice, securing the fabric on the back with a staple gun. Mount the headboard to your wall or bed frame. This project allows you to create a headboard that perfectly matches your bedding and room decor.
58. Bedside Pendant Lights
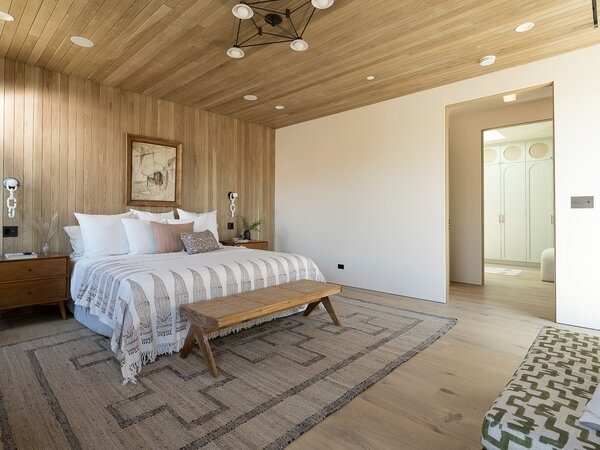
Install custom pendant lights beside your bed for a designer look. Purchase simple pendant light kits and shades that match your decor. If you’re comfortable with basic electrical work, you can hardwire these into your wall. For a simpler option, choose plug-in pendant kits and use decorative cord covers to run the wires down the wall. This project adds ambient lighting and frees up space on your bedside tables.
59. Dream Catcher
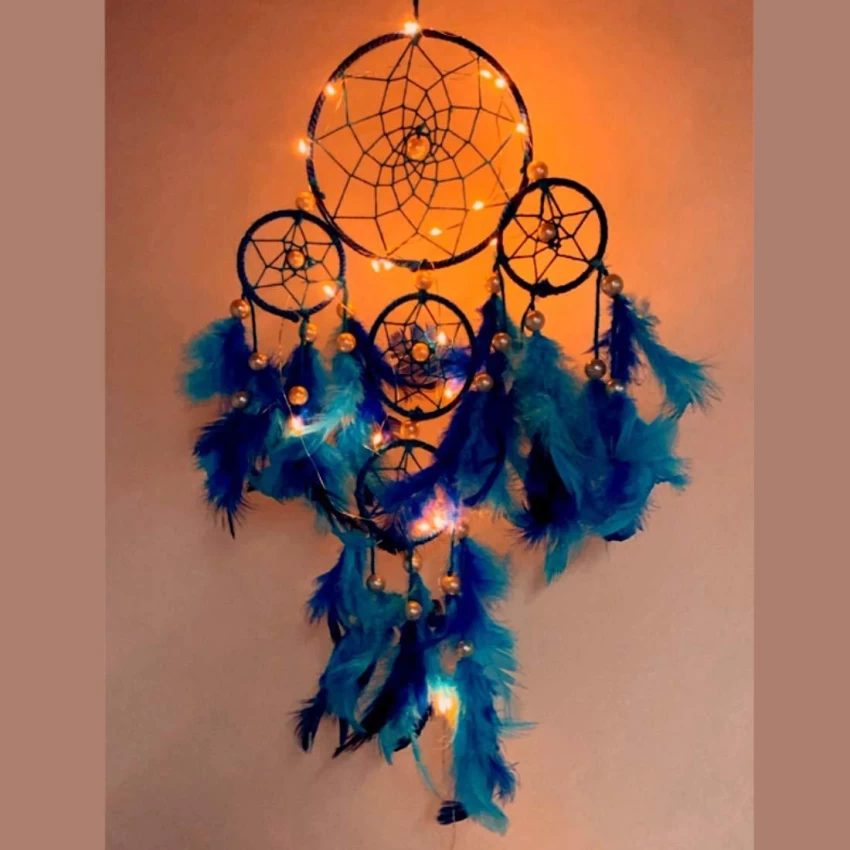
Craft a decorative dream catcher for a whimsical touch in your bedroom. Use an embroidery hoop or a bent wire hoop as your base. Wrap the hoop with yarn or leather cord, then weave thin string across the center in a web-like pattern. This project adds a personal, handmade touch to your wall decor.
Tip: Decorate with feathers, beads, or small crafted elements hanging from the bottom of the hoop.
60. Floating Nightstand
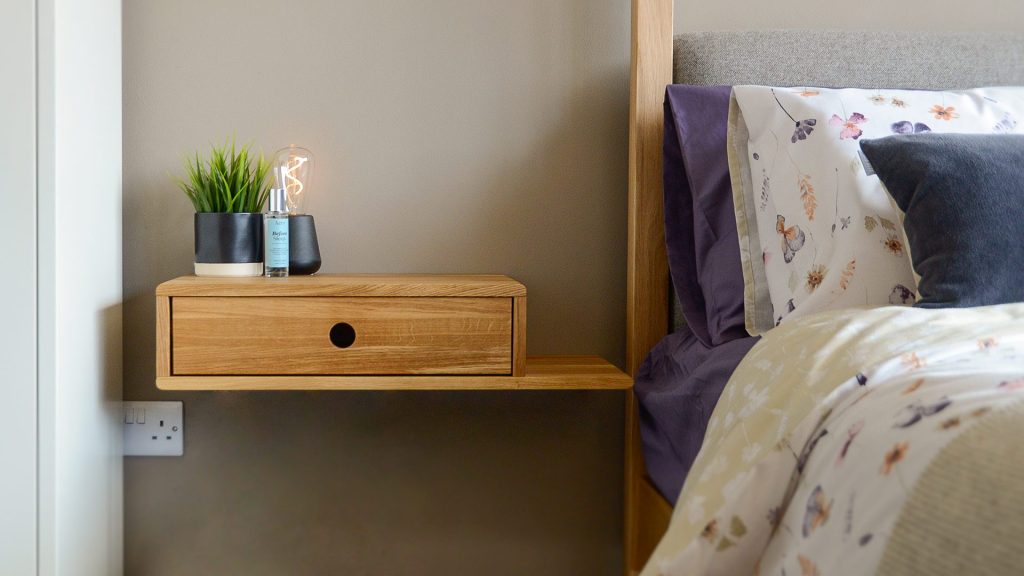
Build a space-saving floating nightstand for a modern, minimalist look. Cut a piece of wood to your desired size and shape. Sand it smooth and finish with paint or stain. Mount it to your wall using sturdy brackets, ensuring it’s level and secure. This sleek nightstand saves floor space and can be customized to fit perfectly in your bedroom.
Entryway and Hallway Decor
61. DIY Key Holder
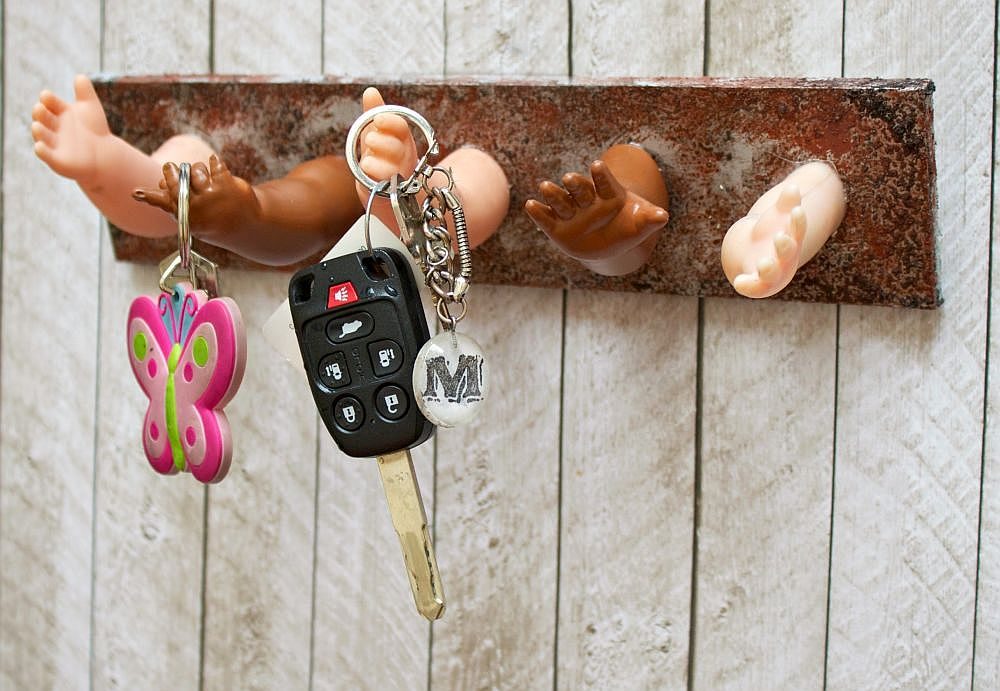
Create a functional and decorative key holder for your entryway. Start with a small wooden board or plaque. Paint or stain it to match your decor. Screw in decorative hooks or knobs for hanging keys. For added functionality, attach a small shelf above or below the hooks to hold mail or other small items. This project keeps your keys organized and adds a personal touch to your entryway.
62. Upcycled Mirror Frame
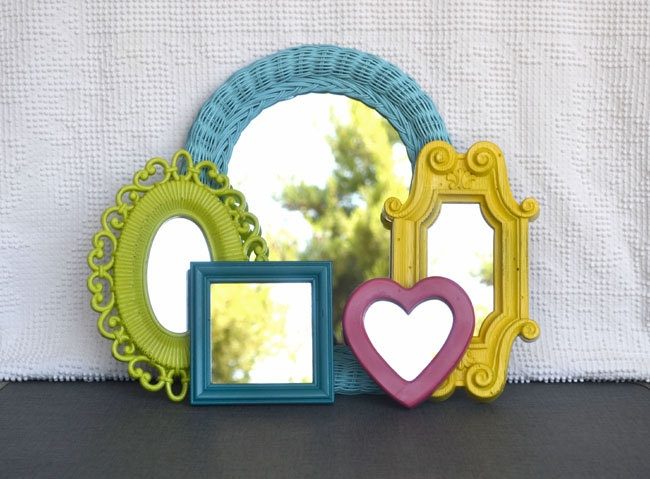
Give new life to an old mirror by refreshing its frame. Remove the mirror from the frame and set it aside carefully. Clean the frame thoroughly, then paint it in a color that complements your decor. For added interest, try a metallic finish or distressed look. Once dry, reattach the mirror. This project can dramatically change the look of your entryway or hallway with minimal effort.
63. Boot Tray with River Rocks
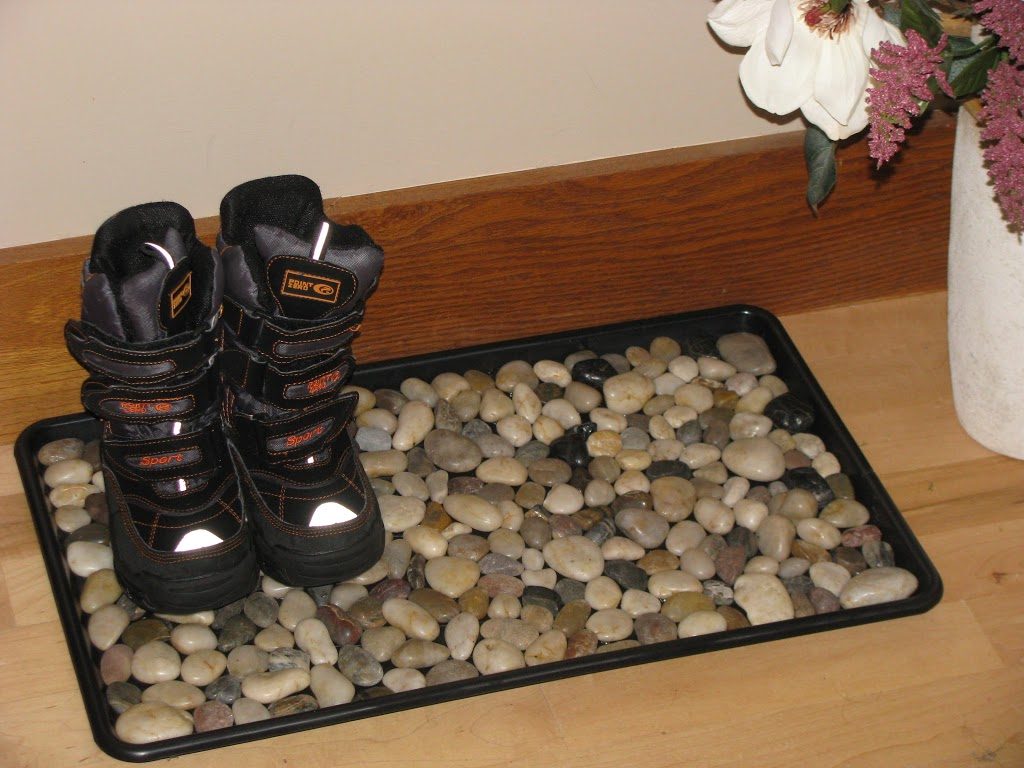
Craft a stylish and functional boot tray for your entryway. Start with a large, shallow tray or baking sheet. Paint it in a color that matches your decor. Once dry, fill the tray with smooth river rocks. This not only looks attractive but also allows water to drain from wet boots or shoes, keeping your floors clean and dry.
64. Gallery Wall
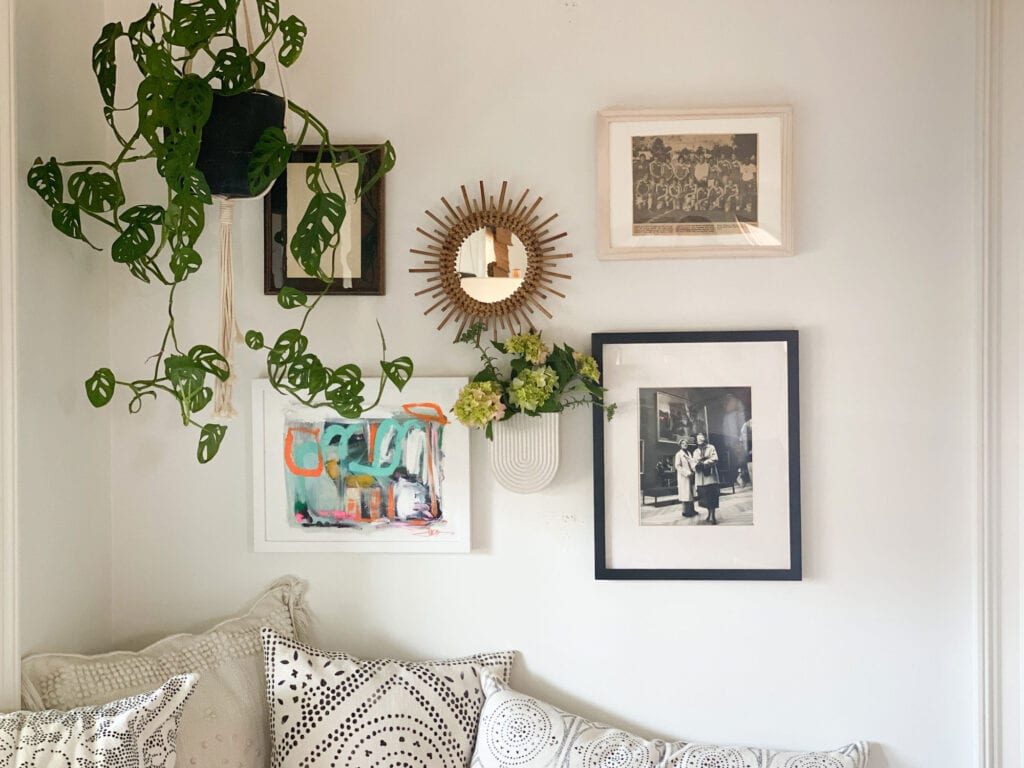
Create a personalized gallery wall to showcase your favorite photos and art pieces. Collect frames in various sizes and styles – you can even paint mismatched frames a uniform color for a cohesive look. Arrange the frames on the floor to find a pleasing composition before hanging them on the wall. This project turns your hallway into a curated display of meaningful images and mementos.
65. Shoe Storage Bench
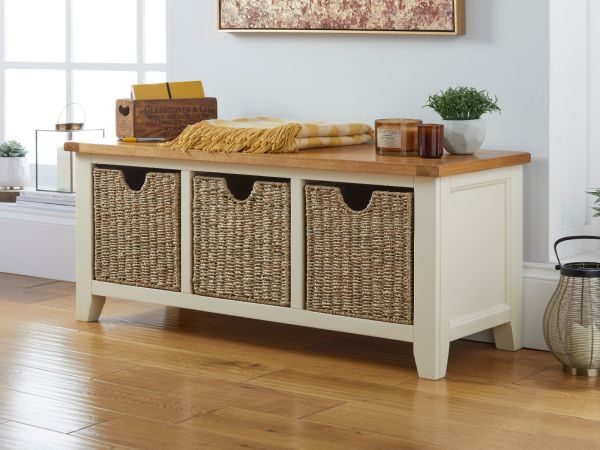
Build a dual-purpose bench for your entryway that provides seating and shoe storage. Use wooden crates or build a simple box structure with plywood. Add a cushioned top for comfortable seating, and install dividers or shelves inside for shoe organization. Paint or stain the wood to match your decor. This project creates a practical and attractive solution for entryway clutter.
Living Room Decor
66. DIY Throw Blanket
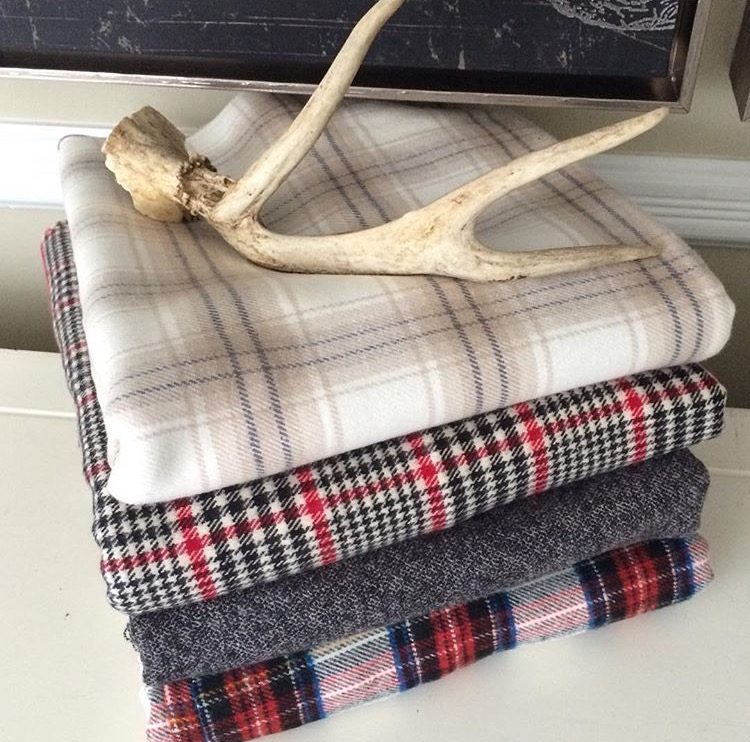
Create a cozy throw blanket for your sofa or armchair. For a no-sew option, purchase two equal-sized pieces of fleece fabric. Lay them on top of each other and cut 4-inch strips around all edges.
Tie these strips together to join the two layers. For a more advanced project, try simple quilting techniques to create a patchwork throw. This personalized blanket adds warmth and color to your living room.
67. Painted Wooden Crate Coffee Table
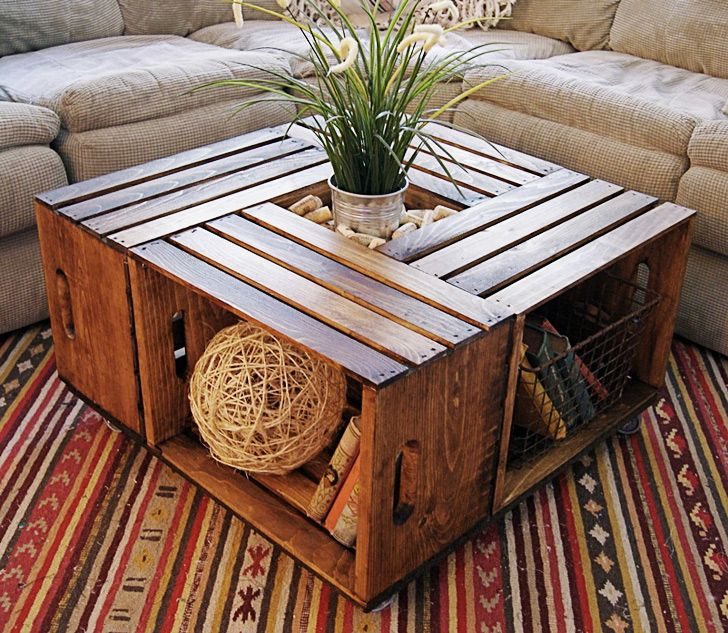
Transform simple wooden crates into a rustic coffee table. You’ll need four identical crates, wood stain or paint, and casters. Sand the crates smooth, then stain or paint them in your desired color. Once dry, arrange the crates in a square formation and secure them together using wood screws. Attach casters to the bottom for easy mobility. This DIY coffee table provides both style and storage, perfect for small living spaces.
68. Book Page Wreath
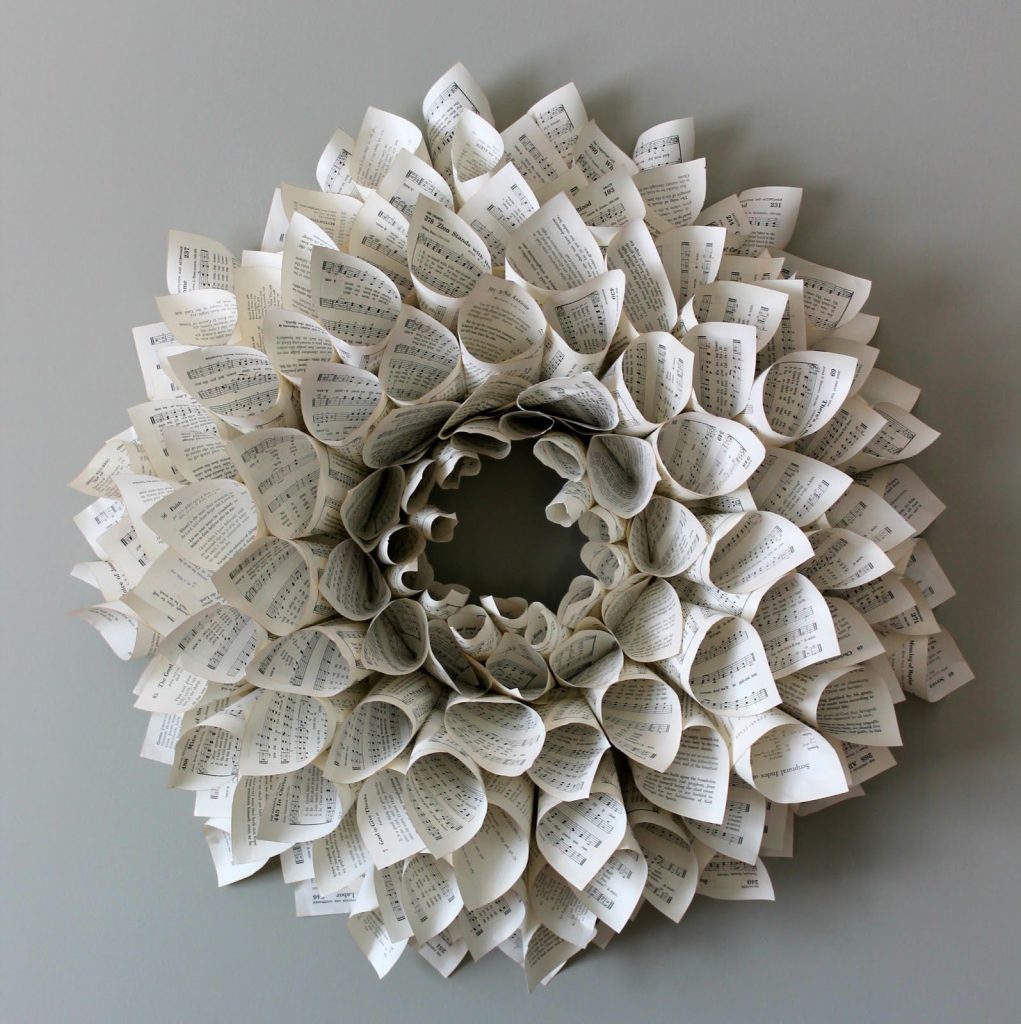
Create a literary-inspired wreath using pages from an old book. Roll individual pages into cones and secure them with glue. Attach these cones to a circular wreath form, starting from the outer edge and working your way in. Layer the cones to create a full, textured look. This unique wreath adds a touch of vintage charm to your living room wall.
69. Tufted Ottoman
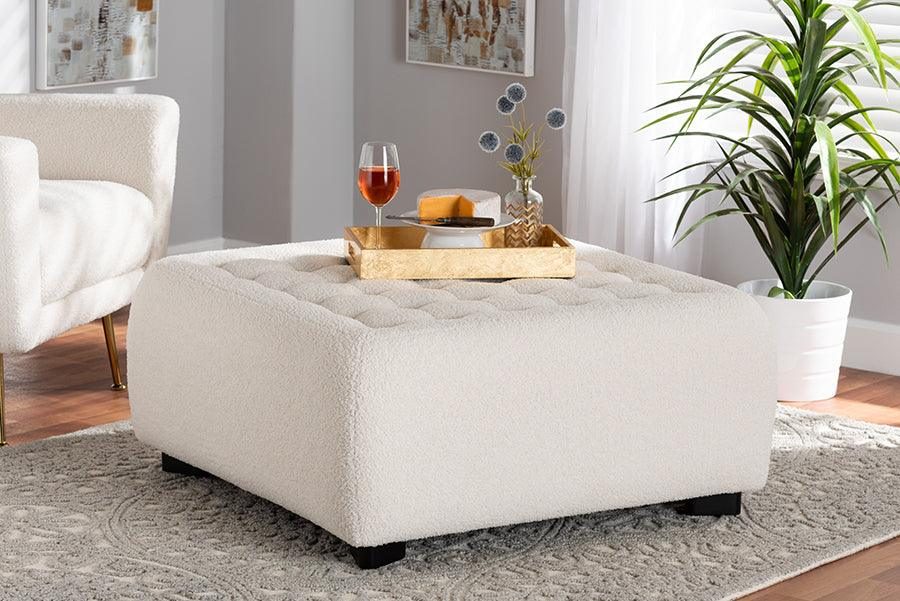
Upgrade a plain ottoman or storage cube with a tufted top. Remove the existing cover and add a layer of foam to the top. Cover with batting, then drape your chosen fabric over the top. Use a long upholstery needle to create tufts, securing them with buttons. Staple the fabric underneath, ensuring it’s pulled taut. This project gives new life to old furniture and adds a touch of elegance to your living room.
70. Floating Corner Shelves
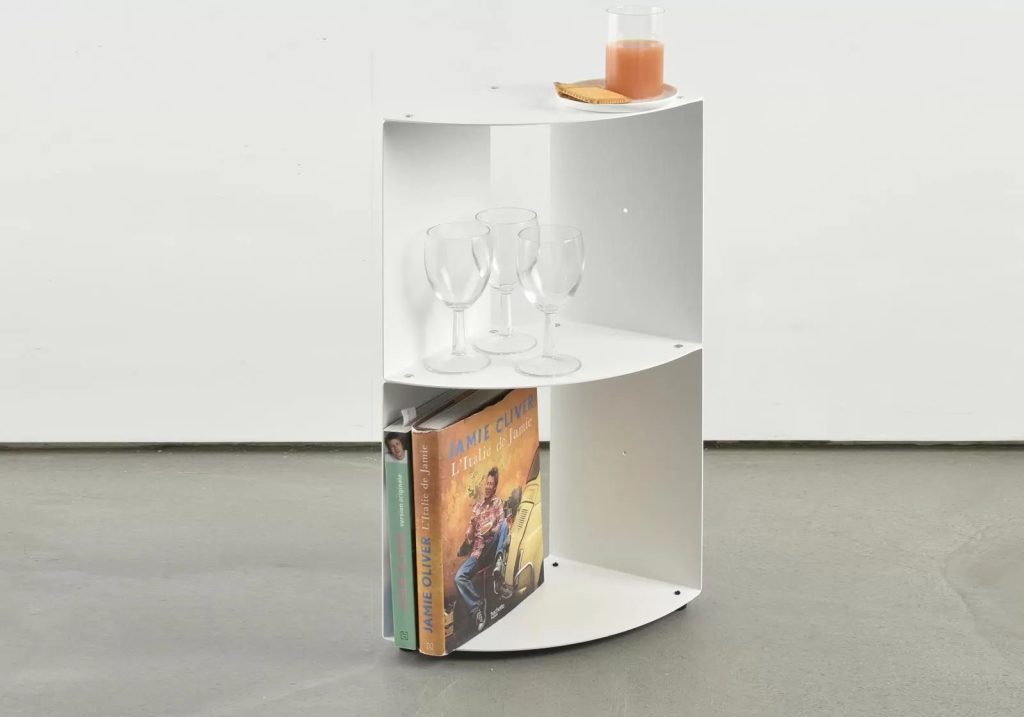
Maximize corner space with floating shelves. Cut triangular pieces of wood to fit your corner. Sand and finish them to match your decor. Mount them securely to the walls using brackets or cleats, ensuring they’re level. These shelves provide a stylish display space for books, plants, or decorative objects while making use of often-overlooked corner areas.
Dining Room Decor
71. DIY Table Runner
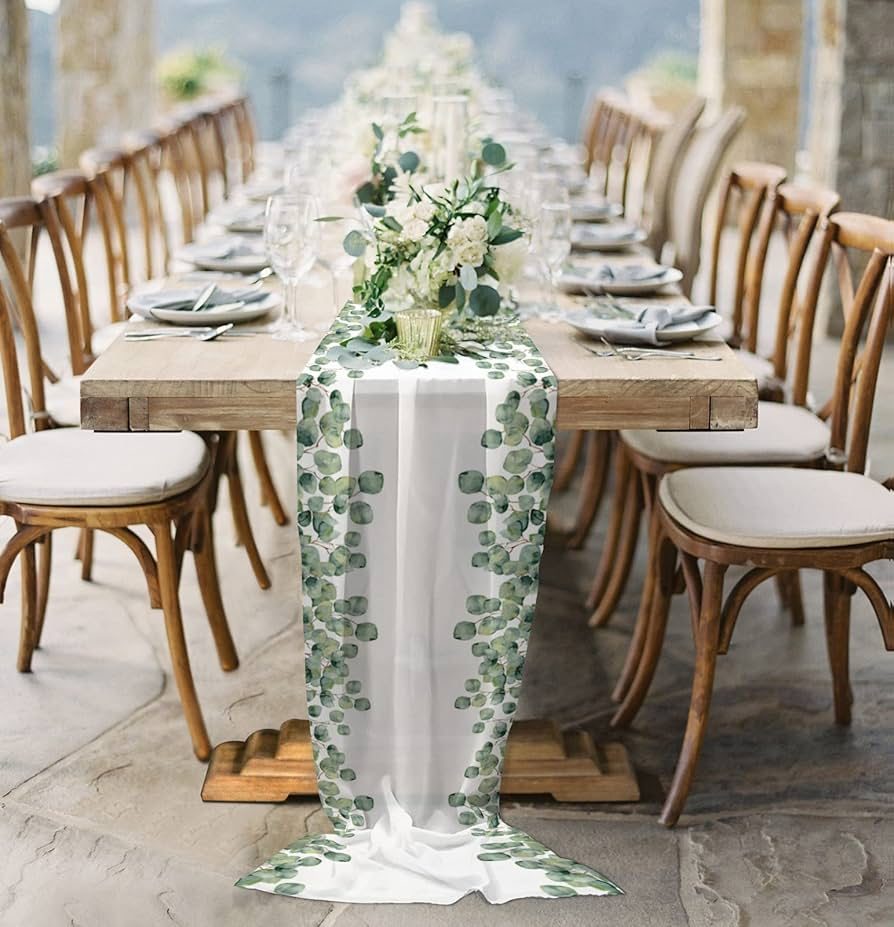
Create a custom table runner to dress up your dining table. Choose a fabric that complements your dining room decor. Cut it to size, allowing for a hem on all sides. For a no-sew option, use iron-on hemming tape to create neat edges. For a more advanced project, try adding decorative stitching or appliqués. This personalized runner adds color and style to your table setting.
72. Painted China Cabinet

Refresh an old china cabinet with a new paint job. Clean the cabinet thoroughly and lightly sand it to help the paint adhere. Apply a primer, then paint in your chosen color. For added interest, try painting the interior a contrasting color or applying wallpaper to the back panel. Replace old hardware with new knobs or handles. This project can completely transform the look of your dining room.
73. DIY Placemats
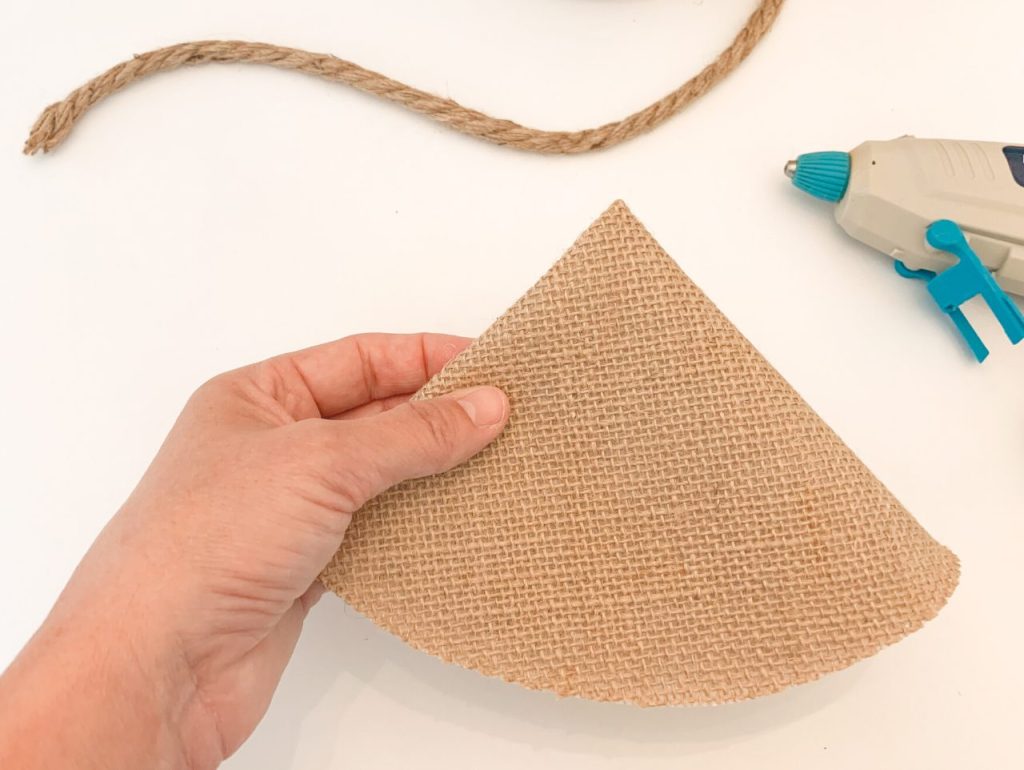
Craft unique placemats to complement your table settings. For a rustic look, use burlap or linen fabric cut to size and fringed at the edges. For a modern touch, try using cork or leather. You can personalize these with paint, embroidery, or even photos transferred onto fabric. These custom placemats add a personal touch to your dining experience.
Related Guide: 100 Budget-Friendly Home Decor Ideas
74. Succulent Centerpiece
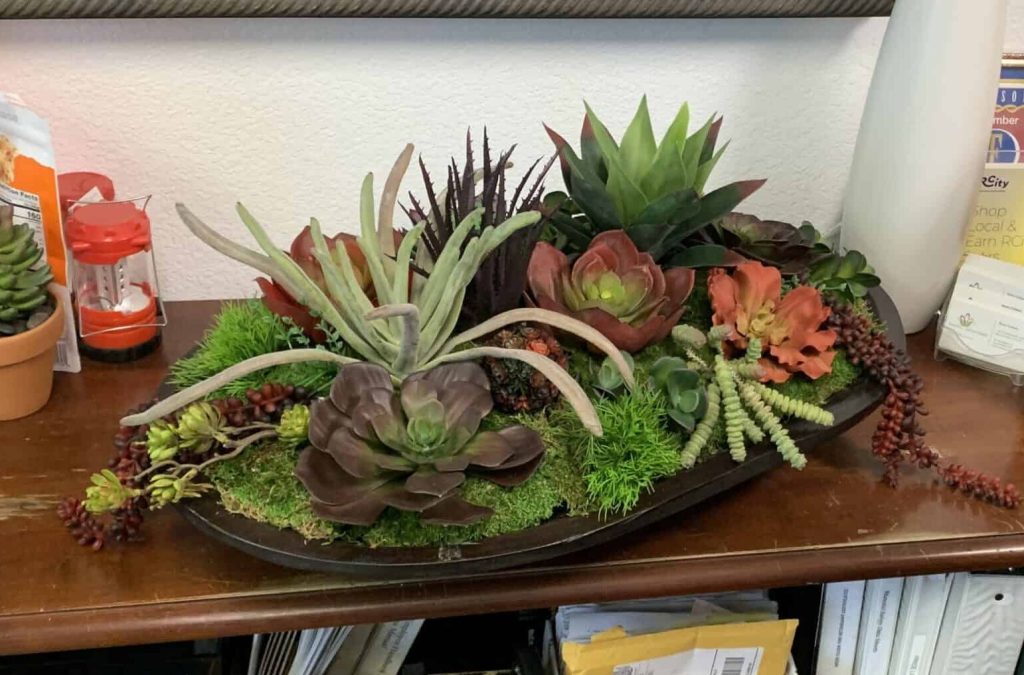
Create a long-lasting centerpiece using a variety of succulents. Choose a long, shallow container and fill it with well-draining potting soil. Arrange different types and sizes of succulents in the container, leaving some space for growth. Add small pebbles or decorative sand around the plants for a finished look. This low-maintenance centerpiece adds a touch of nature to your dining table.
75. Upcycled Chandelier
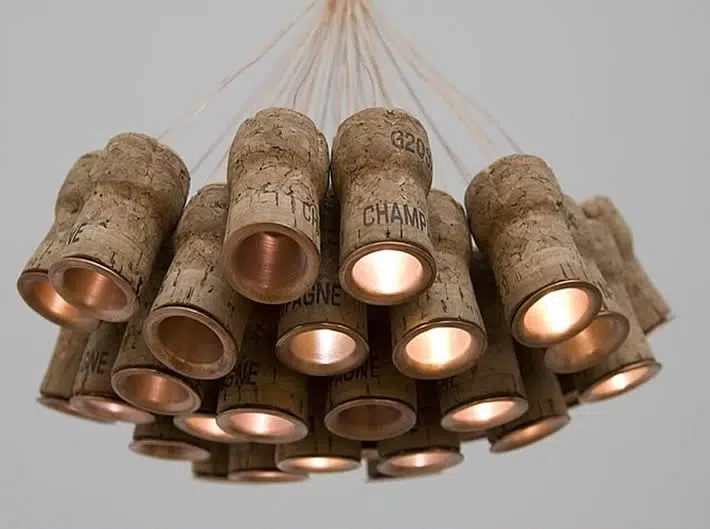
Give an old chandelier new life with a makeover. Remove any old crystals or decorative elements. Clean thoroughly and spray paint in your chosen color. Consider adding new decorative elements like wooden beads, seashells, or even colorful paper flowers. This project allows you to create a unique lighting fixture that perfectly matches your dining room decor.
Home Accents and Accessories
76. Marbled Clay Ring Dish

Craft a stylish ring dish using polymer clay. Mix different colors of clay to create a marbled effect. Roll out the clay and cut it into a circular shape. Mold it over an oven-safe bowl to create a shallow dish shape. Bake according to the clay’s instructions. Once cool, you can add metallic paint to the edges for extra flair. This handmade dish is perfect for holding jewelry on your nightstand or vanity.
77. Painted Glass Vases
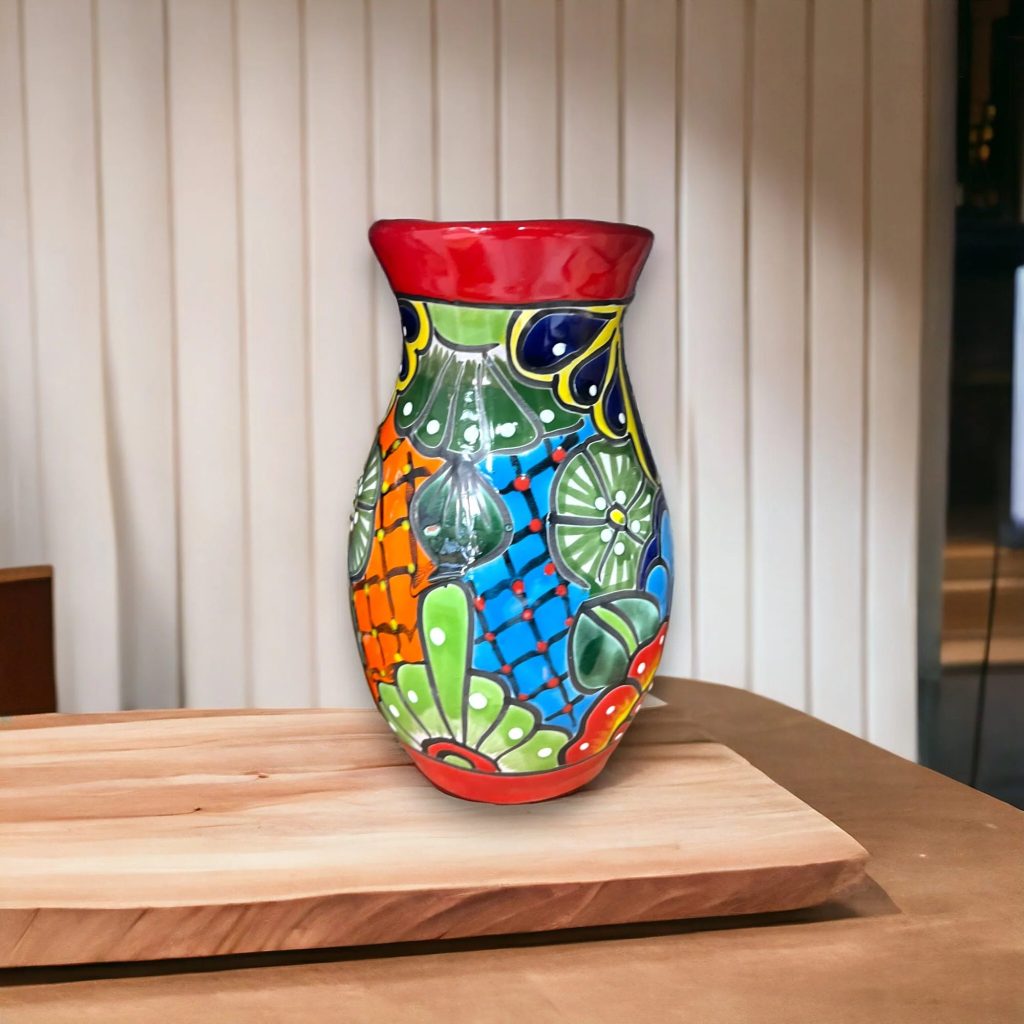
Transform plain glass vases with paint for a custom look. Clean the vases thoroughly and allow them to dry. Use glass paint to create patterns or solid colors on the exterior. For a frosted look, try using etching cream. You can create ombre effects, geometric patterns, or freehand designs. These personalized vases add a pop of color to your floral arrangements.
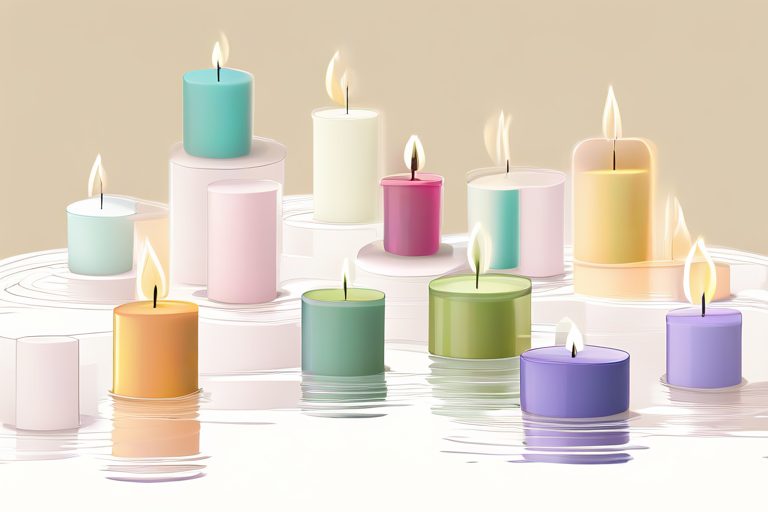
78. DIY Scented Candles
Make your own scented candles in repurposed containers. Clean out old jars or teacups to use as candle holders. Melt soy wax flakes in a double boiler, add your favorite essential oils for scent, then carefully pour the wax into your containers with a wick centered. Allow to cool completely before trimming the wick. These homemade candles add a cozy ambiance and personal touch to any room.
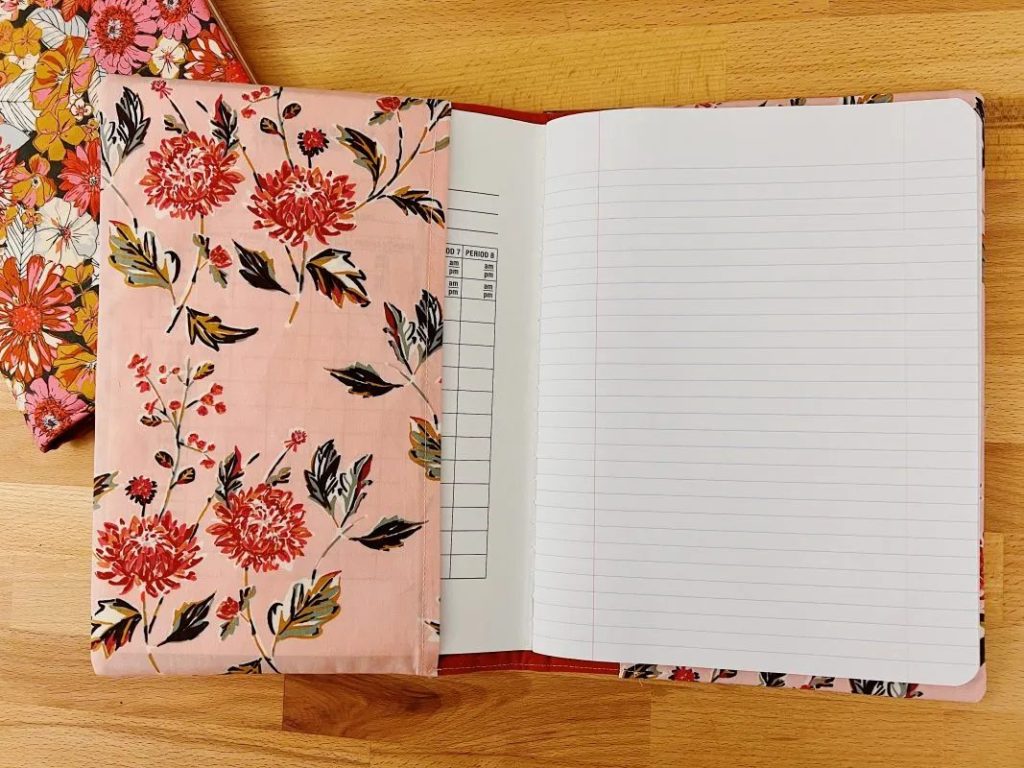
79. Fabric-Covered Books
Give old hardcover books a new lease on life by covering them in decorative fabric. Remove the dust jacket and measure the book to cut fabric to size, allowing extra for folding over the edges. Use book binding glue to adhere the fabric to the cover, folding it neatly at the corners and edges. These fabric-covered books make attractive decor pieces for shelves or coffee tables.
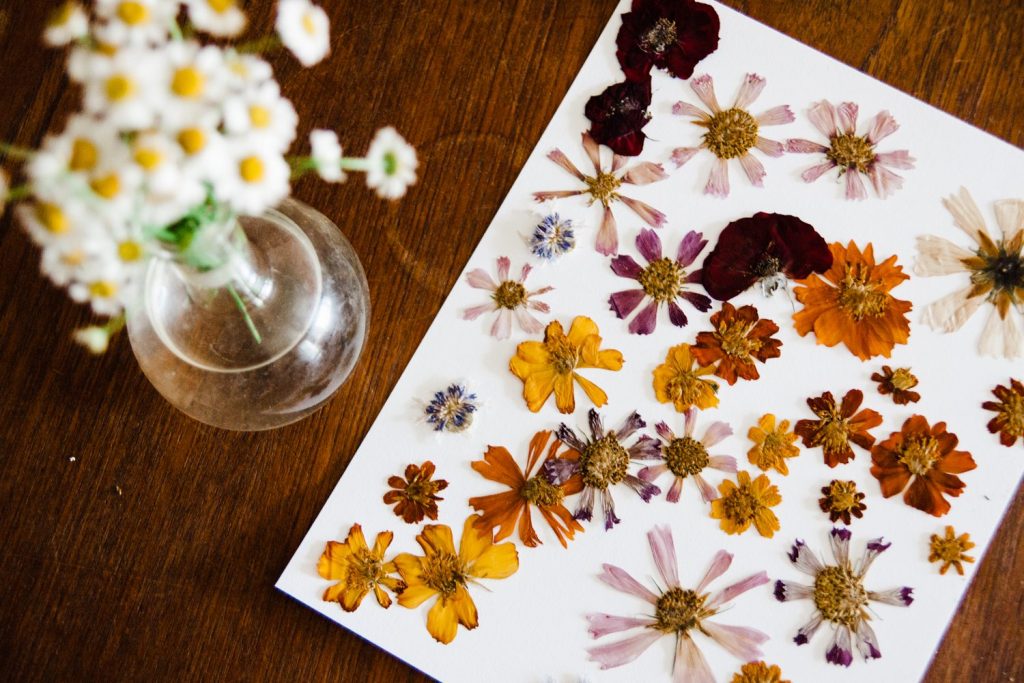
80. Pressed Flower Art
Create delicate wall art using pressed flowers. Press flowers between heavy books or use a flower press. Once completely dry, arrange the flowers on acid-free paper in a pleasing composition. Carefully glue them in place using a small brush and craft glue. Frame your creation in a floating frame to preserve the delicate nature of the flowers. This project brings a touch of nature’s beauty indoors.
Creative Wall Treatments
81. Geometric Wall Design
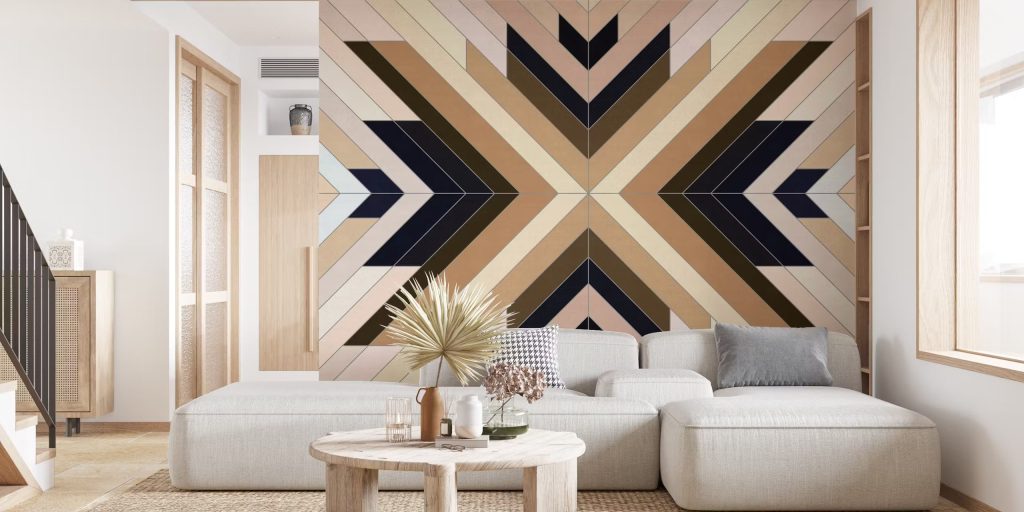
Create a striking accent wall with a geometric paint design. Use painter’s tape to mark out your chosen pattern – triangles, hexagons, or more complex shapes. Paint each section in different colors or shades. Carefully remove the tape once the paint is dry to reveal crisp lines. This project adds visual interest and can make a small room appear larger.
82. Wooden Slat Wall

Install a wooden slat wall for a modern, textured look. Cut thin wooden boards to equal lengths. Sand and stain or paint them as desired. Attach them vertically to your wall using construction adhesive and finishing nails, leaving small, even gaps between each slat. This project adds warmth and dimension to any room.
83. Washi Tape Wall Art

Create temporary, removable wall art using washi tape. Plan your design on paper first, then transfer it to your wall using various colors and patterns of washi tape. This could be anything from simple geometric shapes to more complex murals. The beauty of this project is that it’s easily changeable and doesn’t damage your walls.
84. Stenciled Wall
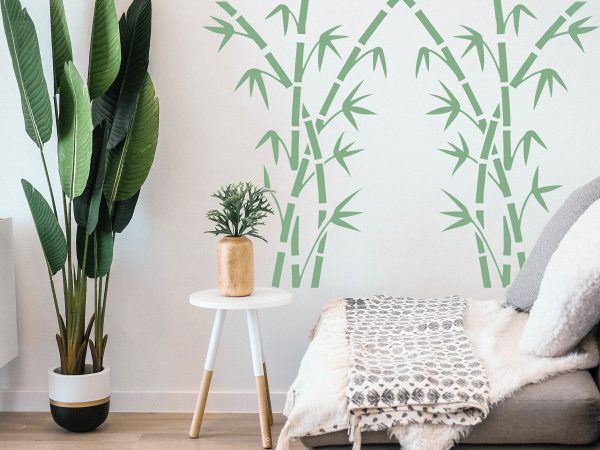
Use stencils to create a patterned wall without the commitment of wallpaper. Choose a stencil design that complements your decor. Secure the stencil to your wall with painter’s tape and apply paint using a roller or stencil brush. Repeat the pattern across your wall, allowing each section to dry before moving the stencil. This technique allows you to create a custom wallpaper look.
85. Photo Wall Collage
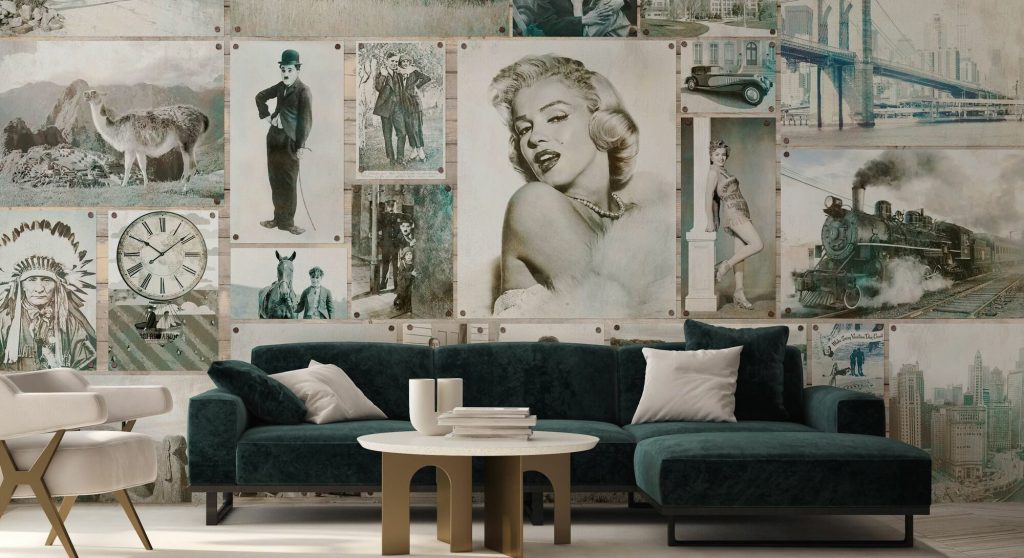
Create a personalized photo collage on your wall. Print out a variety of photos in different sizes. Plan your layout on the floor first, then transfer it to the wall using removable adhesive strips or washi tape. This allows you to easily update the photos over time.
Additional Tip: You can create shapes with the arrangement, like a heart or the first letter of your family name, for added visual interest.
Eco-Friendly and Upcycled Decor
86. Recycled Wine Bottle Vases

Transform empty wine bottles into elegant vases. Remove labels by soaking the bottles in warm, soapy water. Paint the bottles with glass paint or spray paint for a frosted look. For a more rustic appearance, wrap the bottles with twine or jute. These upcycled vases are perfect for holding single stems or small bouquets.
87. Pallet Wood Wall Art

Create rustic wall art using reclaimed pallet wood. Disassemble a pallet and sand the boards smooth. Arrange the boards in a pleasing pattern – you could create a geometric design or spell out a word. Secure the boards together using wood glue and small nails. Add a picture hanger to the back for easy mounting. This project gives new life to discarded materials and adds character to your walls.
88. Tin Can Luminary
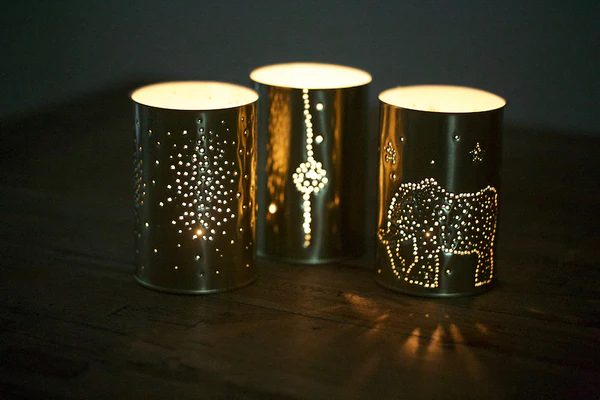
Craft charming luminaries from used tin cans. Clean the cans thoroughly and remove any labels. Using a hammer and nail, punch holes in the can to create a design. Paint the exterior if desired. Place a tea light candle inside for a warm, glowing effect. These luminaries are perfect for outdoor entertaining or adding ambiance to your indoor spaces.
89. Fabric Scrap Rug
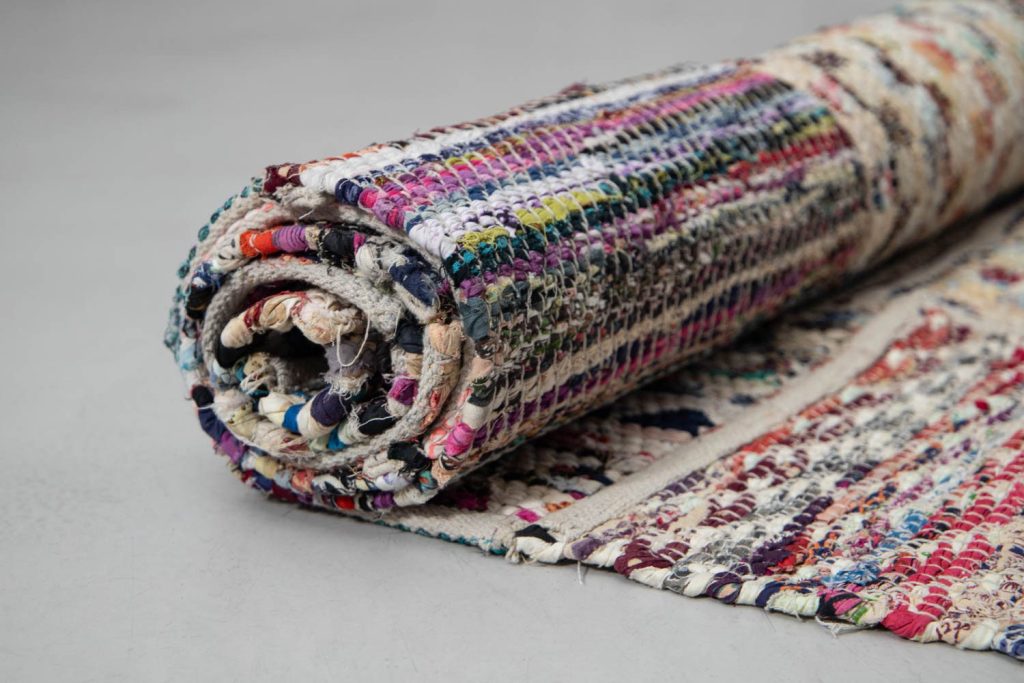
Put fabric scraps to good use by creating a colorful rag rug. Cut fabric into long strips. Braid three strips together, then coil the braid into a circular shape, stitching it together as you go. Continue adding braided sections until your rug reaches the desired size. This project not only reduces textile waste but also creates a unique, handmade floor covering.
90. Terracotta Pot Wind Chime
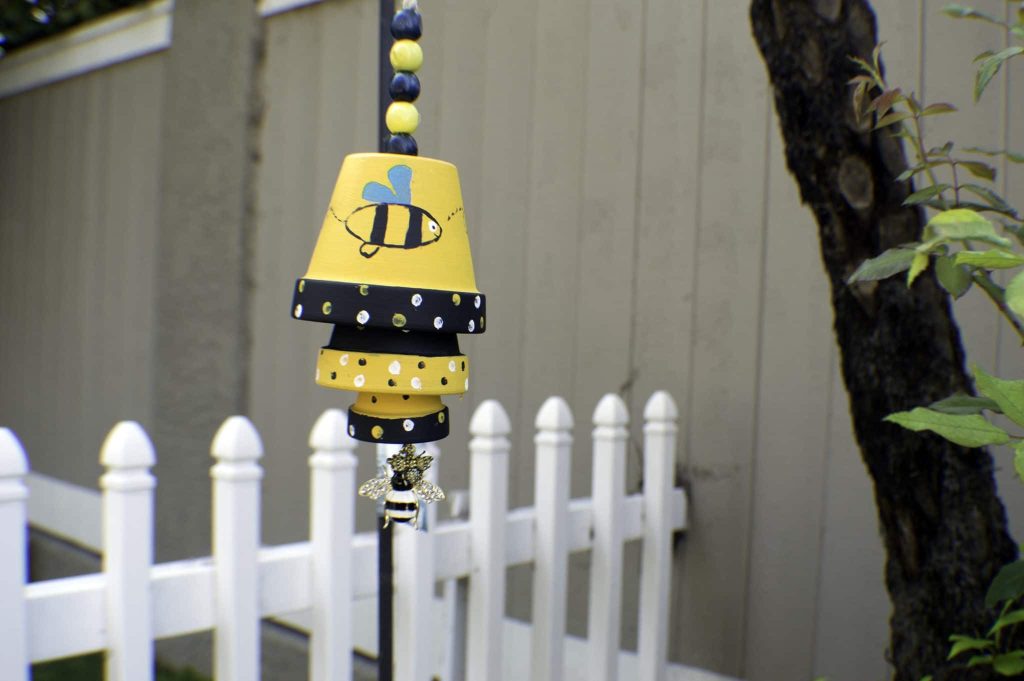
Craft a melodious wind chime using old terracotta pots. Collect pots of varying sizes. Drill a hole in the bottom of each pot. Paint the pots in colors that complement your outdoor decor. Once dry, thread the pots onto a sturdy string or thin rope, securing them at different heights. Hang from a tree branch or porch overhang to enjoy the gentle sounds on breezy days.
Conclusion
As we conclude this comprehensive guide to 90 DIY home decor projects for beginners, it’s important to reflect on the creative journey you’re about to embark upon. Each of these projects offers an opportunity not just to beautify your living space, but also to express your personal style, learn new skills, and experience the satisfaction of creating something with your own hands.
Remember, the beauty of DIY lies not just in the finished product, but in the process itself. Don’t be discouraged if your first attempts don’t turn out exactly as planned – every ‘mistake’ is a learning opportunity and often leads to unexpected creative discoveries. Embrace the imperfections that make your creations unique and personal.
As you work through these projects, you’ll likely find yourself becoming more confident in your abilities and more adventurous in your design choices. You might even start coming up with your own project ideas, combining techniques you’ve learned or adapting projects to suit your specific needs and tastes.
DIY home decor is also an excellent way to create a more sustainable living environment. By upcycling old items, using eco-friendly materials, and crafting things to last, you’re reducing waste and minimizing your environmental impact.
Moreover, filling your home with items you’ve made yourself creates a space that truly reflects your personality and tells your story. Each piece becomes a conversation starter, a memory holder, and a source of pride.
Whether you’re looking to refresh a single room or transform your entire living space, these 90 projects provide a wealth of inspiration to get you started. From quick afternoon crafts to more involved weekend projects, there’s something here for every skill level and time commitment.
So, gather your supplies, roll up your sleeves, and let your creativity flow. Your journey to a more personalized, handcrafted home begins now. Happy crafting!

