
Creating a gallery wall is more than just hanging pictures—it’s about curating a visual narrative that encapsulates your journey, passions, and cherished memories. As an ephemeral representation of your life’s highlights, a well-designed gallery wall transforms an ordinary space into a personalized museum of moments.
The art of crafting this visual storytelling masterpiece requires a delicate balance of aesthetics, sentiment, and spatial awareness. Whether you’re a minimalist who appreciates clean lines and careful curation, or a maximalist who embraces organized chaos, your gallery wall should reflect your unique perspective and aesthetic sensibilities.
In this comprehensive guide, we’ll walk through the essential steps to help you create a gallery wall that not only enhances your living space but also resonates with authenticity and personal meaning.
How to Create a Gallery Wall
From selecting meaningful pieces to achieving the perfect arrangement, we’ll explore how to turn your blank wall into a compelling visual autobiography that visitors will find themselves naturally drawn to explore.
1. Gathering Your Story Elements
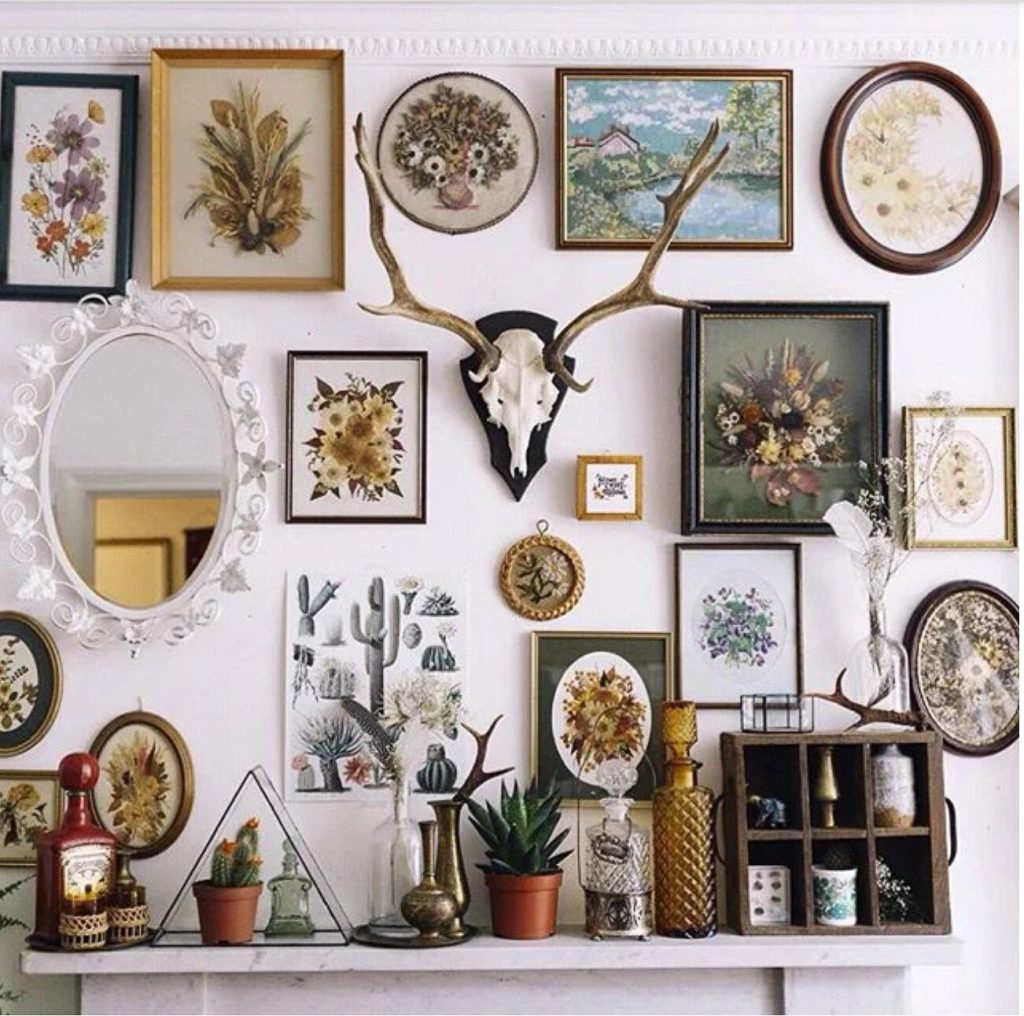
The foundation of a meaningful gallery wall begins with collecting pieces that speak to your personal narrative. Start by diving into your existing collection of artwork, photographs, and memorabilia. Consider including children’s artwork, travel souvenirs, vintage family photos, or even pressed flowers from significant occasions. Each piece should carry its own weight in storytelling while contributing to the larger narrative.
Remember that quantity isn’t as important as quality and meaning. Take time to evaluate each potential piece, asking yourself what role it plays in your story. Don’t feel pressured to fill your wall immediately—allowing your collection to grow organically over time can make it more authentic and meaningful.
2. Choosing a Theme or Visual Direction
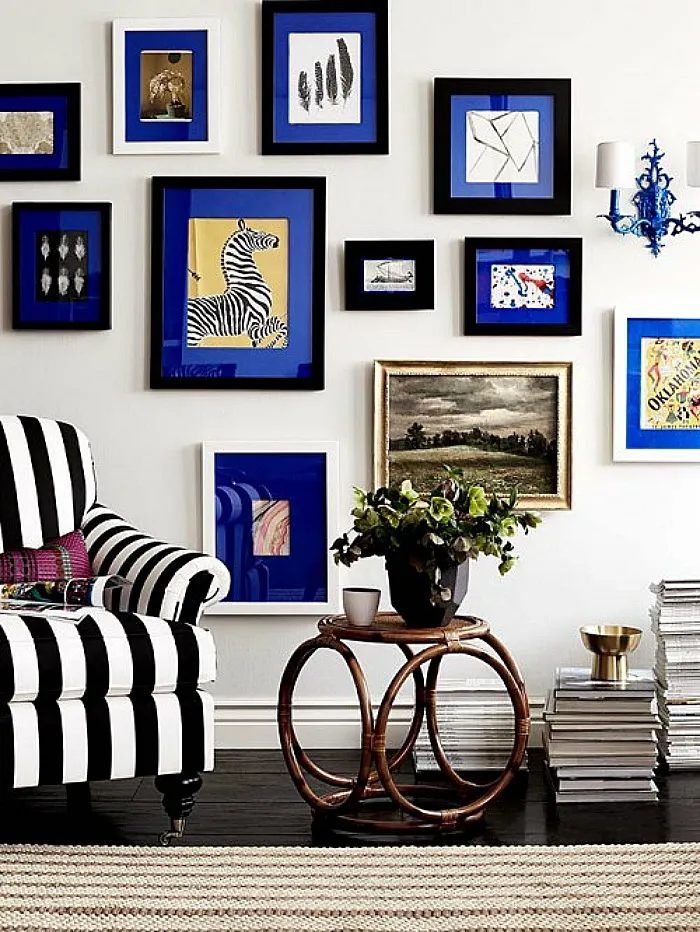
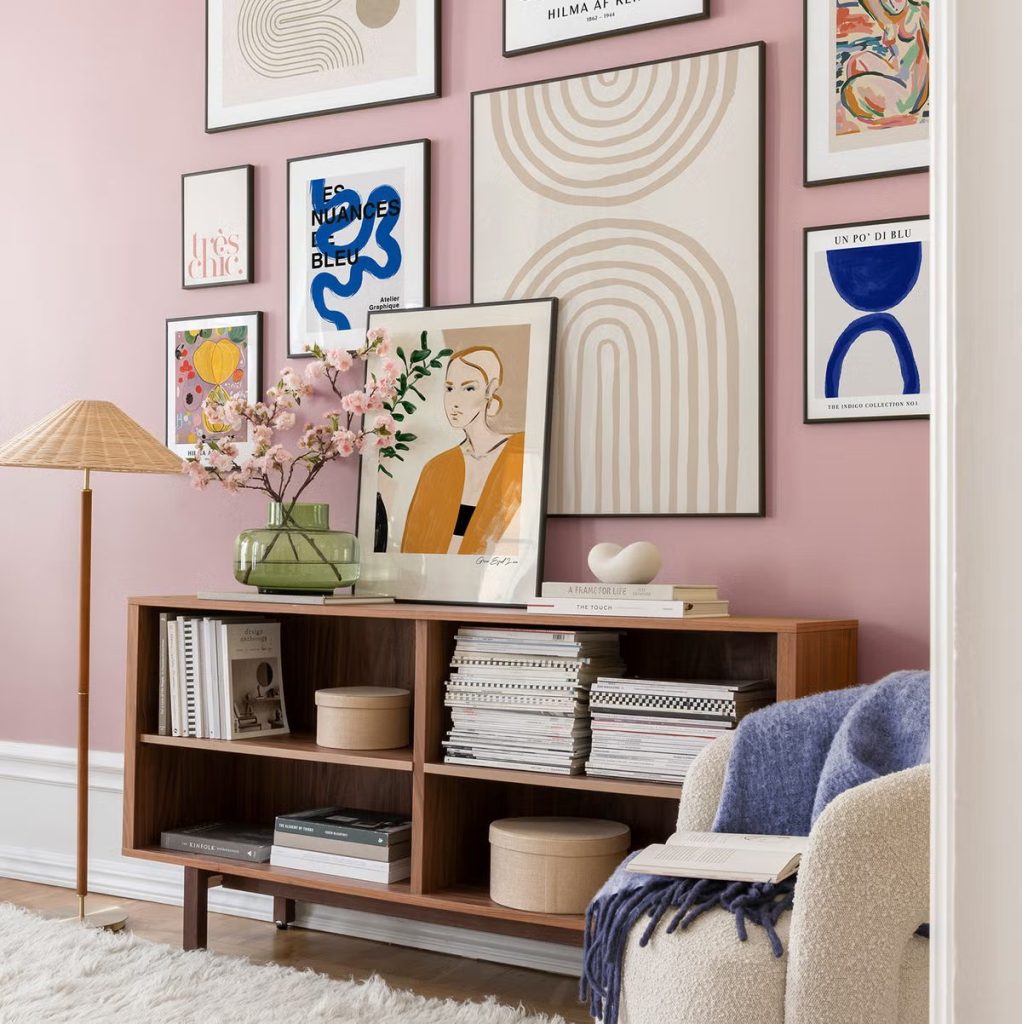
While personal significance is crucial, visual cohesion helps create a polished, intentional look. Consider establishing a loose theme that ties your pieces together, whether it’s through color schemes, frame styles, or subject matter. This doesn’t mean everything needs to match perfectly—contrast and variety can add interest and depth to your display.
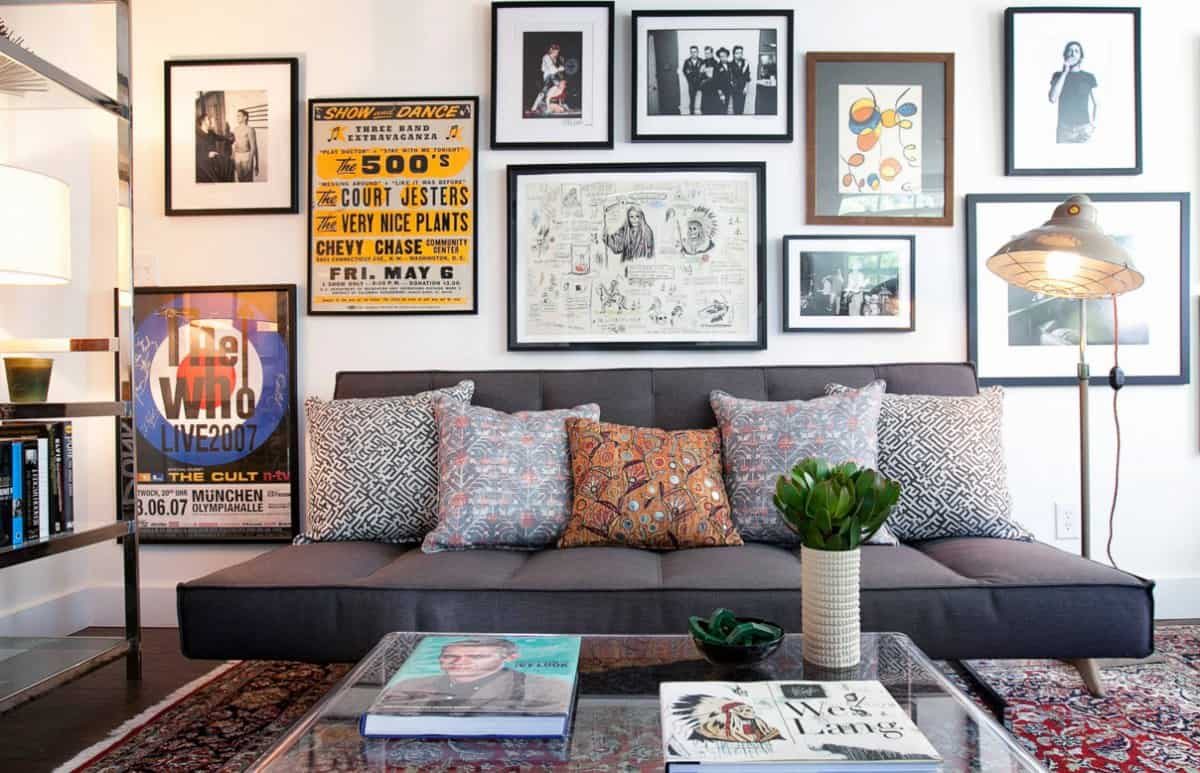
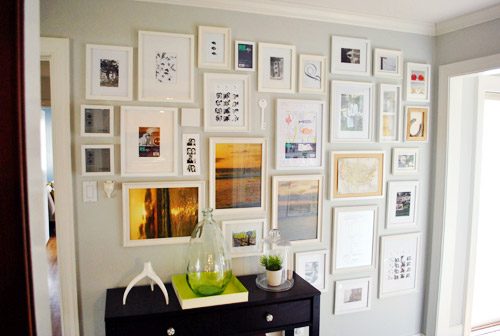
Think about the overall mood you want to create in your space. Are you drawn to a monochromatic arrangement with black and white photographs, or do you prefer a vibrant mix of colorful art pieces? Your theme should reflect both your personality and complement your existing décor while maintaining visual harmony.
3. Planning Your Layout
Before putting any holes in your wall, take time to carefully plan your arrangement. Start by clearing a floor space equal to your intended gallery wall area. This allows you to experiment with different layouts without commitment. Measure your wall space and use painter’s tape to mark the boundaries on the floor.
Consider the visual weight of each piece and how they balance each other. Larger pieces typically serve as anchors, while smaller items can fill gaps and create movement throughout the composition. Try different arrangements until you find one that feels both balanced and dynamic.
4. Selecting and Preparing Frames

The frames you choose can dramatically impact the overall appearance of your gallery wall. Consider mixing frame styles while maintaining some common elements to create visual interest without chaos. Pay attention to the quality of your frames—investing in well-made options will ensure your gallery wall looks polished and professional.
Take time to properly mount and mat your pieces. Professional matting can elevate simple pieces and create a more sophisticated look. Clean all glass thoroughly and ensure each piece is secure within its frame before hanging.
5. Creating a Paper Template System
One of the most helpful steps in creating a gallery wall is making paper templates of each framed piece. Trace each frame onto kraft paper or newspaper, cut out the shapes, and label them with the corresponding artwork. This allows you to experiment with arrangement options directly on your wall using painter’s tape.
Use a level and measuring tape to ensure your templates are perfectly aligned. Mark the hanging points on each template so you know exactly where to place your hardware when it’s time to hang the actual pieces.
Related Guide: How to Style a Coffee Table in 10 Minutes
6. Establishing a Focal Point
Every successful gallery wall needs a strong focal point to anchor the arrangement. Choose a piece that’s either larger than the others or has particular significance to serve as your central focus. This could be a family portrait, a striking piece of artwork, or a cherished heirloom.
Position your focal point at eye level and build the rest of your arrangement around it. This creates a natural hierarchy and helps guide viewers’ eyes through your collection in a meaningful way.
7. Incorporating Dimension and Texture
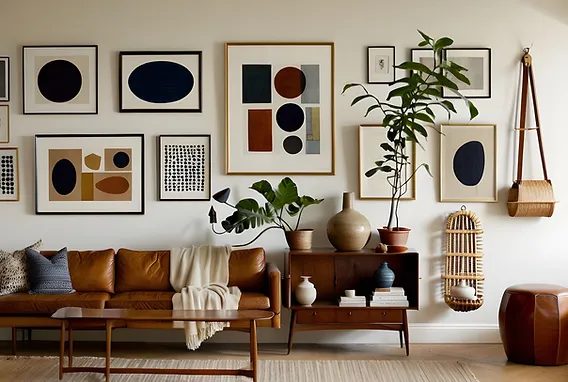
Add depth to your gallery wall by incorporating pieces with different textures and dimensions. Consider including shadowboxes containing three-dimensional mementos, woven wall hangings, or sculptural elements. These variations in depth create visual interest and add another layer of storytelling to your display.
Mix mediums thoughtfully to create contrast while maintaining harmony. The goal is to create an engaging display that invites closer inspection while remaining cohesive as a whole.
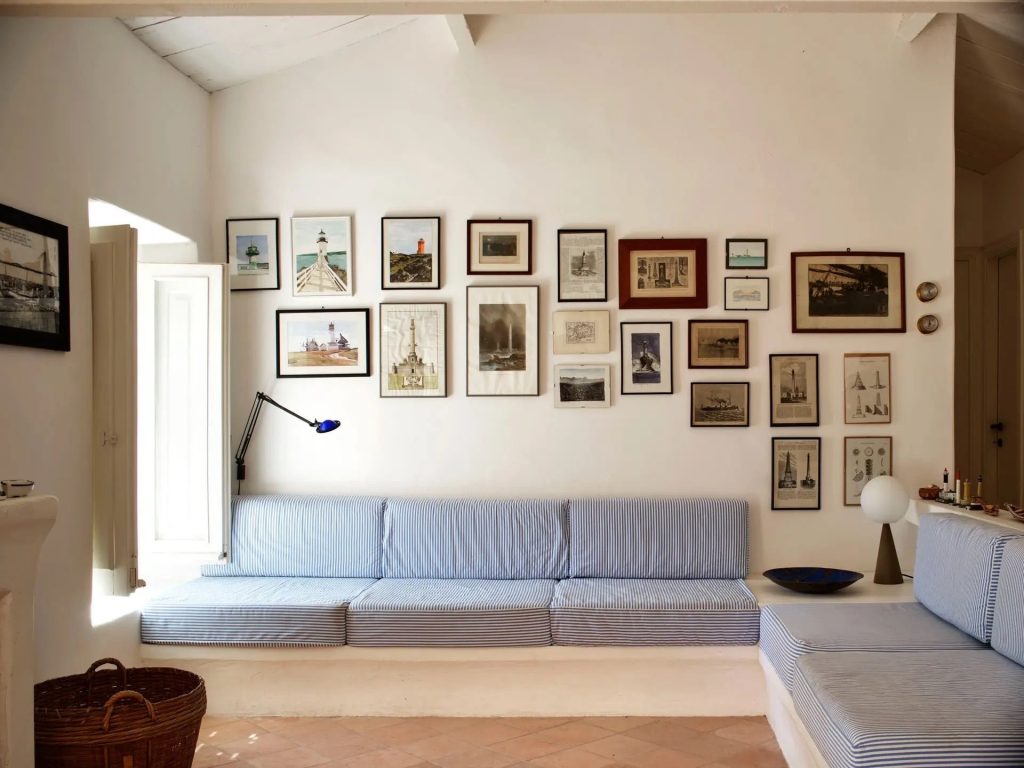
8. Maintaining Proper Spacing
Consistent spacing between pieces is crucial for a polished look. Generally, maintain 2-3 inches between frames for a tight, cohesive arrangement, or 4-6 inches for a more spacious feel. Whatever spacing you choose, keep it consistent throughout the arrangement.
Use a ruler or spacing tool to ensure uniform gaps between pieces. This attention to detail will make your gallery wall look intentional and professionally arranged rather than haphazard.
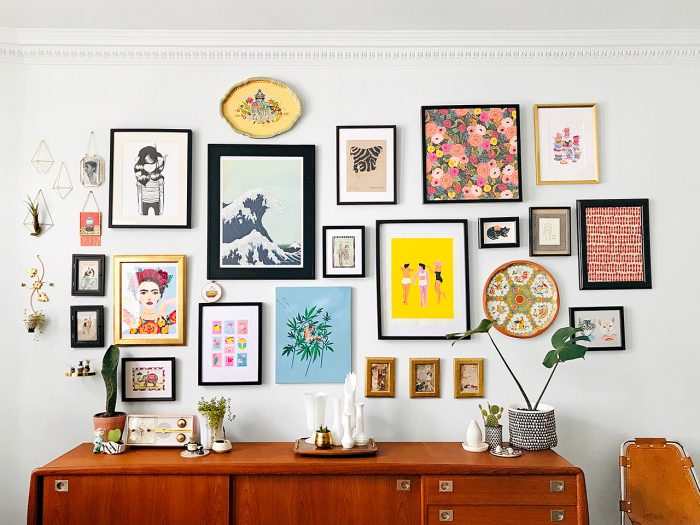
9. Adding Personal Touches
Don’t be afraid to break traditional gallery wall rules by incorporating unexpected elements that reflect your personality. This might include vintage plates, small shelves displaying meaningful objects, or even illuminated pieces. These unique touches make your gallery wall truly one-of-a-kind.
Consider adding small organizational elements like tiny hooks for hanging keys or a small shelf for daily essentials. This helps your gallery wall serve both aesthetic and practical purposes in your space.
10. Lighting Your Gallery
Proper lighting can dramatically enhance your gallery wall’s impact. Consider installing picture lights, track lighting, or strategically placed sconces to highlight specific pieces. The right lighting not only showcases your art but also creates ambiance in the room.
Think about how natural light affects your display throughout the day and adjust your arrangement or lighting accordingly. Well-planned lighting can transform your gallery wall from beautiful to breathtaking.
Conclusion
Creating a gallery wall that tells your story is an evolving process that requires thoughtful curation, careful planning, and attention to detail. The beauty lies not just in the final arrangement but in how it grows and changes with you over time.
As you add new pieces and rearrange existing ones, your gallery wall becomes a living document of your experiences, relationships, and personal growth. Remember that there’s no single “right” way to create a gallery wall—the most important thing is that it authentically represents you and brings joy to your space.
Let your wall evolve naturally, and don’t be afraid to make adjustments as your story continues to unfold. Your gallery wall should be as dynamic and unique as you are, serving as both a reflection of your past and an inspiration for your future.